
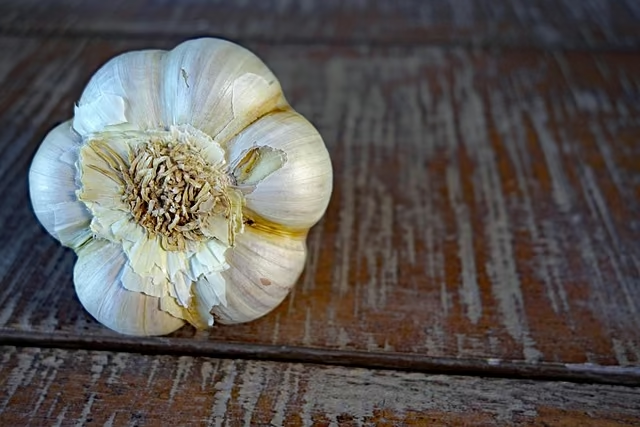
Lacto-Fermented Garlic: A Simple Recipe, Benefits, and Safety Guide
Key Points
- Fermentation tempers raw garlic’s bite and develops sweet, tangy, umami complexity that pairs beautifully with marinades, dressings, and sauces. It makes garlic more versatile and more palatable for picky eaters.
- Fermented garlic nourishes your gut with probiotics and potentially boosts antioxidant and immune benefits. It can preserve important vitamins and minerals while enhancing their bioavailability.
- Begin with basic, clean utensils and components to prevent infection and off tastes. Choose a glass jar with an appropriate weight and an airlock or loose lid. Sanitize it all with hot, soapy water.
- Use a 2% salt brine and filtered water, and submerge all cloves for safe, reliable results. Keep at room temperature, ideally between 16-24˚C, opening daily to check for bubbles, cloudiness, and a delightfully tangy aroma.
- Taste after 7 to 10 days, then refrigerate when the flavor is right to slow fermentation and preserve for several months. Mark your jars, use clean spoons, and throw it away if you see mold or weird smells or colors.
- Use fermented garlic in everyday dishes for quick wins, like stirring it into vinaigrettes, spreading it on toast or pizza, or tossing it with roasted vegetables and grains for richer savoriness with less heat.
Fermented garlic is fresh garlic preserved by good bacteria, transforming its taste, texture, and nutritional properties.
It has a mellow, slightly tangy flavor with less sting than raw cloves, plus a softer texture that spreads beautifully.
Many cherish it for the gut-loving compounds and stable antioxidants fermentation creates. From salad dressings to rice bowls, it transcends cuisines.
The article covers the benefits, simple steps, safety, and storage tips.

- 6L Capacity: Black garlic fermenter offers a capacity up to 6L for fermenting garlic (either solo garlic or multi-clove garlic, with the included stainless steel garlic cage), ideal for both home and commercial use
- Multifunctional: With its temperature control feature, timer and easy-to-monitor digital display, this black garlic fermenter yogurt maker is also incredibly versatile for making yogurt kimchi natto fruit wine rice wine and for other food liquid fermentation purpose
- Garlic Cage: Black garlic fermenter yogurt maker equipped with two-layer stainless steel garlic cage for uniform and all-around heating to achieve perfect fermentation effect
- Detachable Inner Pot: black garlic fermenter yogurt maker includes a thickened inner pot with a smooth surface, which delivers efficient heating and allows for easy cleaning
- Power-Failure Protection: Black garlic fermenter yogurt maker features a power-failure protection, able to automatically continue working after an unexpected power failure, no interruption to the fermentation process
Last update on 2026-11-01 / Affiliate links / Images from Amazon Product Advertising API
Why Ferment Garlic?

Fermentation tames raw garlic cloves’ biting sharpness, creating complex flavor depth and transforming this kitchen staple into a functional food.
It enhances beneficial compounds and adds probiotics from lactic acid bacteria, while also decreasing the strong aftertaste that lingers on the breath, making garlic honey a great addition to meals.
Flavor Evolution
Fermented garlic transforms from pungent and sulfurous to sweet, sour, and subtly umami. Imagine balsamic-like depth with a molasses edge, particularly in black garlic honey. The heat fades, but the character remains, making it ideal for anyone sensitive to raw garlic cloves.
It opens up new avenues in the kitchen. Whisk pureed fermented garlic into vinaigrettes for leafy salads, blend it into yogurt or tahini sauces, or massage it into marinades for tofu, fish, or chicken, using 2 to 3 cloves per 250 grams of protein. Incorporating garlic paste can elevate your dishes significantly.
It slips easily into weeknight cooking: mash it into roasted vegetables, tuck it into pizza sauce, or dot it onto focaccia before baking for a rounder, less spicy finish. If raw garlic bugs your tummy, fermented garlic introduces mellowness. Add half a teaspoon to butter for sautéing mushrooms to add depth without the sting.
If a recipe calls for a fresh clove, start with half a fermented clove. It might be just as spicy, but softer on the palate.
Nutritional Boost
| Aspect | What changes with fermentation | Why it matters |
|---|---|---|
| Antioxidants | Often higher activity than fresh | Supports defense against cell damage |
| Bioavailability | Improved access to nutrients | Better assimilation and impact |
| Probiotics | Lactic acid bacteria introduced | Potential gut support |
| Sulfur compounds | Modified, sometimes enhanced effects | May aid detox pathways |
Lactic acid bacteria can colonize the brine, supporting a diverse diet. Levels vary by technique, but this can support a healthy microbiome.
Fermenting garlic preserves its core vitamins and minerals, and fermentation may even make them easier to absorb. Other studies on aged garlic link consistent consumption to cardiovascular support, including blood pressure benefits.
Though fermented varieties remain less researched, they probably follow a similar path. Fermented garlic shows higher hydrogen peroxide during fermentation, which may contribute to its antimicrobial activity. A couple of studies link garlic consumption to reduced colds.
One study observed a 63% drop compared to placebo, suggesting immune support in addition to its antioxidant benefits.
Digestive Ease
Fermentation digests some FODMAP-type sugars and fibers, so it is less likely to cause bloating than raw cloves. We all experience less cramping and reflux when replacing fermented garlic with regular cooking.
That milder profile can mean less gastric irritation while still delivering flavor. This matters if you’ve stayed away from garlic because it’s uncomfortable but still want its benefits.
A healthier digestive tract craves equilibrium. Fermented garlic’s acids and microbes can nurture good bacteria and promote digestion in an easy, food-first manner.

- This manual garlic twist minces garlic, ginger, herbs, and nuts with a few quick twists, no knife needed.
- Made of food-grade clear plastic, this twisting garlic grinder mincer allows you to see the texture while grinding for better control.
- Features interlocking grinding teeth that crush ingredients evenly, making this multi-functional garlics twist crusher a versatile kitchen tool.
- Compact and lightweight design fits easily in kitchen drawers, RVs, and small spaces, perfect for a garlic mincer twist on the go.
- Easy to clean with a simple rinse or dishwasher safe, and comes with a protective cover for hygienic storage—a reliable garlic press twist for everyday cooking.
Last update on 2026-11-01 / Affiliate links / Images from Amazon Product Advertising API
Essential Fermentation Tools
It’s the tools that do the quiet work that keep that fermented garlic safe, consistent, and flavorful. Use non-reactive materials and wash everything with hot, soapy water, especially if you’re preparing garlic honey or exploring vegetable fermentation recipes.
- Glass jars are non-reactive and easy to clean for brining and storage.
- Airlock lids or storage caps with silicone gaskets provide a tight seal.
- Fermentation weights to keep cloves below the brine.
- Use a digital scale for accurate salt and ingredient ratios.
- Use top-notch salt, such as Himalayan pink, to support safe fermentation.
- Thermometer to check room temperature. Eighteen to twenty-two degrees Celsius is a stable range.
- Cutting tools (mandoline, sharp knife) for prep consistency.
- Optional springs (e.g., PickleHelix) to hold produce down.
- Clean funnels, ladles, and a non-metal spoon for stirring.
The Jar
Choose a glass jar that matches your batch size, typically 250 to 950 ml. Smaller jars help minimize risk when you’re experimenting with a new salt ratio, while 1-quart jars are perfect for weekly cooking.
Avoid plastic or metal containers, as they can react chemically with salt and acids, causing off-flavors and potential leaching. Glass jars stay neutral and let you easily see the brine level, making them ideal for recipes like garlic honey fermentation.
Glass stays neutral, lets you see the brine level at a glance, and cleans without lingering odors. Check for chips or hairline cracks around the rim and base. Even microfractures can break the seal or cause leaks as pressure accumulates.
For your lacto-ferments, you don’t need super-sanitizing; just make sure your jars are clean and residue-free. This simple prep is essential for successful fermentation, especially when you add beneficial ingredients like garlic cloves or fresh herbs.
By following these steps, you can create healthy food that enhances your meals and supports your immune system.
The Weight
A fermentation weight keeps your garlic submerged so mold and pathogenic bacteria don’t get a foothold. If you’re winging it, a tiny heatproof ramekin or a washed, food-grade pebble will do. The objective is complete coverage under the brine.
Don’t choose a weight so heavy that it scrapes the jar walls; choose one that fits comfortably. If it is too loose, cloves bob. If it is too tight, you capture gas bubbles. Springs like PickleHelix keep produce submerged beneath brine, which helps in tall jars.
Wash and sanitize the weight prior to use. If it wobbles, add a second thin weight or pack the cloves more tightly for a snug hold.
The Lid
An airlock lid allows CO2 out but blocks airborne microbes, making it a great way to streamline your daily duties. If you only have a regular screw cap, simply rest it on loose and burp once a day during active fermentation. Storage caps with rubber or silicone gaskets create a dependable seal for the anaerobic environment your garlic ferments need.
Align the lid with your flow, as airlocks are hassle-free and perfect for hectic weeks. Classic lids can work well with careful daily inspections. Always clean your lids, as residue can linger in threads and under gaskets and affect the quality of your garlic honey recipe.
Combine the lid with a digital thermometer nearby to monitor room temperature, since heat accelerates fermentation and cooler rooms slow it down. A scale keeps your salt exact, usually two to three percent by weight, so your brine does the preservative heavy lifting.
The Simple Ingredients

Fermented garlic calls for raw garlic, non-iodized salt, and clean water. Premium inputs establish the mood for flavor, mouthfeel, and a consistent ferment. Chlorinated water can kill the good microbes you want, so use filtered or spring water.
I’m okay with optional spices, but I keep them light and secondary. At its core, the recipe works with just two ingredients: garlic and salt.
Garlic
Pick out firm, unbruised heads. Soft spots or green shoots can disrupt flavor and increase spoilage risk. Peel the cloves. Pre-peeled is fine if it’s fresh and odor-free, though I still trim the root ends for uniform cooking.
Crushing or slicing accelerates fermentation by exposing more surface area. Whole cloves ferment more slowly and stay crisper, while halved cloves soften faster and impart richer garlicky flavors. Either way is fine.
The point is to choose based on the texture you enjoy. Precision goes a long way. Weigh the garlic and salt as a percentage. A typical goal is 2.5% salt by weight, about 2.5 tablespoons for 1.36 kg (3 lbs.) of garlic.
If you skip weighing, a tablespoon of salt per approximately 950 ml (1 quart) jar is an easy default.
Salt
Use mineral-rich, non-iodized salt, like Himalayan pink or Celtic sea salt. These help maintain a balanced microbial membrane and provide a fuller, purer taste than highly refined salts.
Fully dissolve salt in your water to create a clear brine that inhibits harmful bacteria. Change by weight wherever possible. The 2-3 percent range is a sweet spot for most kitchens. If you change the jar size, scale the salt. Don’t guess.
Avoid table salt with anti-caking agents or iodine. Additives can cloud the brine and, at times, slow fermentation.
Water
Opt for filtered, spring, or well water. Systems such as a Berkey are great. Avoid chlorine and chloramine, which can inhibit the helpful lactobacilli that power fermentation.
Measure water to keep your brine concentration consistent. Use room-temperature water because it doesn’t shock the cloves or the microbes. Submerge everything and top off as needed to keep it covered and minimize air exposure.
Optional Spices
- Mediterranean: black pepper, bay leaf, thyme
- East Asian‑leaning: ginger slices, a few white peppercorns
- Eastern European: dill, mustard seeds, caraway
- Latin‑inspired: chili flakes, oregano, coriander seed
- North African: cumin seed, coriander, a thin strip of lemon peel
Add fresh herbs with care, and keep the garlic cloves in the center to maintain the yeast’s activity. If you’re feeling daring, add a pinch of cayenne pepper for a kick.
Quality matters here too; whole spices, fresh herbs, and a light touch result in a clean, layered finish.

- AUTHENTIC CELTIC SALT: Le Marinier Celtic Salt is hand harvested in the pristine French ocean marshes following a traditional method developed over a millennium ago. There are no additives or chemicals added, just pure French sea salt, as nature intended.
- 100% NATURAL AND UNREFINED: Our celtic salt is unprocessed, toxin free, and wild-harvested. The result of a process were the sun and wind evaporate the sea water and the salt begins to crystallize.
- RICH MINERAL COMPOSITION: Contains vital minerals and micronutrients crucial to our health, such as magnesium, calcium, potassium, iron and others. It is packed with electrolytes to improve hydration.
- EXQUISITE FLAVOR AND NATURAL MOIST TEXTURE: Savor a more complex and nuanced flavor compared to regular table salt. It can impart a delicious subtler salty flavor to dishes. It is slightly moister than regular table salt.
- GREY COARSE SEA SALT: The crystals of Le Marinier Grey Coarse celtic salt organic are typically larger, adding a crunchy texture to dishes when used as a finishing seasoning. Commonly used in cooking to season various dishes, including meats, fish, vegetables, and seafood
Last update on 2026-11-01 / Affiliate links / Images from Amazon Product Advertising API
How to Make Fermented Garlic

This easy saltwater ferment preserves garlic cloves and tames sharpness while creating complex, rich flavor.
Get your tools ready in advance, stay clean, and measure your ratios so every batch is consistent.
- Weigh peeled cloves, then calculate 2 percent salt based on the total water weight.
- Dissolve non‑iodized salt in warm filtered water; cool completely.
- Pack cloves into a sterile, wide-mouth pint jar, which is approximately 475 mL.
- Cover with brine, submerge with weight, and leave 2 to 3 centimeters of headspace.
- Ferment at 16 to 24 degrees Celsius. Check daily to maintain brine level.
- Sample starting on day 7. Chill when the flavor suits your taste.
- Note time, salt rate, and temperature for next time.
1. Prepare Cloves
Peel 3 to 4 heads of garlic. Cut off dry ends and any bruised or green-sprouted areas to keep flavors clean and reduce spoilage risk. For a faster ferment and bolder aroma, lightly crush or slice some cloves, but leave many whole for textural contrast.
Weigh the prepared cloves so you can scale brine accurately, then pop them into a clean bowl. With them peeled and ready to grab, packing is smooth and processing time is reduced.
2. Create Brine
Warm filtered water and stir in non-iodized salt until completely dissolved. I hit 2% salt by weight for good preservation and taste balance. For a pint jar, 300 grams of water requires 6 grams of salt. Many home cooks use 2 1/2 tablespoons of salt for about 950 milliliters of water.
Cool the brine before pouring so the garlic stays crisp. Stir until no crystals remain and the brine is enough to cover the cloves entirely. Clear, fully dissolved brine keeps the bottom from having uneven salinity.
3. Pack Jar
I like to use a wide-mouth pint-sized mason jar because they’re easy to load. Layer the cloves as tightly as possible to reduce air pockets, and sprinkle optional flavorings, such as black peppercorns, a bay leaf, and a few coriander seeds, between layers to help them diffuse.
Stop 2-3 cms below the rim. Gently press down to submerge the cloves without crushing them.
4. Add Brine
Cover the garlic with the cooled brine to fully submerge it. Tap the jar to release any trapped bubbles and top off if it sinks. Reserve 2 to 3 centimeters of headspace for carbon dioxide expansion.
Appropriate headspace reduces oozy overflow.
5. Submerge and Seal
To ensure the garlic cloves remain submerged in the brine, set a glass weight on top. If you don’t have a weight, gently shake the jar during the first three days to keep the cloves submerged.
For me, using weights is a great way to maintain the fermentation process.
Seal the jar with an airlock or a lid that is left slightly loose. Keep the jar at room temperature, away from direct sunlight, to let the beneficial compounds develop fully.
6. Ferment Actively
Expect fizz, bubbles, and a wonderful tangy fragrance in the first few days; these are normal signs of lactic fermentation. Maintain temperature, ideally between 16 and 24 degrees Celsius (60 to 75 degrees Fahrenheit).
Burp the jar daily to let the gas out. Watch for cloudiness, rising bubbles, and brine motion. Top off cool brine if evaporation exposes cloves.
7. Taste and Chill
Start sampling on days 7 to 10. It’s good from day 3 to 4, but 3 to 4 weeks adds deeper complexity. Once it’s good for you, transfer the jar to the fridge or a cool cellar to slow things down.
Submerge cloves beneath brine for security and quality. They will keep for many months, even a year. Record your overall time for future fine-tuning, a bit more salt, or a cozy warm room.
For a sweeter path, try fermented honey garlic: cover peeled cloves with raw honey and let it bubble for several weeks.
Reading the Signs

Reliable cues help you judge garlic ferments without guesswork.
- Brisk bubbles, consistent tang, and creeping cloudiness are all good indicators.
- Off-odors, fuzzy growth, and discolored patches suggest problems.
- Keep a log of appearance, smell, and texture by date.
Bubbles
Within the first 2 to 4 days, bubbles emerging through the brine indicate active fermentation where lactic acid bacteria process sugars and expel carbon dioxide. You may notice little beads attached to the cloves or gathering around the jar’s sides; both are typical.
Anticipate the most action at the beginning, then a gradual decline as acids build up and the atmosphere settles. A little froth is okay, but heavy foam, continuous geysers, or brine escaping over the lid can indicate storage that is too warm, overfilled jars, or trapped gases.
Relieve pressure by burping airlocks as intended or transfer the jar to a cooler location, 18 to 22 degrees Celsius. I record bubble intensity each day during week one—using shorthand descriptors like “minimal,” “moderate,” or “intense”—so I can compare future batches and spot trends.
Cloudiness
A turning point many miss: clear brine getting hazy. A little cloudiness indicates a healthy presence of suspended microbials and benign yeast. It tends to intensify somewhere around days three to seven, then plateaus.
If the cloudiness is accompanied by a strong, sour odor or moldy surface fuzz, that’s a warning. Wipe off any food above the brine, and if fuzz returns or the smell stays putrid, pitch it. For the most part, uniform haze indicates that microbes are hard at work and you’re in business.
I take the first obvious clear-to-cloudy switch as a timestamp for the primary fermentation.
Aroma
You’re looking for a fresh, zingy aroma with a slightly sour bite, which is classic lactic acid fermentation. The raw garlic bite mellows week by week, making it much nicer to taste later on. Heavy rotten, sulfurous, or vomit odors indicate spoilage, so don’t force it!
When the fragrance becomes luminous and harmonious instead of piercing and pungent, you’re nearly good to go. If you like your garlic milder, wait until the sharpness diminishes more. Record aroma notes with simple descriptors: “sharp,” “tangy,” “rounded.
Color Changes
Expect cloves to shift from white to yellowish or even greenish as acids react with garlic compounds. Consistent color indicates even fermentation. Blue or green can appear when garlic comes into contact with acids like vinegar or lemon juice.
It comes from alliinase acting on alliin to produce pyrroles. Three produce blue; four produce green. This is similar to a copper patina effect, and it’s not damage. Immature, just-dug, or red-skinned garlic is even more likely to turn blue, purple, or blue‑green.
Some cultures, like Chinese làbā suàn, even value that coloration. Look for pink, inky blue, or black fuzzy spots, which indicate mold, and toss if observed. Monitor color changes to adjust garlic selection and brine sourness for next time.

- 𝗠𝗮𝘅 𝗖𝗮𝗽𝗮𝗰𝗶𝘁𝘆: Weigh objects as heavy as 22 lb/10 kg and as light as 2 g in increments of 1 g
- 𝗜𝗣𝗫𝟲 𝗪𝗮𝘁𝗲𝗿𝗽𝗿𝗼𝗼𝗳 𝗗𝗲𝘀𝗶𝗴𝗻: Features an IPX6 waterproof design, allowing you to easily measure liquids and wipe the scale clean
- 𝗧𝘆𝗽𝗲-𝗖 𝗥𝗲𝗰𝗵𝗮𝗿𝗴𝗲𝗮𝗯𝗹𝗲 𝗕𝗮𝘁𝘁𝗲𝗿𝘆: The scale features a rechargeable battery and comes with a USB-C charging cable
- 𝟱 𝗨𝗻𝗶𝘁𝘀: Choose between grams, ounces, pounds and ounces, milliliters (milk and water), and fluid ounces (milk and water)
- 𝗕𝗼𝗻𝘂𝘀 𝗙𝗲𝗮𝘁𝘂𝗿𝗲𝘀: Use the tare feature and hold function for added convenience

Last update on 2026-11-01 / Affiliate links / Images from Amazon Product Advertising API
Safety and Storage

Good safety practices safeguard taste, crunch, and sanity. Fermented garlic is safe when prepared and stored properly. Specifics are important, including temperature, pH, and sanitary handling.
| Safety measure | Why it matters | How to do it well |
|---|---|---|
| Keep pH ≤ 4.6 (aim 4.2–4.6 or lower) | Acid blocks pathogens, including botulism risk | Test with strips/meters; adjust salt/time if needed |
| Refrigerate 0 to 3.3 degrees Celsius (32 to 38 degrees Fahrenheit) | Slows fermentation and preserves crunch and aroma. Refrigerate promptly, not on door shelves with temperature swings. |
| Airtight lids and dry spoons | Stops recontamination and drying out | Use sterilized containers and no double-dipping |
| No garlic in oil at room temperature | Low-acid garlic and oil can give C. Botulinum | If oiling, acidify first and refrigerate |
| Labeling traceability and quality control | Mark date, ingredients, and pH per batch | |
pH Levels
Aim for a pH of 4.6 or less, with 4.2 to 4.6 as the real-world goal, to keep the environment inhospitable to pathogens. Garlic is naturally low-acid, so the brine and fermentation have to provide the acidity. It should be delicious, but more importantly safe.
Test with pH strips for a quick check, or a calibrated meter for accuracy. Test every day during the first week, then every few days until stable. If pH remains elevated, extend the time at cool room temperature, increase salinity by 0.5 to 1 percent of the vegetable weight, or add a small splash of 2 to 3 percent acidity starter brine.
Note the pH, salt percentage, and ambient temperature for each batch. Trends develop quickly, and soon you’ll calibrate your process without guesswork.
Proper Storage
Transfer fully fermented garlic to the fridge to reduce microbial activity and maintain those lovely flavor layers. Store at 0 to 3.3 degrees Celsius (32 to 38 degrees Fahrenheit) at less than 70 percent humidity.
Seal jars very tightly. This keeps the oxygen out, the texture in, and wandering smells at bay. Keep away from pungent foods because garlic absorbs and imparts aromas.
Use clean, dry utensils when removing cloves, as bowls can introduce yeasts, molds, and even soap residues that dull flavor. If you opt for pantry storage through winter, choose a cool, well-ventilated spot and check pH, brine coverage, and surface activity more often.
For oil-packed varieties, acidify first (give them a quick vinegar or wine soak) and then refrigerate. Two safe paths are to acidify, then oil under refrigeration, or keep cloves submerged in undiluted wine or vinegar in the fridge.
Shelf Life
Expect months in the fridge when pH is 4.6 or lower, jars are sealed, and handling stays clean. Many makers enjoy the ideal during the first 3 to 4 months.
Watch for off odors, dull gray or pink discoloration, sparkling brine that won’t settle, or surface mold. If in doubt, throw it out.
Note: Storing garlic in oil without acid at refrigerator temperatures for more than four days could allow Clostridium botulinum to grow, so follow the acidify-first rule.
Label each jar with fermentation date, salt percentage, and pH. Then schedule regular utilization. Whisk into dressings, puree into sauces, stir into yogurt dips, or mash into roasted veggies to maintain rotation.
Our Conclusion
Fermented garlic adds consistent taste, subtle spice, and powerful probiotics to daily meals. With just fresh garlic, non-iodized salt, and clean implements, the process stays simple and repeatable.
Clear brine, a tangy smell, and gradual color shifts indicate a good ferment. If it gets cloudy, slimy, or off-smelling, that’s the time to pitch and begin again.
To maximize each batch, keep jars in a cool, dark space during fermentation, then transfer them to the refrigerator for extended storage.
Sprinkle cloves into dressings, marinades, soups, or spreads for depth without bite.
For most home cooks, the biggest wins are less waste, more versatility, and a pantry staple that ages like a fine wine—one little jar at a time.
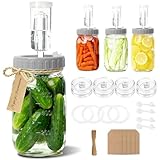
- 【Complete Fermentation Kit】This all-in-one fermentation kit includes four 32 oz mason jars and heavy-duty glass fermentation weights made from food-safe, lead-free, non-porous glass that never absorbs odors, flavors, or colors. The set also includes durable fermentation lids, dual-channel airlocks, and everything you need for making kimchi, sauerkraut, pickles, and more. Includes 20 date-and-note tags with strings for labeling each fermentation session.
- 【Plastic Fermentation Lids, No Rust, No Silicone Wear】Designed as an alternative to metal lids, our food-safe plastic fermentation lids eliminate rust concerns while reducing stress on silicone grommets. This thoughtful design helps maintain a secure seal and extends the lifespan of every fermentation jar in the set.
- 【Ferment & Store with One Lid】Our plastic fermenting lids let you switch effortlessly from fermenting to storage. Simply remove the airlocks and insert the silicone stopper. Each jars instantly converts into a sealed mason jar, giving you a smooth ferment-to-store workflow without changing lids.
- 【Wide-Mouth Mason Jar Design】Each 32 oz fermentation jar features a wide 3.4″ opening for easy filling, packing, and cleaning. Clear ml and oz markings help you measure ingredients accurately and monitor fermentation progress.
- 【Upgraded Airlock & Weight System】Our dual-channel airlocks work with the tight-sealing plastic fermentation lids to maintain a stable, low-oxygen environment. The lead-free glass fermentation weights are non-porous and food-safe, keeping vegetables fully submerged for safe, consistent, and flavorful results in every batch.
Last update on 2026-10-31 / Affiliate links / Images from Amazon Product Advertising API
Frequently Asked Questions
Is fermented garlic the same as black garlic?
Fermented garlic, a great way to preserve fresh cloves in brine, is cultivated with beneficial compounds like lactic acid bacteria. Black garlic, made from whole bulbs aged under controlled heat, offers a unique flavor profile and numerous health benefits.
How long does garlic take to ferment?
Fermentation typically takes 2 to 4 weeks at room temperature (18 to 22˚C), with warmer rooms speeding up the process. Begin tasting after day 10; it’s ready when mildly tangy, less sharp, and aromatic.
Do I need a fermentation weight and airlock?
A clean jar, brine, and fully covering the garlic cloves are important for fermentation. Weights minimize mold risk, while airlocks reduce burping, making it great for newbies.
What salt should I use for brine?
Use a non-iodized salt, like sea salt or pickling salt, for your recipes. Iodine and anti-caking agents can cloud the brine and affect flavor, so avoid them.
How do I know fermented garlic is safe to eat?
Good batches smell deliciously tangy, not putrid, and have a clear to slightly milky brine. Cloves, especially garlic cloves, sink or stay submerged, and a pH under 4.6 improves safety.
Can fermented garlic turn blue or green?
Yes, it’s innocuous. Pigments react with acids and sulfur, especially when using garlic cloves or fresh herbs. It can occur with green garlic or minerals in filtered water. A color change does not always indicate spoilage.
How should I store fermented garlic, and for how long?
Once it reaches your favored flavor, transfer the garlic cloves to the fridge. Push the cloves down and avoid any dirty or used utensils. It will keep in the fridge for months, allowing the beneficial compounds to mature. Toss it if the smell or texture grosses you out.


