

Four Easy Fermented Food Recipes for Beginners to Make at Home
Key Points
- Fermentation uses beneficial bacteria and yeasts to transform sugars into acids and gases, producing lactic acid that preserves veggies and adds a zingy taste. Use a salt brine to keep vegetables submerged, encourage lactic acid bacteria, and inhibit spoilage.
- Regularly consuming yogurt, kefir, kimchi, and sauerkraut can support gut microbiome balance and may improve digestion, nutrient absorption, and immune function. Begin with mini daily doses and rotate different ferments to vary probiotic species.
- Select fresh produce, non-iodized salt, and filtered water for reliable results. Maintain sanitary equipment to minimize mold risk. Label jars with the recipe and date. Then check daily for bubbling, a sour aroma, and flavor changes.
- Start with easy recipes like sauerkraut, kimchi, fermented carrots, and kombucha to learn the fundamentals of brine, submersion, temperature, and timing. Prepare small batches, sample often, and keep notes to refine your craft.
- Store finished ferments in the fridge or a cool pantry to extend shelf life and keep them crisp. Enjoy them as side dishes, snacks, or condiments along with meals to increase nutrient absorption. Sprinkle on salads, wraps, or grain bowls for everyday use.
- Troubleshoot by looking for good signs like mild fizz and a pleasant sour aroma, and discard any batch with fuzzy mold, pink or black splotches, or a rotten smell. Tweak salt, submerge, and track progress to fix fermentation issues.

- Everything you need for healthy, homemade fermented foods – includes all the essential fermenting supplies for creating probiotic-rich vegetables at home. Comes with premium fermenting lids for wide-mouth mason jars, glass weights, a pickle pounder, pickle grabbers, pH test strips, and a full guide.
- Designed for wide-mouth mason jars – our patent-pending fermentation lids are engineered for a precise fit on all wide-mouth mason jars. No leaking, no pressure buildup – just smooth, mess-free fermentation. Please note: fermentation jars are not included in this fermenting kit.
- Recipe & guide book included – follow simple step-by-step instructions to make restaurant-quality ferments at home. Includes recipes for Classic Sauerkraut, Garlic Dill Pickles, Fermented Jalapeños, Pickled Red Onions, Golden Turmeric Kraut, and more – plus guidance on using each accessory properly.
- Premium tools for safe, reliable fermenting – heavy glass weights keep veggies fully submerged, our pickle pounder packs ingredients tightly for perfect brine coverage, and the clip-on pickle grabbers make retrieving finished ferments easy. pH test strips are included to ensure safe acidity levels every time. It’s a perfect kit for beginners and fermentation enthusiasts looking to elevate their gut health naturally.
- Enjoy the confidence of our 100% satisfaction guarantee – as an American owned and operated company we stand behind our products and offer any support you may need.
Last update on 2026-10-31 / Affiliate links / Images from Amazon Product Advertising API
Fermenting food recipes are salt, time, and microbes to make safe, tangy, and rich food. Popular examples include sauerkraut, kimchi, kefir, yogurt, and sourdough.
Your primary utensils are clean jars, a scale, non-iodized salt, and a cool room at 18 to 22 degrees Celsius. The core steps include brine ratios, an anaerobic setup, and daily checks.
To help new cooks and busy pros alike, the guide offers simple starting points and advice on flavor, texture, and food safety.
The Science of Fermentation
Fermentation is a dynamic, living process where microbes, enzymes, and time transform raw food into shelf-stable, vibrant products.
This fascinating food science takes place at the crossroads of microbiology, chemistry, biology, and gastronomy, explaining why cabbage becomes sauerkraut — crisp-sour, milk becomes kefir — tangy, and sweet tea turns into kombucha.
Good bacteria and yeasts fuel these transformations by consuming sugars and producing acids, alcohols, and carbon dioxide. In homemade vegetable recipes, lactic acid bacteria (LAB) thrive when oxygen is low, and salt is just right.
They convert glucose and fructose into lactic acid, which lowers pH, inhibits spoilage microbes, and creates the tangy, fresh flavors we savor in kimchi and pickles.
In breads and beverages, tailored yeast strains such as Saccharomyces transform sugars to alcohol and carbon dioxide, dictating rise, bubble size, and flavor.
Enzymes released by these microbes and by the food itself break larger molecules into smaller ones, liberating amino acids and peptides that enrich umami and smooth out roughness.
Salt brine is both doorman and pathfinder. At 2 to 3 percent salt by mass for most vegetables, it pulls water out of cells, establishes a self-constituted brine, and tips the playing field toward LAB.
As lactic acid accumulates, pH often drops below 4.0, preserving texture while building vibrant, sour flavors.
Sauerkraut stays crunchy if you slice it fine and pack it tight. Cucumber pickles retain their snap when kept cool. Homemade kimchi reveals layered heat and garlic nuances as chili, garlic, and ginger oils complement brine intensity. These decisions—salt, cut, pack, and temperature—act like control knobs.
Fermentation enhances flavor, texture, and shelf life in a precise way. Lower pH slows spoilage. Carbon dioxide can add light fizz in brined carrots or kvass.
Proteolysis and lipolysis increase complexity in miso and soy sauce, often through molds like Aspergillus oryzae (koji) that supply strong enzymes.
Dual fermentations add another layer. Doubanjiang starts with a moldy mash that unlocks sugars and amino acids. Then a bacterial-yeast stage builds depth, salt, and long-keeping power.
Parallel ideas appear in sourdough, where lactic acid bacteria plus yeast work together, and in drinks like beer and saké, where grain starch becomes sugar before yeast takes over.
Across cultures—including Japanese whisky philosophy, saké, and koji work—makers tune these invisible ecosystems to craft stable, expressive foods, showcasing the beauty of fermented vegetables.
Key terms you’ll meet often:
- Brine: Salt-and-water solution that shapes microbe balance.
- Starter culture: Selected microbes added to steer results.
- Lactic acid bacteria (LAB) are bacteria that produce lactic acid and preserve.
- Enzymes are proteins that break down large molecules into flavor-building parts.
- Aerobic/anaerobic: With or without oxygen. Most veggie ferments are anaerobic.
- pH: Acidity scale; lower pH improves safety and sourness.
Health Benefits of Fermented Foods

Fermented foods, such as homemade kimchi and sauerkraut, provide live cultures, postbiotics, and enzymes that support gut health, improve nutrient bioavailability, and may even benefit immunity and mental health. Even one serving a day can help.
1. Gut Microbiome
Our gut microbiome is home to approximately 100 trillion microbes. Adding fermented vegetables to your diet helps feed and balance this crowded community by providing probiotics and bioactive compounds that support beneficial species.
Not all microbes survive digestion or colonize the gut, but thousands of fermentation by-products, such as organic acids, peptides, and bacteriocins, help shape a healthy environment.
Pair that with regular servings of homemade kimchi, sauerkraut, kefir, or yogurt to significantly boost microbial diversity, which is associated with resilience and easier digestion.
Rotate vegetable recipes: kefir one day, miso soup the next, then curtido or kombucha to diversify species exposure.
Monitor stool pattern, bloating, and energy for two weeks after adding a new ferment, then adjust portion sizes accordingly.
2. Nutrient Absorption
Fermentation dissolves anti-nutrients such as phytic acid and oxalates, which can bind minerals. It reduces certain FODMAPs and can partially pre-digest gluten in sourdough, making nutrients easier to access and meals easier on the gut. Lacto-fermenting cabbage and carrots can increase the availability of vitamin C and B vitamins and enhance iron absorption.
Use simple brines with about 2% salt by mass to ferment beets, cucumbers, or peppers. Then, sprinkle small amounts into salads to increase micronutrient density with no added preparation.
- Simple comparison
| Food form | Mineral availability | Digestive ease |
|---|---|---|
| Raw vegetables | Moderate, limited by anti-nutrients | Variable, higher FODMAP load |
| Fermented vegetables | Higher, anti-nutrients reduced | Often easier, acids/enzymes present |
Pair ferments with meals. Kimchi goes well with rice and eggs. Sauerkraut pairs nicely with legumes to encourage iron and zinc absorption.
3. Immune Function
These probiotic-rich foods interact with the gut-associated lymphoid tissue, helping tune immune responses. Research links daily ferments to reductions in low-grade inflammatory proteins like interleukin-6, a contributor to diabetes, arthritis, and chronic stress.
These beneficial strains and their metabolites can compete with pathogens, lower gut pH, and strengthen the mucosal barrier. Plan two to four servings per week: yogurt with fruit, kimchi fried rice, and sauerkraut on grain bowls.
Keep small sides or snacks, such as fermented carrots or kimchi pancakes, to boost consumption without big servings.
4. Mental Wellness
It communicates using neural, immune, and metabolic signals. Fermented foods can promote mood and clarity by generating short-chain fatty acids and neurotransmitter precursors. A few trials note better mental wellness with consistent probiotic food consumption, but findings depend on strain and dosage.
Experiment with different recipes and track the impact in your food journal—sleep, focus, stress—over a month to identify patterns that work for you.
5. Food Preservation
Fermentation safely preserves foods by lowering pH, inhibiting spoilage organisms, and extending shelf life, reducing waste. Good starters include cabbage, carrots, cucumbers, radishes, green beans, and peppers.
Save peak-season produce for year-round enjoyment, such as turning summer cucumbers into pickles and autumn cabbage into kraut. Store finished jars in the fridge or a cool pantry at 2 to 7 degrees Celsius; keep veggies submerged, clean tools, and toss if you notice mold or an off odor.
Certain individuals and high-risk immunocompromised patients should consult a doctor before incorporating probiotics or large amounts of ferments.
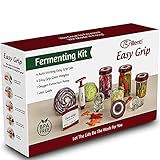
- Hassle-Free Waterless Fermentation Airlock Lids Are So Easy To Use: Our no burp value automatically releases gases and blocks oxygen so no burping of jars is needed; our fermenter lid is low profile and easily fits into cupboards
- Durable Food-Grade BPA-free Plastic Fermentation Lid: Unlike other 4 tab lids, Easy Grip fermentation lids are safely made of food-grade, hard, durable plastic with a thick leak proof gasket
- The Original four tab Fermentation Lids for Wide Mouth Mason Jars: Comfortable Easy Grip Tabs allow for easy opening when your fermented vegetables are done; the easiest, most comfortable to use wide mouth mason jar fermenter lid
- Date Reminder And Fermenting Weights: Our ferment lids remember the date and the Easy Grip weights keep vegetables submerged below brine for perfect ferments every time; our fermenting lids and weights make great starter lacto fermentation kits for sauerkraut, kimchi, cabbage or any fermented food
- Low profile waterless airlock fermentation lids: No Bulky water filled airlock so the jars fit easily into cupboards; fill a widemouth mason jar with vegetables and brine and screw on the lid; it’s that easy
Last update on 2026-10-31 / Affiliate links / Images from Amazon Product Advertising API
Your Fermentation Starter Kit
Build a simple setup that handles core workflows: prep, pack, ferment, and store. Start lean, learn the cues, and then scale. Starter kits exist for kombucha, yogurt, kefir, and fermented veggies, but a simple one works for saueworks and quick pickles.
Fermentation happens in stages: first, you salt or brine, then Lactobacillus converts sugars into lactic acid. Most vegetable ferments take days to weeks, but prep takes 15 minutes.
Use your ferments as condiments, sides, or recipe boosters.
- Wide-mouth glass jars (500 ml to 1 L): easy to pack, burp, and clean.
- Plastic or silicone lids: resist corrosion; avoid reactive metal.
- Fermentation weights—glass preferred—to keep produce under brine.
- Use a large mixing bowl and a sturdy spoon to massage and brine.
- Kitchen scale for accurate salt ratios. Two percent by weight is typical.
- Use fine salt, non‑iodized salt, and filtered water to avoid chlorine/chloramine.
- Scrub brush, hot water, soap, and clean cloths.
- Labels and a marker: note recipe and date.
- Bonus: extra containers, Tupperware, or small bottles.
Start here before investing in specialty crocks or airlock lids. Just set up a mini “fermentation station” on your counter so tools and staples stay within reach.
Essential Equipment
Select wide-mouth jars. Choose straight sides so they compress tightly and keep air out. Match them with plastic or silicone lids that seal just as well without the risk of rusting.
Add glass weights sized to your jars. They sit flat and hold down cabbage shreds or carrots. Go with a big mixing bowl. Use a trusty spoon to salt, toss, and massage veggies without a mess. The scale accelerates repeatable results.
Have a scrub brush, hot water, and soap on hand. Clean implements reduce the chances of yeast pellicles or funk. Keep extra Tupperware or small bottles around for fridge storage. Smaller containers permit you to portion kimchi, brined radishes, or curtido for quick meals.
Critical Sanitation
Wash hands, jars, and utensils well to combat mold and unwanted bacteria. This protects step one, sanitation, so the right microbes can take hold right away.
Sterilize jars by running them through the dishwasher or with hot water and soap before each batch. Rinse thoroughly and allow them to air-dry. Let jars air-dry with a clean cloth prior to sealing. You’re aiming for a snug fit.
Make sure your fingers are clean, or use a sanitized spoon, when pressing vegetables under brine. Strain out anything that floats, or it will mold.
Ingredient Selection
Select fresh, crisp produce with no bruises or soft spots. Use pure, non-iodized salt and filtered or purified water for stable brines and steady acid rise.
Test a steady: carrot-ginger-garlic, cabbage-chili-scallion, beet-dill-peppercorn. Spices, herbs, and alliums guide scent, consistency, and acid through days to weeks.
Log favorites in an easy list. Track salt rate, room temperature, and days until the sour hits your palate. That helps accelerate subsequent runs.
Beginner Fermenting Foods Recipes

Small-batch ferments build skill with low risk. Use 250 to 500 milliliters or half 500-milliliter jars, or 2-liter jars; label with date and salt ratio, then keep brief notes on taste, texture, and time.
Transfer your jars to a dark spot for the initial 24 hours, then burp every 8 to 12 hours until bubbling is consistent. Stick to each recipe, taste every day, and scale and days are repeatable.
Classic Sauerkraut
Shred 1 medium green cabbage (approx. 1kg). Add 20 g fine salt (2% by weight). Massage for 8 to 10 minutes until it sweats and the shreds bend without snapping.
This step draws brine and is key to crunch and safety. Stuff firmly into a jar, pressing until the brine rises above the cabbage. Place a weight on top and use an airlock lid or a burp-able loose lid.
Add 1 tsp caraway, 1 tsp dill seed, or 6 crushed juniper berries for a classic deli note. Ferment at room temperature (18–22°C) for 1–3 weeks.
Taste daily for flavor and texture. Sauerkraut is a typical first ferment. It is uncomplicated, forgiving, and imparts fundamental skill. It keeps for months in an airtight jar and is great on eggs, wraps, or tacos.
Simple Kimchi
Slice up 1 medium napa cabbage (around 1.2 kg), 4 spring onions, and 1 carrot. In a large bowl, toss with 30 g salt and let it rest for 30 minutes.
Add 4 minced garlic cloves, 20 g ginger, and 1 to 3 tablespoons of Korean chile flakes (gochugaru) to taste. Massage vigorously to distribute the paste and extract more liquid.
Pack into a jar, pressing out air pockets and keeping the mix under its own brine with a weight. Kimchi, a Korean staple, uses napa cabbage instead of regular green cabbage.
The leaves ferment quickly and remain tender. Ferment for three to seven days at room temperature. Taste each day for tang and crunch. Chill to slow souring.
It keeps for months and brightens rice bowls, omelets, and tacos.
Fermented Carrots
Slice or julienne 500 g carrots. Pack 2 garlic cloves and 2 dill sprigs in a clean jar. Cover with 2 percent brine: dissolve 1 tablespoon fine salt in 500 milliliters of water.
Place a weight to keep all pieces submerged. Add 1 teaspoon mustard seed for warmth or 1/2 teaspoon turmeric for color. Burp after day 1 if using a regular lid.
Ferment at room temperature for 5 to 10 days, until tart and crisp. Store in the fridge for a quick snack or salad topper.
Basic Kombucha
Brew 1 liter of strong black or green tea with 60 to 70 grams of sugar and cool completely. Pour into a glass jar with a handle, add 100 milliliters of starter kombucha, and a healthy SCOBY.
Cover with a clean, breathable cloth and secure with a rubber band to keep dust and bugs out. Ferment for 7 to 14 days at 21 to 24 degrees Celsius, tasting for a soft balance of sweet and tang.
Bottle in small, pressure-rated bottles and chill after a day on the counter for light fizz. Fermentation becomes simpler and more foolproof after a few times.
Some projects take weeks, while others take months, but completed ferments keep well chilled.

- COMPLETE STARTER KIT: Includes a 1 gallon glass fermenting jug with handle, #6.5 rubber stopper, 6-bubble airlock, black plastic lid, three yeast varieties, and 3.5 oz of food grade yeast nutrients.
- 1 GALLON GLASS JUG: Clear glass construction and a 1 gallon capacity provide a spacious vessel for home fermentation, while the handle makes the jug easier to handle.
- THREE WINE YEAST VARIETIES: Includes Red Star Premier Classique, Premier Cote des Blancs, and Premier Cuvee to give home brewers three yeast options for different wine projects.
- YEAST NUTRIENTS INCLUDED: The 3.5 oz jar of food grade yeast nutrients supports healthy yeast activity and efficient fermentation throughout your batch.
- VERSATILE FERMENTATION SETUP: Explore small-batch winemaking, fruit wines, and yeast starter preparation with this versatile fermentation setup.

Last update on 2026-10-31 / Affiliate links / Images from Amazon Product Advertising API
Troubleshooting Your Ferments
Quick cues save time and food.
Healthy signs include:
- Steady bubbles after day 2–3, not constant fizz
- Pleasant sour or fruity smell, never putrid
- Crisp veggies, not mush or sludge
- Cloudy brine, white film (kahm), or white ring at the bottom.
Keep the brine level above the produce; no dry edges. Keep this printed troubleshooting chart by your jars. Keep notes of dates, room temperature, salt rate (percentage by mass), vessel size, and headspace. With time, patterns emerge, and solutions become quick.
What to Expect
In the first week, color shifts are normal. Cabbage softens from bright green to muted. Carrots hold color, but the brine turns cloudy. Beets bleed pigment. Early CO2 shows as trails, flecks, or a small raft of bubbles.
A ferment that barely bubbles at first may just be a slow starter, especially if your room sits in the low 50° F (10–12 °C). Cooler rooms slow acid production and delay visible activity.
A thin white film (kahm yeast) or a white ring at the bottom is usually not a problem. Scoop it off if it thickens, but the batch can still be fine. Beet brine in particular can become thick and viscous. The high sugar content raises osmotic pressure and lactic acid production, changing the texture.
Just wait. Flavors stack over days to weeks: sharp acid, then rounded notes, then depth. Taste with a clean spoon every few days. Pull earlier for crunch and later for tang. If the texture turns thick and slightly slimy, it can self-correct as the acid increases.
Common Problems
Mold, mush or foul odors indicate disaster. Fuzzy growth, pink or black spots, or a rotten smell all signal spoilage.
Surface scum or yeast? Scoop out the scum with a clean spoon and top up with brine. Use a weight to keep produce submerged and minimize air space so CO2 pushes oxygen out faster.
Check salt. Aim for 2.0-2.5% by mass for most veggies. Salt guides microbial activity, preserves crunch, and enhances flavor. Too low invites spoilage, and too high stalls microbes.
Thick ferments like beet brine may need a nudge. Mix gently and ensure full coverage.
Blue mold over multiple jars indicates contamination or inadequate storage. Sanitize tools, use a new salt, use filtered water, and keep jars away from bread, fruit, or cheese rinds.
Use a troubleshooting table to match symptoms, such as blue film, a slimy stage, or no bubbles, with fixes like sanitation, time, temperature, or brine.
When to Discard
If you observe fuzz, pink or black spots, or it smells like rot, toss the entire batch. Never taste to check.
Compost where you can and start fresh with clean jars, new brine, and correct headspace. Less headspace means less oxygen for any unwanted microbes.
Record what failed: salt rate, room temp, headspace, weight used, and dates. These notes improve future outcomes.
Beyond the Basics

Fermentation opens up a creative avenue beyond sauerkraut and kombucha, especially with homemade vegetable recipes that require minimal equipment and cheap, accessible ingredients.
Timelines vary; some jars of fermented vegetables reach their prime in 3 to 7 days, while others take longer, but even early flops teach quickly. Just keep a few jars in the fridge for daily meals, from grain bowls to hummus wraps.
- Use what you can buy year-round. Steer clear of exotic produce initially.
- Scale salt to vegetable weight, two to two and a half percent for crunch and three percent for heat.
- For a softer texture, lower the brine to 1.5-2% and reduce the time.
- Try secondary fermentation for fizz (sealed bottles, 24–72 hours).
- Explore wild ferments: no starter, rely on native microbes.
- Join workshops/forums for troubleshooting photos and pH advice.
- Keep a journal: date, temp, salt %, weights, flavor notes.
- Run 200- to 300-gram test jars before scaling to 2- to 3-kilogram batches.
Adapting Recipes
Begin with pantry-friendly swaps. Swap green cabbage for Napa to inch toward kimchi notes. Add herbs like dill for zesty pickles, or kick up carrots with ginger and chili. Whole spices release slower. Ground spices hit fast and can muddy brine.
Salt and brine define texture. Dry-salted slaws at 2 to 2.5 percent remain crisp. Whole-veg brines fall in the 2 to 3 percent range. Higher concentrations slow fermentation but tame softness and heat.
Warmer rooms hasten souring but can push mush. Cooler rooms add nuance.
| Ingredient swap | Effect on flavor | Effect on texture | Notes |
|---|---|---|---|
| Napa for green cabbage | Softer, sweeter, kimchi-like | More tender | Great with gochugaru, garlic |
| Carrot for daikon | Earthy, sweet heat | Stays firm | Slice thin for faster sour |
| Apple matchsticks | Gentle sweetness | Softens over time | Use 1–2% of mix |
| Mustard seeds | Sharp, nutty pop | No change | Bloom in hot water, then cool |
| Ginger (fresh) | Warm spice, citrusy | Slight tenderizing | Start at 5–10 g/kg |
Try concepts in little jars first. Scale only after you like day-3 and day-7 tastes.
Flavor Profiles
Mix savory, spicy, and sweet to develop layers. Consider cabbage with garlic and dill, or beets with orange peel and clove. Even a ginger bug starter can become bright ginger ale once you build a clean, active culture.
Flavor enhancers deserve a place. Garlic, ginger, dill, mustard seed, and black peppercorns do well in most veggie ferments. Toast spices to wake up their aromas, then cool them before using.
Go crazy with ferments every day! Spoon kraut on salads, tuck kimchi in wraps, or top grain bowls with curtido for crunch and acid. Taste before packing and again mid-ferment. If flat, season with a pinch of salt, a touch of sugar, or more aromatics. Then finish.
Cultural Variations
World staples lead the way in homemade kimchi with Napa cabbage, gochugaru, garlic, and salted seafood, demonstrating layered heat and umami. German sauerkraut, a classic vegetable recipe, keeps it lean with cabbage, salt, and juniper.
This Latin American curtido combines cabbage with onion, oregano, and carrot for a quick, light ferment that showcases the versatility of fresh vegetables.
Go regional — try creative recipes from other parts of the country or world to really push your skills and palate. Mark your favorites and jot down important ingredients so you can play mix and match with local produce, including seasonal vegetables.
Honor fundamental techniques, such as right salinity, immersion, and timing, but customize to what flourishes around you. This balance preserves tradition while welcoming new taste trails, making fermentation an exciting kitchen experiment.
Our Conclusion
To finish, go small and make it pure. Salt correctly, monitor the temperature, and try on a predetermined day. Trust your schnoz and your notebook. A fine kraut after seven days at 22°C speaks volumes. So does a tangy kefir after sitting on the counter for twenty-four hours. Close steps produce consistent victories.
To develop competence, conduct brief experiments. Divide one batch among three jars. Only change the salt rate or time. Monitor pH with test strips. Watch texture, fizz, and aroma. That trumps guesswork.
To be safe, dump any batch with mold, slimy brine, or a sharp stink. No patch there.
For ongoing fun, share jars, exchange ideas, and record each batch. To get started today, choose a recipe above, time yourself, and prep your jar.

- THE KEY TO GREAT FERMENTATION – Our wide mouth fermentation kit will keep your fermenting vegetables submerged to prevent spoiling caused by excess oxygen. The lids help maintain the anaerobic environment suitable for fermentation. Contains everything you need to begin fermenting in your own mason jar: weights, lids and acacia wood tamper.
- FOOD-SAFE GLASS & PLASTIC – Our weights are composed of the same food-safe soda lime glass as mason jars. They’re non-porous and lead-free. No need to worry about flavor or odor transfer – and they won’t stain. And our lids are made from BPA-free plastic, so they’re 100% food-safe
- SUITABLE FOR WIDE MOUTH MASON JARS – 2.7″ diameter compatible with all brands of wide-mouth mason jars. With our mason jar fermenting kit, fermenting is easy and fun for small batch fermentation. Also great as pickling equipment and pickle weights.
- HASSLE FREE FERMENTATION: Our airlock lids automatically release gas, acting as airlock lids without the need for fussy daily maintenance. You can turn any wide mouth mason jar, big or small, into a fermentation vessel
- FERMENT TO YOUR HEART’S CONTENT: Perfect for use as a sauerkraut or kimchi kit. Just add cabbage and/or other vegetables, salt and flavorings. Then tamp down, submerge in brine, place a weight on top to keep everything below the liquid level and top it off with a fermentation lid. Sit back and wait for perfect sauerkraut or kimchi!
Last update on 2026-10-31 / Affiliate links / Images from Amazon Product Advertising API
Frequently Asked Questions
What is fermentation, and how does it work?
Fermentation is a natural process in which microbes such as bacteria or yeast transform sugars into acids or alcohol, making it essential in food science. This process not only preserves fresh vegetables but also creates new flavors, enhancing nutrient bioavailability in homemade kimchi, sauerkraut, and other creative recipes.
Are fermented foods safe to make at home?
Yes, if you stick to clean techniques and tested recipes for homemade fermented vegetables. Always use fresh vegetables, non-iodized salt, and clean jars like mason jars. Keep vegetables immersed in liquid brine during fermentation, and the ferments should smell pleasantly sour, not foul.
What basic tools do I need to start fermenting?
Start with mason jars, lids, and a weight to keep your fresh vegetables under brine, and keep your work area clean. A digital scale, pure salt, and a fermentation airlock help with the fermentation process, and non-reactive materials like glass are essential.
How long do beginner ferments take?
While some more advanced ferments, like homemade kimchi, can take weeks or months, most beginner vegetable recipes take 3 to 14 days at room temperature (18 to 24°C). Sauerkraut typically requires 1 to 3 weeks. Quick pickles can be done in a few days, so taste every day after day 3 and transfer to the fridge when the flavors suit you.
How can I tell if my ferment went bad?
Warning signs of spoilage in homemade fermented vegetables include fuzzy mold, pink or black growth, slimy texture, or a rotten smell. A proper ferment, like sauerkraut, will smell sour and fresh, with effervescence and a mucky brine.
What salt should I use for vegetable ferments?
Use non-iodized salt, like sea salt or pickling salt, for your homemade fermented vegetables. Iodine and anti-caking agents can disrupt the fermentation process, affecting the texture and microbial activity in your vegetable recipe.
Do fermented foods improve gut health?
Fermented foods, such as homemade kimchi and sauerkraut, are packed with live cultures that support a diverse gut microbiota. These creative recipes can support digestion and immune function, but results may vary by individual and product. Always check with your healthcare provider before making significant dietary changes.


One Comment