
Beginner’s Guide to Fermenting Foods at Home: Tips, Safety, and Easy Recipes
Key Points
- Fermentation is an anaerobic means by which lactobacilli and yeasts transform sugars into acids, gases, and alcohols that preserve foods, enhance flavor, and improve digestibility. Begin with clean utensils and consistent chopping to encourage even and safe fermentation.
- Lactic acid and other metabolites lower pH to block pathogens while creating probiotic-rich foods that can support gut and immune health. Keep your vegetables submerged and use airlocks or breathable covers to encourage good microbes.
- Fermentation at home prolongs shelf life and decreases food waste, all while giving you control over salt levels, spices, and textures to suit your diet and palate. Start with cabbage, carrots, or cucumbers, and document times, temperatures, and tasting notes to ensure reproducible outcomes!
- Best conditions are 18 to 24 degrees Celsius, indirect light, and clean, uncluttered work surfaces to avoid mold and off-odors. Use non-iodized salt, filtered water, and fresh produce, and date and content-label your jars for consistent record-keeping.
- Select appropriate vessels for your batch size — glass jars, ceramic crocks, or food-grade plastic with weights to keep solids below brine. Starter cultures such as whey, kefir grains, sourdough, or a SCOBY normalize results for dairy, bread, and kombucha.
- Troubleshoot early by keeping an eye out for bubbles, sour clean aromas, and a consistent brine level. Chuck any batch with mold penetration or horrible smells. Tweak salt percentage, temperature, or time to remedy mushiness or sluggish activity. Transfer completed ferments to the fridge for storage.
Fermenting foods at home is about harnessing benevolent microbes to transform raw ingredients into zesty, shelf-stable staples like kimchi, yogurt, and sauerkraut.
Simply put, salt, time, and the correct temperature direct lactic acid bacteria and yeasts to reduce pH and generate flavor.
Think straightforward instructions on brine ratios, jar prep, and safe pH targets of 4.6 or under.
To suit our busy lives, we offer mini-batch workflows, affordable tools, and solutions for common problems, from floppy pickles to stinky odors.

- 【VSAPRDT Fermentation Kit – Perfect for Homemade Fermentation】Includes 4 glass fermentation weights, 4 wide-mouth 304 stainless steel fermention lids (with 4 food-grade silicone gaskets), 4 BPA-free water airlocks, plus 1 food-grade silicone gasket and 5 silicone stoppers (jars not included). Fits all wide-mouth mason fermentation jars, providing a complete solution for fermenting pickles, and more—safe, hygienic, and easy to use!
- 【Food-Grade Glass Fermentation Weights 】Fermentation jar lids made of high-density glass, each sauerkraut weight approximately 7 oz (200g) to keep fully submerged below brine. The non-porous surface resists absorbing odors, flavors even after long-term use.
- 【304 Stainless Steel Fermenting Lids – Rustproof & Airtight】Crafted from seamless stainless steel , these wide mouth fermentation lids feature silicone seals for a perfect airtight fit. The wide-mouth design allows easy handling, while the airlock releases gases, ensuring stable and hassle-free fermentation.
- 【Smart Airlock System Design】Dual-channel fermenting airlocks create CO2-release . Pre-drilled holes with reinforced grommets ensure seals. Silicone stoppers (included) allow jar storage post-fermentation without lid replacement!The fermentation kit is a complete pickling kit designed for homemade fermentation.
- 【 Silicone Stopper Design– Effortless Sealing After Fermentation】No need to replace the fermentation jar lid! Simply remove the airlock and plug the hole with the included silicone stopper to switch to storage mode. Saves time, and locks in freshness. The sauerkraut kit is a complete fermentation kit designed for homemade fermentation.

Last update on 2026-10-01 / Affiliate links / Images from Amazon Product Advertising API
The Living Science

Fermentation is a carefully managed alliance with microbes—bacteria, yeasts, and occasionally molds—that transform vegetables, dairy, and grains. They operate in oxygen-poor environments, ferment sugars into acids, alcohols, and gases, and render foods more shelf-stable, tangy, and even effervescent.
Lactic acid is the star of many ferments; it drops the pH, inhibits spoilage microbes, and retains crunch in your cabbage or carrots. The jury is still out on the more sweeping health assertions, but some of these good bugs probably help your stomach. Fermented fare has grounded cultures for millennia for reasons of preservation, detoxification, and taste.
The Microbes
Lactobacillus species dominate a great many vegetable and dairy ferments. They convert glucose and lactose into lactic acid, quickly lower pH, and establish the tangy flavor you enjoy in sauerkraut and yogurt.
Yeasts like Saccharomyces and Brettanomyces ferment plant sugars to alcohol and carbon dioxide, powering sourdough rise and kombucha’s gentle buzz. Microbes help form texture and aroma by producing organic acids, ethanol, CO2, and esters.
Think pickled cucumbers, creamy yogurt, airy sourdough, and the funk in kimchi. Starter cultures provide predictable strains for yogurt, kefir, and sourdough, while wild ferments draw on your produce and air, which can impart more complex profiles but can fluctuate in results.
Context is everything. Target two to three percent salt by mass for veggies. Fully submerge solids under brine to maintain an anaerobic environment and keep jars at eighteen to twenty-two degrees Celsius.
Skim off surface yeast or mold in the brine; this is normal and not a failure. If you see pink slime, caustic smells, or soft mush, toss and toss again.
The Benefits
- May support a diverse gut microbiome when eaten regularly.
- Some research associates yogurt and kefir with reduced heart risk.
- Some early experiments indicate kimchi may boost insulin sensitivity and reduce weight gain.
- Extended shelf life through low pH and anaerobic storage.
- Possibly more digestible, microbes pre-digest sugars and certain anti-nutrients.
- Flavor range you control: sour, mild, spicy, umami.
- Nutrient tuning through input selection and timing is important, but keep in mind that the total evidence remains limited.
Not all fermented foods are created equally in terms of safety or health; prioritize those with live cultures and sensible salt for optimal benefits.
The Methods
| Method | How it works | Best for | Pros | Cons |
|---|---|---|---|---|
| Dry brine | Salt draws water to form its own brine | Cabbage, radish | Simple, less gear | Needs precise salt, pack well |
| Wet brine | Salted water poured over produce | Cucumbers, okra | Easy submersion control | More liquid, space |
Use reliable starters: thermophilic or mesophilic cultures for yogurt and cheese, active sourdough for bread, and a healthy SCOBY for kombucha.
Fermentation kits can eliminate guesswork with airlocks and weights, though jars and a clean rock do just fine if you keep an eye on pH and brine levels. Think cabbage, carrots, beets, mango, apples, oats, and rice.
Rotate crops, measure salt ratios, and taste every day after day two. The science is mounting but not definitive, though the existential victories—sustenance, dominion, and knowledge—are indisputable.
Your Fermentation Toolkit
Construct a miniature, dependable, clean-working rig with measuring and oxygen-exclusion capabilities.
Keep a checklist: wide-mouth canning jars (about 1 L), ceramic crock for bigger batches, food-grade plastic tub for bulk veg, airlock lids or storage caps with rubber or silicone gaskets, fermentation weights (ceramic, stainless springs, or coils), a mandoline for even cuts, a sharp knife, a clean mixing bowl, a food processor, a digital scale with high capacity (up to 8000 g) and fine precision, non-iodized salt such as pure Himalayan pink salt, filtered water, herbs and spices, and fresh produce.
Establish a mini pantry or kit, a bin or shelf where these tools reside, so prep remains quick and uniform.
Essential Vessels
Utilize glass jars, ceramic crocks, or food-grade plastic containers depending on batch size and budget. Your Fermentation Toolkit: Glass is inert and easy to see through. One-liter wide-mouth jars suit kraut, kimchi, carrot sticks, or curtido. Ceramic crocks maintain stable temperatures and accommodate whole-leaf ferments.
Food-grade plastic works for big brines, like cucumber or olive cures. Wide-mouth jars make packing tight, burping, and cleaning easy. You can reach in with a tamper, throw in weights, and check brine lines without a struggle.
Keep produce submerged in brine with ceramic discs, stainless springs, or coils. Weights prevent floaters that attract mold, maintain anaerobic conditions, and promote even salt distribution.
Select airlock lids for dynamic, gas-rich ferments. Gases vent with oxygen out. For easy projects, cloth with a band works, but gasketed caps minimize contamination and spills.
Critical Ingredients
Begin with non-iodized, additive-free salt and filtered water. Himalayan pink salt is your friend. It is mineral dense, unrefined, and free of those annoying anti-caking agents that can make brine cloudy or microbes sluggish.
Starter cultures give you control. Use whey for quick lactic pickles, kefir grains for milk kefir or water kefir, and a robust SCOBY for kombucha. They reduce lag time and produce a more uniform decrease in pH.
Add depth to flavor and functionality with garlic, ginger, chili, peppercorns, dill, bay, or coriander. Most spices contribute phenolics that lactic acid bacteria love to ferment, while also flavoring the aroma.
Examine fruits and vegetables. Avoid bruised, slimy, or moldy items because they increase pathogen and yeast load and throw off the ferment.
Ideal Environment
To successfully ferment vegetables, target a temperature range of 18-24C (65-75F). Cooler temperatures slow down the fermentation process, while warmer ones can accelerate it and affect texture. It’s essential to keep a room thermometer handy to monitor this. Avoid placing jars in direct sunlight or near heat sources, as light and heat can lead to unwanted off-flavors and surface growth.
Ensure you work on a sanitary bench with clean tools and thoroughly rinse off soap. Clutter can harbor biofilm and crumbs that may introduce mold seeds into your fermented food.
Be mindful of airflow and humidity during the fermentation process. Moderate airflow aids off-gassing, while high humidity helps maintain seal integrity. Regular lid inspections are crucial for successful fermenting.
For crisp results in your fermented vegetable recipes, prepare precise 2-3% salt brines using a digital scale. This will enhance the flavor and texture of your fermented veggies.
By following these guidelines, you can create delicious fermented foods that offer numerous health benefits, including improved gut health and beneficial bacteria for your digestive system.
How to Ferment Foods

Start with a clean setup and simple vegetables for fermenting, such as cabbage, carrots, or cucumbers.
Follow clear steps: prepare, submerge, wait, taste, and store. Use a fermentation vessel and keep tools and jars sterile to prevent contamination. Trust a good recipe book for ratios, timing, and troubleshooting.
1. Prepare
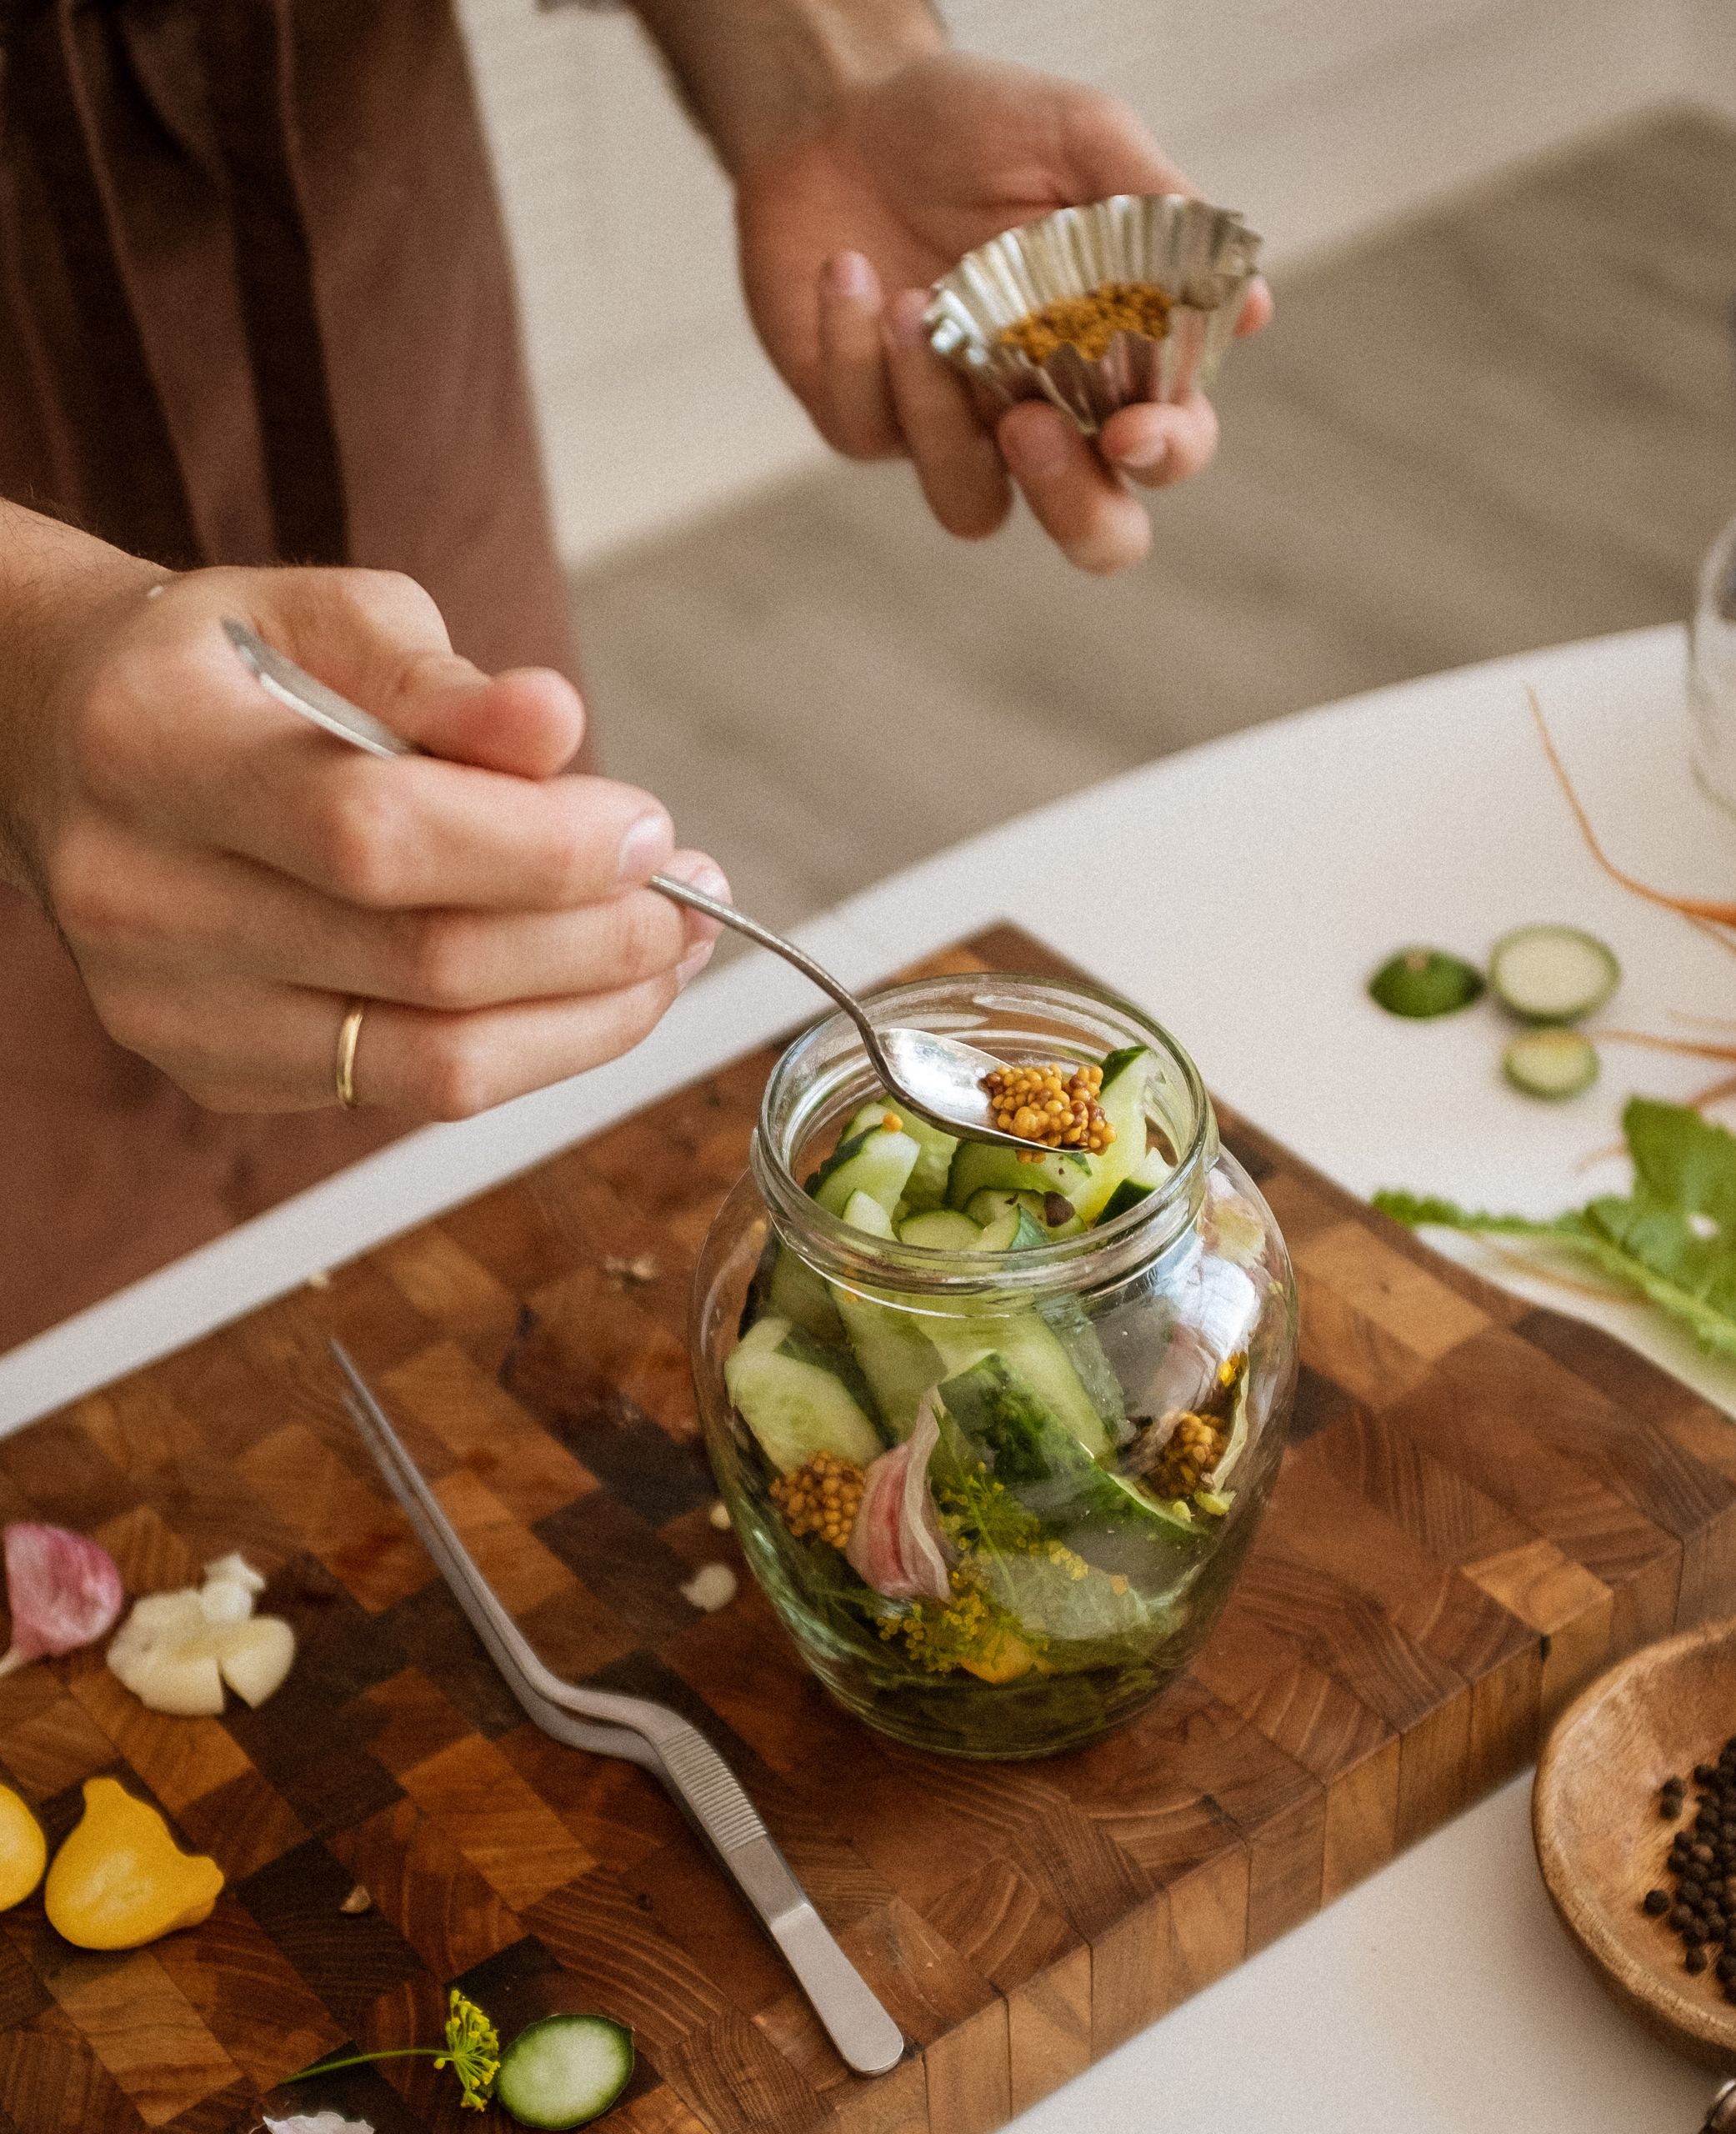
Start by washing and preparing your produce. Rinse fruits and vegetables under cool water, cutting out any bruised spots. Slice pieces to a uniform size to ensure that the microbes work at the same speed. Shredded cabbage, sliced carrots, and cucumber spears are ideal for creating delicious, evenly flavored and textured fermented vegetables.
Weigh your veggies, then add salt at a ratio of 2-5% by weight. A good default is two percent for most vegetables. For example, if you have 600 grams of cabbage, you would use 12 grams of salt. Massage the mixture until brine forms or pour a 2 to 5 percent salt brine over whole pieces to enhance the fermentation process.
For a 1-liter jar, aim for 20 to 50 grams of salt, depending on the produce and your style. Firmly stuff the mixture into sanitized jars, leaving 2 to 3 centimeters of headspace. Be sure to wipe the rims and label each jar with the date, contents, and salt percentage for tracking and future tweaks.
2. Submerge
Press solids completely under brine with a glass weight, food-grade pebble, or smaller jar inside. This keeps it anaerobic, which lactic acid bacteria require.
Top off with an additional 2% brine if necessary so no bits float. Any exposed pieces can mold. Check daily and remove floaters and harmless surface scum. Press down to submerge all ingredients beneath the brine.
3. Wait
Ferment at room temperature, roughly 18–22°C. Warmer rooms speed the process, and cooler rooms slow it. A minimum of 2 weeks is recommended before eating, though some quick pickles taste good sooner and deeper sours need longer.
Look for bubbles, a nice tangy smell, and color changes as indicators of fermentation. Gas accumulates, so ‘burp’ lids daily or use airlock lids gently loosened to vent pressure without oxygen entering. Don’t agitate jars otherwise.
Take your cue from your recipe. Kimchi might peak around 1 to 3 weeks. Sauerkraut often comes into its own after 3 to 6 weeks.
4. Taste
Break into it with a sterilized spoon. Taste forkfuls every couple of days to monitor salt, sour, and crunch.
If it’s too sharp, transfer to the fridge to slow down. If it’s bland, continue at room temperature. Jot tasting notes: date, aroma, texture, and any brine adjustments.
5. Store
Once flavor hits just right, refrigerate to halt or slow fermentation and preserve texture. Use airtight containers to trap fizz and minimize odors.
Label jars with finish date for rotation. Enjoy as a side, a snack, or on top of bowls, salads, and sandwiches for acidic brightness and crunch.
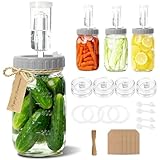
- 【Complete Fermentation Kit】This all-in-one fermentation kit includes four 32 oz mason jars and heavy-duty glass fermentation weights made from food-safe, lead-free, non-porous glass that never absorbs odors, flavors, or colors. The set also includes durable fermentation lids, dual-channel airlocks, and everything you need for making kimchi, sauerkraut, pickles, and more. Includes 20 date-and-note tags with strings for labeling each fermentation session.
- 【Plastic Fermentation Lids, No Rust, No Silicone Wear】Designed as an alternative to metal lids, our food-safe plastic fermentation lids eliminate rust concerns while reducing stress on silicone grommets. This thoughtful design helps maintain a secure seal and extends the lifespan of every fermentation jar in the set.
- 【Ferment & Store with One Lid】Our plastic fermenting lids let you switch effortlessly from fermenting to storage. Simply remove the airlocks and insert the silicone stopper. Each jars instantly converts into a sealed mason jar, giving you a smooth ferment-to-store workflow without changing lids.
- 【Wide-Mouth Mason Jar Design】Each 32 oz fermentation jar features a wide 3.4″ opening for easy filling, packing, and cleaning. Clear ml and oz markings help you measure ingredients accurately and monitor fermentation progress.
- 【Upgraded Airlock & Weight System】Our dual-channel airlocks work with the tight-sealing plastic fermentation lids to maintain a stable, low-oxygen environment. The lead-free glass fermentation weights are non-porous and food-safe, keeping vegetables fully submerged for safe, consistent, and flavorful results in every batch.
Last update on 2026-10-01 / Affiliate links / Images from Amazon Product Advertising API
Beyond the Basic Brine
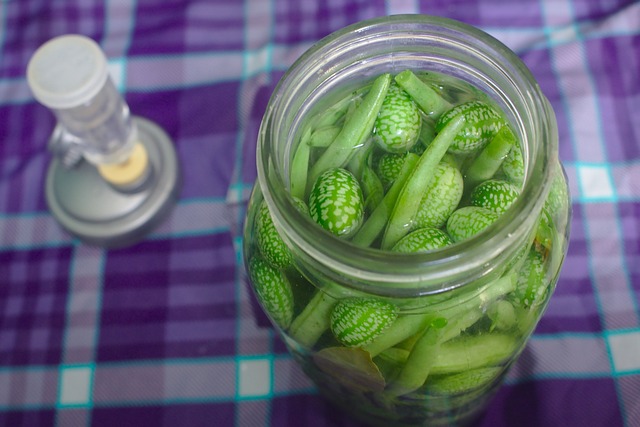
Advanced ferments, including easy-to-ferment vegetables, broaden your pantry beyond salted vegetables.
The same core rules still guide safety and flavor: keep produce submerged, choose salt levels with intent, and control time and temperature.
Sourdough Starters
Go beyond the basic brine and explore the world of fermented foods. Develop a starter by mixing equal parts flour and water by mass, allowing native yeast and lactobacilli to colonize it. Whole-grain flour accelerates early growth due to the extra enzymes and minerals, making it an excellent choice for your fermentation process.
Stir daily, discard half, and feed with fresh flour and water until it doubles in 4 to 8 hours and smells mildly sour rather than harsh. Feed schedules are important. At room temperature, feed 1:2:2 (starter:water:flour) every 12 hours for strength.
For a softer crumb, opt for a 100% hydration starter. If you prefer tangier notes, experiment with a drier 60–70% hydration. Use the active starter to leaven various dishes, including pancakes, waffles, and even fermented vegetable recipes, as the acids enhance digestibility and shelf life.
Keep in the fridge between bakes. Refresh one to two times at room temperature prior to mixing dough for peak rise. Stay Beyond the Basic Brine. Keep your tools clean to prevent off-flavors and monitor aroma, rise, and bubble size to fine-tune flavor.
Dairy Cultures
Yogurt, kefir, and buttermilk use particular starter cultures, either freeze-dried or from a spoonful of your previous batch. Heat milk for yogurt to 85 to 90 degrees Celsius to denature proteins for a thicker set, then cool to 43 to 45 degrees Celsius before inoculation.
For your kefir, avoid high-heat denaturing if you’re aiming for a thin drink. Inoculate at 20 to 25 degrees Celsius with kefir grains for a blend of lactic acid bacteria and yeasts. Maintain temperature throughout incubation.
Yogurt sets in 4 to 12 hours at 40-45°C; longer times add more tang. Kefir ferments within twelve to forty-eight hours at room temperature. Strain off grains and refrigerate to prohibit further souring.
Incorporate cultured dairy into your smoothies, overnight oats, marinades, dressings, and sauces. Save a little for your next starter, and rejuvenate with a commercial culture if texture wanders or flavor gets yeasty.
Sweet Teas
Kombucha begins with sweet tea, SCOBY, and starter liquid at around pH 4. Go with black or green tea for consistent antioxidant levels. Herbal is fine if you mix in at least 50% real tea.
Standard sugar is 50 to 70 grams per 1 liter. Less sugar dilutes fermentation, while more provides quicker acid and later fizz. Primary ferment at 18–30°C for 7–14 days.
For a second ferment, bottle with 10–15% fruit purée or 10–20 grams of sugar per 1 liter, cap and hold for 1–3 days before chilling. Fermentation rules still apply across vegetables: brine at 2 to 5 percent salt by weight.
Two percent suits quick ferments, while three percent is for longer storage. One kilogram of cabbage with 20 grams of salt is about 2%. Ensure all produce is kept submerged for proper anaerobic conditions.
When sliced cucumbers change color after a day or two of brining, that’s the brine penetrating the vegetable. Below 13 degrees Celsius (55 degrees Fahrenheit), many ferments can last for a year.
Post your notes, ratios, and stumbles with friends or a little blog to cultivate skill in the open.
Common Fermentation Problems
Quick reference for diagnosing issues and adjusting the fermentation process.
- Problems and fixes:
- Mold: remove or discard and improve submersion.
- Odd smells: discard and correct salt or temperature.
- Mushy texture: use cooler temperatures, more salt, or tannins.
- No bubbles: check temperature, culture, or sugars.
- Contamination: clean tools.
- pH control: measure and acidify if needed.
- Temperature control: maintain 18-22°C for many vegetable ferments.
- Brine strength: aim for 2-3% for most vegetables.
- Oxygen control: use weights or lids.
- Learning loop: record salt percentage, temperature, and time.
- Safety first: sanitize gear, keep produce below brine, use clean water, and monitor pH below 4.5 for vegetables. Some microbes tolerate pH below 4.0, so keep hygiene tight!
- Troubleshooting flow: Observe (sight, smell, texture), verify salt and temperature, ensure proper oxygen exposure, then decide whether to continue or discard.
- Make notes per batch to fine-tune time, salt, and temperature.
Unwanted Mold
Mold appears fuzzy and may have green, black, blue, or pink hues on the surface. It develops when oxygen comes into contact with sugars, usually due to inadequate submersion or contaminated utensils.
If the mold is just a thin, flat, white, non-fuzzy yeast film, skim and keep going. If it is fuzzy or colored, remove the affected surface and discard the batch if growth goes beneath the brine or threads down the sides.
Avoidance is an easy habit. Maintain all produce 2–3 cm beneath the brine with a scrubbed weight. Sterilize jars, lids, and weights, and rinse well to remove soap residue. A salt brine at 2–3% encourages Lactobacillus, Leuconostoc, and Weissella and inhibits spoilage molds.
Temperature is important. Warm rooms supercharge gas production that can float food above brine. Try to stay within 18 to 22 degrees Celsius, and keep crocks off sunny counters. In hot summers, keep it in a cool space to reduce the danger.
Odd Smells
Typical aromas include clean, tangy, lactic, and faintly yeasty. Rotten, sulfurous, fecal, or solvent or chemical odors indicate spoilage or contamination. Throw away without tasting — not worth it because pathogens such as enterotoxigenic Staph aureus, Listeria monocytogenes, and Bacillus cereus are genuine threats.
Review salt and temperature. Low-salt or 28 to 32-degree Celsius rooms can encourage off-flora. Recalibrate to 2 to 3 percent brine for vegetables and shift to 18 to 22 degrees Celsius.
Vent pressure every day for lids without airlocks and reseal to keep anaerobic. Use a pH meter or strips. Lactic ferments should fall below approximately 4.5 in days.
Mushy Texture
Soft or hollow veg indicates insufficient salt, excessive heat, excessive time, or enzyme-rich produce. Summer sauerkraut from spring cabbage in heat tends to become soft. Others say it becomes super mushy and hollow after a week when jars sit near 32°C.
Begin with crisp, fresh produce. Use 2 to 2.5 percent salt for cabbage; stay at 3 percent or more for cucumbers in hot weather. Shift jars to 16-20 degrees Celsius if the texture slips quickly. Reduce the warm-stage time.
For crunch, add tannins: grape, oak, or black tea leaves. Quickly cool after peak activity, then refrigerate to hold firm.
No Bubbles
Few or no bubbles can indicate sluggish microbes, cold rooms, excessive salt, or an old starter during fermentation. It’s essential to check the temperature first; under 16 degrees Celsius, many cultures tend to creep. Warm gently to around 20 degrees Celsius for optimal fermentation of your fermented vegetables.
If you’re using starter whey or brine, always verify freshness. Gently shake to resuspend beneficial bacteria and dislodge carbon dioxide from the jar walls. When using kombucha or water kefir, adding a little sugar or a slice of fruit can energize activity and enhance the fermentation process.
Consider the quality of your raw materials as well. Some vegetables with a low microbial load or very old spices might lag in the fermentation process. In seafood or dairy ferments, cold brining at 3-8°C for months can significantly alter timelines.
Certain styles of fermenting require 3 to 8 months and depend on native milk microbiota. It’s crucial to set realistic expectations and measure pH rather than simply chasing bubbles for successful fermented food recipes.
Trusting Your Senses

Trust your senses when fermenting foods, as they are your best tools in home fermentation. Beyond vision, scent, and flavor, you should rely on tactile, auditory, and internal cues such as nausea, salivation, and comfort while maintaining notes on your fermented vegetable recipes.
- Look for consistent visual cues over days, not minutes.
- Trust your nose, and give the jar a good sniff before you pop it open. Then sniff the brine.
- Taste small, spaced samples to track acidity changes.
- Feel textures with clean utensils; note crisp vs. mushy.
- Trust your senses; listen for the fizz on opening. A soft hiss indicates active CO2.
- Check your body’s response; discomfort means stop and reassess.
- Log dates, salt %, temperature (°C), and daily sensory changes.
- Use senses to decide readiness, not a fixed timer.
The Look
Healthy ferments shift color as pigments react to acid and salt. Cabbage turns brighter then mellow, cucumbers go olive, and brine turns slightly cloudy as lactic acid bacteria bloom. Little bubbles that stick to edges or float up when you tap the jar are proof of vigorous CO2.
Mold is a red flag: fuzzy, raised growth in white, blue, green, or black. Kahm yeast is flat and powdery white; it is not toxic but is an indicator to skim and optimize salt or oxygen management. Sliminess on vegetables, ropy brine, or pink streaks are signs of spoilage. Toss it.
Keep daily tabs on brine height. Vegetables should remain submerged 1 to 2 centimeters in brine to reduce oxygen exposure. A little bit of cloudiness is typical; sudden milkiness with off-odors is not.
Match your jar against trusted photos in a guide to calibrate your eye. We’re all different in how comfortable we are with visual change. Respect that.
The Smell
A quality ferment has a clean, sour, and slightly yeasty aroma. Sauerkraut leans toward lactic sharpness, kimchi leans toward garlic and chili, and kefir leans toward dairy tartness. Anticipate additional sulfur early, which often dissipates.
Chemical, solvent-like, rancid, or putrid odors are signs of contamination. If your nose recoils, your body’s deep wisdom may be cautioning you. We evolved to smell danger and listen to it.
Trust Your Senses- Smell the brine and solids before you taste. If the brine smells fresh-sour and not pungent, continue. If in doubt, don’t taste. Honor your frontier and begin a fresh batch with cautious salt, 2 to 3 percent by weight, as experimentation schooled us in safe food conservation.
The Taste
Sample with a fresh fork. Normal is tangy, savory, and bright, with crispness for vegetables. Acidity will develop over time, particularly at 18 to 22 degrees Celsius.
If you get bitter, metallic, numbing, or soapy notes, spit and discard. Your interoception—that sense of internal state—guides your selection. Others discover this after tasting ferments following dry fasts or simply via serendipitous synchronicities that shove them into fermentation. These experiences form trust.
Adjust later: More salt slows souring and favors crunch. Less salt speeds acid but risks softness. Warmer rooms abridge time, and cooler ones lengthen it. Heat and cut size guide flavor.
We all have our preferences. See, note, and determine what you enjoy, not what a cookbook tells you.
Trusting Your Senses: Experimenting with new foods builds confidence, and it’s okay to proceed at your own speed.
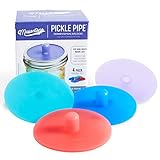
- EASIEST MASON JAR FERMENTING AIRLOCK: These premium quality self burping ferment caps have a one way waterless valve to vent gas automatically while home fermenting vegetables. This simple one-piece airlock requires no water, burping or maintenance.
- FOOLPROOF FERMENTATION: Fermenting veggies is tricky without the right pickling supplies and equipment. Strong pressure presents & can blow off the cover or even burst the glass. Open air can spoil the ferments so our own-way valve prevents spoilage.
- MAKE PROBIOTIC-RICH FOOD AT HOME: Ferment your own sauerkraut, pickles, kimchi & more. Pickle Pipes can ferment any vegetable from cabbage to carrots, cucumbers, tomatoes, garlic, radishes & more. Get your probiotics economically & naturally at home!
- LOW PROFILE DESIGN: Our waterless pipe system is comprised of a low-profile lid that makes storage easier. Our silicone airlocks valve design take up less space and allow you to conveniently store your fermenting vegetables in cupboards and drawers.
- FOOD & DISHWASHER SAFE: Your Pickle Pipes are made of premium quality food-safe silicone. They are BPA-free & contain no phthalates, but are tough and durable and easy to clean. They can go into your dishwasher along with your wide mouth mason jars.
Last update on 2026-10-01 / Affiliate links / Images from Amazon Product Advertising API
Our Conclusion
Home ferments create fresh flavor, low cost, and less waste. Jars, clean implements, and a loyal brine do the job. Salt defines crunch and sour. Air flow halts mold. Cold slows the little critters. Warmth accelerates them.
To be safe, smell, then look, then taste a lick. Sharp sour, bright tang, and firm bite equal good. If it has fuzzy growth, a slimy feel, or smells funny, chuck it.
For skill, go small. Sample a 2% salt brine with cabbage, carrots, or radish. Log the date, temperature, and salt. Taste daily! Pay attention to what’s different. Tweak the next batch.
Ready to take a stab at your first jar! Get a scale, rinse a jar, and prepare a 2% brine today.
Frequently Asked Questions
What is fermentation, in simple terms?
Fermentation is a magical process in which beneficial bacteria, such as lactic acid bacteria and yeast, consume sugars to produce acids, gases, or alcohol. This process not only preserves foods like sauerkraut and kimchi but also enhances taste and offers health benefits, making fermented vegetables easier to digest.
What basic tools do I need to ferment at home?
You’ll need mason jars and lids, a fermentation vessel with a weight to keep the fermented veggies submerged, a non-reactive spoon, and a digital scale. An airlock is nice but optional. Use chlorine-free water and high-quality salt to ensure your fermented food recipe succeeds.
What salt-to-water ratio works for most brines?
A 2% brine is a good baseline for fermenting vegetables, which translates to 20 grams of non-iodized salt per 1 liter of water. For crunchier fermented veggies, consider using 2.5-3%. Always weigh salt and water for accuracy and consistent results.
How do I know if my ferment is safe to eat?
Trust them; the fermentation process should produce a sourish smell, not a putrid one. The color should appear natural without any fuzzy mold, and the brine must be clear to slightly cloudy. Try a little to see if your fermented veggies are ready.
Why is mold forming on my ferment, and what can I do?
Mold develops when food comes into contact with air, so always keep everything submerged in brine during fermentation. Use a weight, skim floating bits, and wipe jar rims. If fuzzy mold appears anywhere, toss it; however, a thin, white film (kahm yeast) is harmless and can be removed.
How long should I ferment vegetables at room temperature?
At 18–22°C, begin tasting your fermented vegetables after 3–5 days. Most fermented foods are ready at 7–14 days, while warmer rooms speed up the fermentation process. Transfer to the refrigerator when the flavor and tang of your fermented food recipe are to your liking.
Can I ferment without special cultures?
Yes. Most vegetables, especially when fermenting, have wild lactic acid bacteria on their surfaces. For dairy or grains, using a fermentation kit with a starter culture can help ensure consistency. Remember to use clean tools, quality ingredients, and the right salt content to nurture the beneficial bacteria.


8 Comments