
How to Make Fermented Green Beans That Stay Crunchy
Our Observations
- Fermenting green beans involves using lactic acid bacteria to turn natural sugars into lactic acid, lending tang, snappy crunch, and probiotic goodness. This is different from vinegar pickling, which preserves using acid added directly rather than biologically produced.
- Use non-iodized salt, such as kosher or pickling salt, and filtered water to support good bugs. Maintain equipment cleanliness and bean freshness, and include a small jar weight to ensure the beans stay submerged and minimize contamination risk.
- Make a brine with roughly 12 to 15 grams of salt per 250 milliliters of water for reliable fermentation, then cool to room temperature before pouring. Leave headspace, keep it all submerged below the brine, and vent the gas with a loose lid or fermentation cap.
- Let ferment at 18 to 24 degrees Celsius, out of direct sunlight, and look for bubbles, cloudiness, and a pleasantly sour aroma as signs of success. Taste after 5 to 7 days and continue until the flavor and crunch are to your liking.
- Refrigerate or otherwise store completed beans cold to inhibit further microbial activity and retain crispness, ensuring that beans remain submerged. Label jars with dates and ingredients, and maintain a basic log to tweak future batches.
Personalize taste with dill, garlic, peppercorns, chili, mustard seed, coriander, or bay leaves, and try yellow beans or mixed veggies. Recycle leftover brine as a starter or splash it in salad dressings for tang and probiotics.
Fermenting green beans is a salt-brine preservation technique that produces lactic acid, giving them a crunchy, sour flavor and an extended shelf life.
With a 2 to 3 percent sea salt brine, fresh beans, and an anaerobic setup, this drops pH to about 3.5 to 4.0 over 5 to 10 days at 18 to 22 degrees Celsius.
Spices like garlic, dill, or chili add depth without covering the bean’s snap. For safe craft and consistent taste, her main post provides equipment lists, timing heuristics, and debugging techniques.

- Traditional pickled vegetables recipe: preserved for over 40 years; this pickled green beans recipe will surely delight original flavor pickle eaters with a classic taste
- Guilt-free low calorie snack: curb your cravings with a nourishing pickled beans in a jar; perfect for appetizers minus the high calories
- Gluten-free asparagus pickled: Foster’s pickled green beans are free of any preservatives and gluten
- Vegan and vegetarian-friendly: down to the last ingredient, Fosters pickled green beans are plant-based and stay true to what you see on the label
- Make it a party favorite: garnish pickled green beans for bloody mary and it will be perfect for your parties, holidays and intimate gatherings
Last update on 2026-10-01 / Affiliate links / Images from Amazon Product Advertising API
The Fermentation Transformation
Fermenting fresh green beans transforms tender pods into probiotic-packed nutrition using lactic acid bacteria. These organisms feast on plant sugars, lower the pH with lactic acid, and create a protective sour brine solution. The texture moves from the raw squeak to a firm, snappy bite as pectins tighten.
Flavor intensifies from grassy to zippy, tangy, and herbal if you toss in fresh dill, garlic cloves, or peppercorns. The nutrients remain, and some become easier to utilize as fermentation can enhance bioavailability and degrade anti-nutrients.
Fermentation is not vinegar pickling. Pickling relies on an acid you introduce, such as distilled vinegar, to establish an immediate sour palate and shelf-stable pH. In contrast, the fermentation process uses a salt brine, typically 2 to 3 percent by mass, to specifically cultivate the lactic acid bacteria that produce the acid in situ.
With green beans, we achieve a classic “dill pickle” note from dill heads, garlic, and black pepper or mustard seed in the quart jar. Vinegar pickles have a sharp taste on day one but lack the slow-build complexity found in fermented dilly green beans.
Salt-brined beans develop a pure sourness, a gentle fizz, and that elusive crunch over days to weeks.
A simple workflow: trim the beans, pack them tightly in a clean jar with dill, garlic, and spices, then cover with a 2–3% salt brine (20–30 g non-iodized salt per 1 L of water).
Keep beans submerged in brine with a weight to prevent oxygen exposure. Fit a loose lid or an airlock so CO2 can escape during fermentation.
Burp the jar every day during the first week to evacuate gas and prevent brine from spilling over. Maintain a temperature between 15–24°C (60–75°F) to encourage beneficial microorganisms.
Warmer temperatures promote rapid souring, while cooler temperatures temper it. Begin tasting after day 3 to gauge the flavor of your fermented vegetables.
Most batches complete in 7–14 days, but this can run anywhere from a few days to several weeks depending on temperature, salinity, and your tartness preference.
When it tastes good, seal and transfer to the fridge. Fermented beans can be stored in the cold for months, often 12 months if submerged and kept clean.
Here, bacteria and a few yeasts ferment sugars and some fibers. This change can help make beans more digestible and possibly increase some vitamins. It’s great for the gut.
We cohabitate with hundreds of beneficial bacterial species. When we consume live-culture ferments, we inject organisms and metabolites that can help maintain that ecosystem.
Benefits of fermentation include enhancing the flavor and nutritional profile of your favorite meals, making it a delicious addition to your diet.
| Benefit | What it means for you |
|---|---|
| Probiotics | Live cultures may support gut flora balance |
| Digestibility | Nutrients can be more available, less stomach strain |
| Flavor depth | Layered sour, herbal, and umami notes |
| Texture | Firm, crisp bite with good snap |
| Shelf life | Stable in fridge for several months |
| Low waste | Preserves garden or market surplus |
Essential Fermentation Gear
This selection strives for clean, repeatable ferments with minimal fuss whether you’re stocking a small kitchen or scaling up careful experiments.
- Half-gallon wide-mouth mason jar as vessel
- Food-grade airlock with lid and rubber grommet
- Glass or ceramic jar weight sized for wide-mouth jars
- Non-iodized salt: kosher or pickling salt
- Digital scale accurate to 1 g
- pH strips (range 2.8–5.2) for spot checks
- Sanitation supplies include fragrance-free dish soap, food-safe sanitizer, and clean towels.
- Long-handled spoon, funnel, and tongs
- Spare lids, gasket rings, and labels
- Notebook or fermentation log (paper or a simple spreadsheet)
- Optional: Vegetable fermentation kit with pre-drilled lids, stoppers, and weights
I use a half-gallon mason jar for green beans because the tall shape keeps whole pods neatly stacked in vertical layers. A wide mouth allows you to pack tight and drop in a weight with less chance of chips.
Pair your jar with an airlock to vent CO2 while preventing oxygen from entering. A lid drilled to accommodate a rubber grommet provides a snug, gas-tight fit for the airlock stem. This easy headspace management reduces surface yeast development and simplifies brine level monitoring.
If you want a ready set, a vegetable fermentation kit bundles the lid, grommet, and weight so you spend less time sourcing parts.
Sanitize before every batch. Rinse jars, lids, airlocks, and weights in hot water with gentle, unscented soap, rinse well, then fan with a food-safe sanitizer, following the instructions.
Sanitized equipment minimizes early-stage spoilage that can outcompete lactobacillus. Rinse utensils you will touch mid-process—spoons, funnels, tongs—to maintain workflow sterility when you shift weights or add brine.
Opt for non-iodized kosher or pickling salt. Both dissolve quickly and skip anti-caking agents that can murk brine or stress fermenting bacteria.
Salt and water weigh for accuracy. A 5% brine consists of 50 grams of salt and 1,000 grams of water. Stir until translucent, then pour to cover the beans by at least 2 centimeters.
Add a glass or ceramic weight to keep pods beneath the brine line. This easy step prevents oxygen from triggering soft textures and off odors. Pack fresh, crisp beans, trim the ends, and use sanitary utensils to avoid jar breakage from overpacking and minimize contamination.
Ferment at room temperature, around 18 to 22 degrees Celsius. Warmer rooms accelerate acid drop. Cooler rooms decelerate it.
Mark start date, salt percentage, room temperature, and flavor notes on the log. Include rapid pH checks on days two to three to understand how your environment influences sourness and crunch.
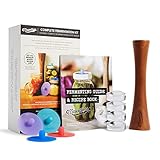
- PREMIUM STARTER KIT FOR THE HOME FERMENTER: Includes all the tools needed to convert a regular (small) mouth mason jar into a fermenting machine! Kits turn 4 jars into fermenters for smaller batches for veggies & fermented garlic, salsa & hot sauces!
- 9 PC KIT INCLUDES: 4 Pickle Pipe Airlock Tops, 4 Pickle Pebble Infinity Glass Weights, 1 Acacia Pickle Packer Vegetable Tamper and Bonus Printed Recipe Book. Become a probiotic vegetables maker and pickling pro with the best supplies and equipment from the #1 source.
- MAKE YOUR OWN DELICIOUS PROBIOTIC SUPERFOODS: Ferment vegetables (carrots, pickles & radishes etc.) in a brine or use your acacia wood pounder to pack tasty dry salted ferments like sauerkraut and kimchi. Good stuff for your tummy and immune system!
- EASY TO USE AND MAINTENANCE FREE: Simply fill jars with veggies and salt or brine, apply Pickle Pebble weights & waterless self burping airlock lid. No need to monitor or burp your jars, your Pickle Pipe airlocks vent gas without letting oxygen in.
- FROM THE MASON JAR ACCESSORIES EXPERTS: Making your own fermented foods is fun and easy when you trust the Masontops name. Step-by-step instructions with beautiful pictures on how to easily make probiotic superfoods at home are included.
Last update on 2026-10-01 / Affiliate links / Images from Amazon Product Advertising API
How to Ferment Green Beans
Fermenting green beans is the process of submerging fresh, crisp pods in salty brine so lactobacillus can transform sugars into lactic acid.
Go for peak-season beans with tight skins and bright color. Use a clean jar, enough salt brine to shield the ferment, and room temperature to spark life.
Anticipate bubbles, a mild tang, and a firmer bite when done.
- Prepare 500 ml to 1 L jars.
- Mix this with non-chlorinated water and non-iodized salt, approximately half a tablespoon per cup or one tablespoon per two.
- Pack trimmed beans and spices.
- Submerge with weight.
- Ferment 3–7 days at 18–24°C.
- Chill for storage. Fresh garden beans have the best texture and flavor. The brine favors lactobacillus and inhibits spoilage microbes.
1. Prepare Beans
Rinse beans thoroughly in cool water, then slice off both tips for uniform fermentation and a tidy bite. Rip any limp, blemished, or rusty-spotted pods. You get what you put in.
Trim to fit a 500 ml or 1 L jar so they nestle below the shoulder.
Optional: Blanch for 1 to 2 minutes, then chill fast. This can set color and add crunch, which is good for older beans or thicker varieties such as Romano.
Even size counts. Short segments ferment more uniformly. Whole beans look wonderful but may require an additional day.
2. Create Brine
Mix kosher, pickling, or sea salt with non-chlorinated water. Use ½ tablespoon per cup of water (approximately 8 to 10 grams per 240 milliliters). For a small test batch, combine 1 tablespoon of salt with 2 cups (480 milliliters) of water.
Skip iodized salt and chlorinated water. Both can slow or inhibit fermentation. If tap water is chlorinated, let it sit for 24 hours or use filtered water.
Tightens texture and tastes saltier with a stronger brine. Cool the brine to room temperature before use to safeguard those wonderful microbes.
3. Pack Jars
Stand beans straight for a tight pack and pristine appearance. Tuck in garlic, dill, bay, mustard seed, black peppercorn, or a little hot chili for heat.
Leave 2-3 cm headspace to accommodate CO2 and brine surges.
Press down to expel air gaps so brine reaches all surfaces.
4. Submerge Beans
Set a glass weight, small jar, or clean stone on top. All solids need to be kept below the brine to prevent mold.
Wipe the rim. Use a fermentation cap or a lid left slightly loose. If using a tight lid, place parchment between the lid and jar to reduce corrosion and open daily to vent.
Check brine daily and top up with matching brine if needed.
5. Ferment Actively
Keep at 18 to 24 degrees Celsius, away from the sun. Look for bubbles, a light haze, and a clean sour aroma.
Start tasting around days 3-5. Most people prefer 5 to 7 days for snap and tang. A longer time intensifies sourness.
Skim insidious white kahm yeast. Throw away if you spy fuzzy mold or sniff rot. Checking daily helps you catch problems early.
6. Store Cold
Then move to the fridge or a cool cellar to tamp down activity and lock in flavor.
Beans under brine for stability. Date and spice-label it so you can repeat or tweak it next time.
Serve as a snack, with rice bowls, in salads or alongside decadent mains.
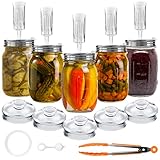
- COMPLETE SET: 5 stainless steel fermentation lids, 5 glass weights, 5 airlocks, 6 silicone rings, 6 silicone grommets and 1 silicone tong.
- HIGH QUALITY MATERIAL AND DURABLE: The glass weights dimensions is 2.75″*2.75″*1.37″ and the weight is approximately 200 g /7 oz. These glass weights are made of high quality materials, which are resistant to corrosion and can be used for a long time.
- EASY TO USE: Before the fermentation, insert the airlocks into the lid hole, screw lid on your jar, add water to the airlock. After fermentation, take off the airlock, close the silicone cap. The lids have a silicone ring underneath to make things airtight and prevent oxygen from entering the jar to pollute the ferments.
- EASY TO PUT IN AND TAKE OUT: The raised handle is easy to grip. To prevent brine splashing, use silicone tongs to slowly place the glass weight in. Clamp the both sides of handle and gently remove from the bottle mouth.
- If you’re not completely satisfied simply let us know and we will offer a prompt refund or replacement, no questions asked
Last update on 2026-10-01 / Affiliate links / Images from Amazon Product Advertising API
Beyond the Basic Brine
This level transcends a simple brine to intentional decisions that sculpt crunch, tang, and fragrance as food safety remains in control. A strong brine is the backbone.
For varying jar sizes, add ½ tablespoon of non-iodized sea salt per 240 ml of water, or opt for a 5% salt brine by weight for tighter control. That would be 80 g salt to 1600 g water. Non-iodized sea salt is important because iodine inhibits lactobacilli.
In lacto-fermentation, the brine inhibits putrefying bacteria, allowing lactobacillus to transform sugars into lactic acid. That acid seals in a fresh, tart crispness and retains color. Weight beans to keep them submerged and prevent surface yeast.
To prime a new batch, replace some of the water with brine from a finished jar. We’ve found that this does two things: it kick-starts acid production and shortens the sour curve.
Seasoning is where you direct taste. Whole spices infuse more slowly and maintain brine clarity. Go easy so the beans remain the star.
Crank up the next time if you desire more oomph.
Test one jar with heat, one with herbs, and one with roots, so you can compare them side by side after 5 to 10 days at 18 to 22 degrees Celsius.
- Dill seeds (1 tbsp)
- Whole celery seeds (1 tbsp)
- Whole cloves (1 tsp)
- Bay leaf (1)
- Ginger slices (4 × 6 mm)
- Garlic (2–3 cloves, crushed)
- Mustard seeds (2 tsp)
- Black peppercorns (1 tsp)
- Red chile flakes (½–1 tsp)
- Lemon zest (4–6 strips)
Diversity enhances plate appeal and flavor. Yellow beans ferment like green ones but bring gold tones. Organic beans usually have tougher skins and a crisp snap.
Mix vegetables for contrast: carrot sticks for crunch and color, small cucumbers for a familiar pickle note, and cauliflower florets for a mild bite.
Stand beans up, nestle shorter vegetables to fill the gaps, and keep headspace of 2 to 3 centimeters.
If the room is warm, choose the 5 percent brine; if cooler, the half tablespoon per cup works beautifully and keeps salinity at a moderate level.
Don’t just dump basic brine when you’re done! Fold 60 to 120 milliliters into a fresh jar as a starter, and include it in the total liquid.
Or whisk 30 to 45 milliliters into a salad dressing with oil, mustard, and herbs for a sharp, probiotic kick. Don’t cook the brine if you want live cultures.
| Method | Acid Source | Timeframe | Texture | Flavor Depth |
|---|---|---|---|---|
| Traditional dill pickles | Vinegar added | Hours to 1 day | Firm to soft | Sharp, one-note sour |
| Quick pickling | Hot vinegar brine | Same day to 2 days | Tender-fast | Bright, spice-forward |
| Fermented dilly beans | Lactic acid from brine | 5–14 days | Crisp if kept cool | Complex, evolving sour |
My Fermentation Philosophy

Fermenting green beans is a minimalist, low-tech approach to preserving peak-season produce and developing flavor over time, with salt and patience. I treat it as everyday kitchen work: repeatable, safe, and adaptable.
This process of fermenting dilly green beans not only enhances the taste but also helps preserve fresh produce.
Fermentation, to me, is a living system. We direct it; we don’t coerce it. The lacto in lacto-fermentation refers to lactic acid, not lactose. Scientists initially observed this acid when milk soured, but that’s only one vegetable that it can act upon.
When working with garden vegetables, the fermentation method can yield delicious results.
With green beans, I go straight-up salt-and-water brine in a way that tips the scales. Harmful microbes are kept back. Salt-tolerant lactic acid bacteria wake up, consume the plant sugars, and produce lactic acid.
That acid subsequently lowers the pH and secures both safety and crunch, which is essential for making classic dill pickles.
Health lies at the heart of this selection. A substantial portion of the immune system lines the gut, so consistent consumption of varied microbes counts. Fermented foods provide probiotics, enzymes, and vitamins that are preserved or even increased over time, while raw or cooked veggies can lose vitamins in storage or reheating. Enjoying these foods can significantly benefit gut bacteria.
I don’t hawk it as a magic bullet. I simply regard it as a single, consistent practice with many small victories that add up. Each batch of fermented vegetables offers its unique flavor profile.
I apply strict guidelines to make the process replicable. For green beans, I lean on a 5% brine by weight: 50 g of non-iodized salt per 1,000 g of water.
Cover the beans completely, place a weight on them, and eliminate oxygen to ensure the fermentation process is effective.
At 18–22°C, active fermentation begins within a day. By day 3, the brine is hazy and smells bright, not foul. Begin tasting each day from day 4. Lighter sour tends to fall between days 4 and 7. Warmer rooms lead to faster fermentation, while cooler rooms lead to slower fermentation.
Pull the jar when the snap, salt, and tang suit your palate, then chill to stanch the microbes. This simple fermentation process can be adjusted based on your taste preferences.
I advocate thoughtful experimentation. Adjust brine strength in a safe range if you like. Four percent creates a softer profile, while six percent leads to a firmer, saltier line.
Toss in some garlic, dill, mustard seeds, or a strip of chili for heat, enhancing the overall flavor of your favorite meals.
Record jar size, salt percentage, room temperature, and the day you put it in cold. Small batches teach you your space and water. This is coevolution in a jar: we grow with the bacteria that live with us.
I enjoy fermented beans alongside rice bowls, eggs, stews, or as an afternoon snack. Pass jars around with friends, have the kids measure the salt, and swap notes.
The skill remains modest and communal, fostering a love for fermenting in every household.

- Thick Glass: Fermentation lid made from clear glass, the same glass used in the mason jars. They are easy to use in your sauerkraut and kimchi
- Easy Grip Handle: Nonslip grip design make these heavy weights easy to put in and out of your mason jars. If the weights are too deep in the jar, it can be easily picked up with a clamp, and also can prevents saltwater splashing
- FIT ALL Wide-Mouth Jars: 9 Packing standard 2.7″ diameter glass fermentation weights fit all wide mouth mason jars(pint, quart, ½ gallon, etc). For small batch fermentation, fermentation in glass bottles is easy and fun
- HEAVY FERMENTATING WEIGHT: The heavy glass pickle weights keep vegetable ferments safely under the brine. Ideal for Sauerkraut, pickle, Kimchi, and any vegetable and fruit ferments
- FLAT BOTTOM: The bottom is flat to avoid air bubbles forming underneath
Last update on 2026-10-01 / Affiliate links / Images from Amazon Product Advertising API
Serving Your Creation

Pickled green beans, especially when prepared as fermented dilly green beans, add crunch, vibrant acidity, and a hint of funk. They accommodate everything from on-the-go snacks to gourmet bites.
Serve fermented green beans chilled as a crunchy, garlicky snack or appetizer.
Refrigerate the jar for at least 2 hours before serving. Cold temperature stiffens texture and preserves the snap. Pull the whole beans directly from the brine and allow to drain on a towel.
Drizzle with extra-virgin olive oil, crack some black pepper, and add lemon zest if you’re into it! If you used garlic, ginger, or hops during the 4- to 5-day room-temperature ferment, those notes will pop now.
Maintain the brine line clean in the jar, leaving approximately 2 to 5 centimeters (1 to 2 inches) of headspace below the lid when you repack it. This helps minimize spills and keeps oxygen out.
Taste a bean after 4 to 5 days to judge doneness: it should be tart, less salty than day one, and firm, not squeaky. If the flavor is young, let it rest another day, then refrigerate.
Add finished dilly beans to salads, grain bowls, or as a side for dinner to boost flavor and nutrition.
Slice on the bias and fold into quinoa, brown rice, or farro bowls with cucumber, chickpeas, and herbs. The lactic acid from lactobacillus, nourished by sugars in the beans during the ferment, adds complexity without additional dressing.
For an easy side, stir in some roasted carrots, toasted seeds, and a dollop of yogurt. Save 60 to 120 milliliters of brine for the dressing, then whisk it with olive oil and mustard at a 1:3 ratio.
Note that the same brine can seed your next batch; use about 120 milliliters (one-half cup) of it in your non-chlorinated water to kick-start the culture.
Use green bean pickles as a garnish for brunch Bloody Mary cocktails or charcuterie boards.
For drinks, use beans long for visual height. Garnish with a lemon wheel and an olive on a skewer. The five percent salt brine keeps the savor strong, so a quick rinse will pull back salinity if necessary.
On boards, it pairs well with sharp cheddar, cured meats, and plain crackers. Include a tiny ramekin of brine for dipping; it rouses decadent pâtés and schmears.
Suggest creative ways to incorporate fermented beans into recipes, such as chopping them for a fresh salad or pairing them with classic dill pickles.
Chop and fold into tuna salad with celery and dill, no vinegar required! Mince with capers for a quick tartar to spoon over grilled fish or tofu.
Combine buttered radish and baguette with whole beans and dill pickles. Dice into warm scallion potatoes for a five-minute picnic salad.
For those who home-ferment, mix 5% salt by weight into non-chlorinated water, cover the beans and spices like garlic, ginger, and hops, leave 2 to 5 centimeters of headspace, seal, and let lactobacillus produce lactic acid at room temperature for 4 to 5 days.
Our Conclusion
To wrap up, green bean ferments hit that sweet spot: crisp bite, bright acid, steady salt. It remains simple, but the power is in your hands. Adjust the salt ratio to modify crunch.
Turn time to tune into sour. Throw in a little chili, dill, or garlic to form the finish. My advice is to use small jars for quick trials, then scale up once you like the brine.
Keep track of batch dates, room temperature in °C, and salt in grams per liter. That log rewards quickly.
For an easy dinner victory, dress beans with sesame oil, lime, and toasted seeds. For snacking, pair with sharp cheddar and rye. For a side, dice into an herbaceous rice bowl.
Prepared to fire up a jar this week? Post your batch notes and taste victories to us.
- COMPLETE SET: 5 stainless steel fermentation lids, 5 glass weights, 5 airlocks, 6 silicone rings, 6 silicone grommets and 1 silicone tong.
- HIGH QUALITY MATERIAL AND DURABLE: The glass weights dimensions is 2.75″*2.75″*1.37″ and the weight is approximately 200 g /7 oz. These glass weights are made of high quality materials, which are resistant to corrosion and can be used for a long time.
- EASY TO USE: Before the fermentation, insert the airlocks into the lid hole, screw lid on your jar, add water to the airlock. After fermentation, take off the airlock, close the silicone cap. The lids have a silicone ring underneath to make things airtight and prevent oxygen from entering the jar to pollute the ferments.
- EASY TO PUT IN AND TAKE OUT: The raised handle is easy to grip. To prevent brine splashing, use silicone tongs to slowly place the glass weight in. Clamp the both sides of handle and gently remove from the bottle mouth.
- If you’re not completely satisfied simply let us know and we will offer a prompt refund or replacement, no questions asked
Last update on 2026-10-01 / Affiliate links / Images from Amazon Product Advertising API
Frequently Asked Questions
How long do fermented green beans take to be ready?
The majority of batches of fermented dilly green beans ferment in 5 to 10 days at 18 to 22°C. Taste each day after day 4, as they are ready when the beans are tangy, crisp, and have that delicious pickle flavor. Warm rooms ferment more quickly, while cool rooms slow the fermentation process.
What salt-to-water ratio should I use for the brine?
Use 2 to 3 percent salt by weight, which is 20 to 30 grams of non-iodized salt per 1 liter of water. This range favors fermentative bacteria, promoting the fermentation process while maintaining the crispness of the green beans.
Do I need special equipment to ferment green beans?
To achieve delicious fermented dilly green beans, a clean quart jar, a weight to keep the beans submerged, and an airlock or loose lid suffice for the fermentation process.
How do I keep the beans crisp during fermentation?
Start with fresh, firm green beans and cut off the ends while keeping them whole. Make a 2-3% salt brine solution to submerge the beans completely. Ferment at a cool temperature of 18 to 20 degrees Celsius, adding a few grape or oak leaves to enhance tannins and flavors.
Is cloudiness or white film on top normal?
Cloudy brine is normal in the fermentation process. A thin white film called kahm yeast is harmless; just skim it off. However, fuzzy, colorful mold or overpowering stinky rotten smells indicate spoilage, so if you’re not sure, dump it and start over.
Can I add garlic, dill, or spices to the brine?
Yes. Include peeled garlic cloves, fresh dill, and spices such as peppercorns, mustard seeds, or chili flakes. Remember, these additions should be used sparingly to maintain the amazing pickle flavor in your brine solution.
How do I store fermented green beans once they taste right?
Transfer the quart jar to the refrigerator. Fermenting green beans helps keep them submerged. The fermentation process is slowed in cold storage, preserving the amazing pickle flavor and crunch. Enjoy your dilly green beans within 2 to 3 months.


