

Beginner’s Guide to Fermenting Apple Cider Safely at Home
Key Points
- Start with quality apples and preservative-free juice for clean flavor and consistent fermentation. Mix varieties to balance sweetness, acidity, and tannins for a more complex cider.
- Choose your yeast intentionally to control dryness, aroma, and alcohol content. Match the yeast strain to the temperature range, and rely on commercial options for consistent results.
- Construct a tidy, efficient toolkit to avoid cross-contamination and simplify workflow. Sanitize each surface and implement it before every step to safeguard taste and safety.
- Have a process to eliminate guesswork and make it repeatable. Track gravity, temperature, and timing to know when to rack, age, and bottle.
- Craft taste post-fermentation by customizing sweetness, carbonation, and aging. Use precise temperatures and optional blends of spices, fruits, or oak to create a signature profile.
- Troubleshoot early, save a batch, and learn for next time. Watch for stuck fermentation, off-aromas, and contamination. Record your fixes to polish your technique.
Fermenting apple cider is the process where yeast converts apple juice sugars into alcohol and carbon dioxide. Start with fresh juice at 11–13% Brix.
Get food-grade gear, sanitize well, and pitch a known yeast strain at 18–20°C. Track gravity with a hydrometer to monitor fermentation and dryness.
For clarity, cold crash at 2–4°C, then rack off sediment. Coming up next — critical steps, equipment lists, timelines, and flavor control tips.

- Smart Brew Automatic Controller: Advanced automatic venting system precisely manages CO2 release and fermentation conditions for set-it-and-forget-it brewing, helping to prevent blow-offs, oxidation, and contamination while maintaining an anaerobic environment
- Universal Fit for Multiple Bucket Sizes: Designed to fit 3.5, 5, 6, and 7 gallon fermenting buckets, providing versatile compatibility for all your home brewing setups
- Carbon Filter System: Micro carbon air filter blocks airborne contaminants, providing a controlled environment for curing and minimizing the risk of undesirable substances from affecting the harvest without needing to unscrew lids and expose contents
- Airtight Food-Grade Seal: BPA-free, durable materials create a reliable, leak-proof seal that is easy to install, sanitize, and clean, suitable for all your fermented brews and mead
- Time and Effort Savings: Automatic features such as easy open and automated exchange of gases reduce the need for manual intervention and monitoring, saving time and effort while ensuring a precise and efficient curing process
Last update on 2026-11-01 / Affiliate links / Images from Amazon Product Advertising API
The Cider Foundation
Fermentation depends on fruit quality, clean juice, and good yeast, including several cider yeasts. Tight sanitation is crucial, as every decision influences aroma, sweetness, acidity, tannin, and potential alcohol, crafting styles from crisp and dry to lush and semi-sweet.
Choosing Apples
Begin with intent. Sweetness propels alcohol, acidity enhances brightness, and tannin imparts grip. Dessert apples such as Gala and Fuji drive sugar but lack tannin. Branley’s, like sharp apples, give malic bite.
Kingston Black and Yarlington Mill, true cider apples, deliver bittersweet depth and structure.
Mix for moderation. A common matrix is 60% dessert for sugar, 25% sharp for acid, and 15% bittersweet for tannin. If you don’t have any traditional cider fruit, throw in a small portion of crab apples for acid and bite.
Remember, Schilling Cider House has 50 ciders on tap, a reminder that great apple varieties make for many styles.
Choose crisp and juicy. Late-season fruit produces better flavor and more juice. Mill and press right after harvest to control browning and wild microbes.
Cull, cull, cull, cull, cull, cull, cull. Throw away any apples that are rotting or moldy. Even a tiny pocket can seed phenolic stink or stalled ferments.
Selecting Juice
Take fresh-pressed juice with no preservatives. Potassium sorbate or benzoate will kill yeast and stall the batch.
- Choose those that say only ‘apple juice’ or ‘apple cider’.
- Avoid “from concentrate” if possible; fresh juice has a better aroma.
- Guarantee no potassium sorbate, sodium benzoate, or sulfites are added post-press.
- If you want, choose organic or local orchard juice for traceable fruit and terroir.
Verify gravity with your hydrometer. An original gravity of 1.050 to 1.060 indicates roughly 6 to 7.5 percent ABV post-attenuation. If it’s low, raise gravity by adding concentrated apple juice or a touch of sugar.
Understanding Yeast
Pick the trail. Wine yeast (EC-1118, QA23, etc.) likes to ferment dry, clean, and stable, with apple and pear esters showing up. Ale yeast (like US-05 or S-04) will impart a touch of residual sweetness and a softer mouthfeel.
Wild or native yeast imparts rustic complexity but comes with higher risk. These commercial strains offer predictability, cleaner finishes, and sharp fermentation curves. They are great if you’re after consistent results or going to mix.
Measure intensity and heat. Target 15 to 22 degrees Celsius (60 to 72 degrees Fahrenheit). Too cold slows kinetics, and too warm spikes fusels. Pitch rate and starting oxygen are critical for healthy growth.
Experiment across three primary methods: pitched commercial yeast, controlled wild ferment (with sulfite rest), or spontaneous from orchard flora. Each varies in risk, speed, and flavor.
Combine with a buddy — racking, cleaning, and weekly checks are less of a hassle with two pairs of hands. Sanitize everything, measure temperature, and let it dry for 2 tks. Cider is elementary, yet the devil is in the details when it comes to success.
Your Fermentation Toolkit
This toolkit keeps your process tidy, consistent, and safe, puts you in charge of taste and sparkle, and helps you create excellent cider.
Check out this checklist to design your setup, overcome bottlenecks, and prevent off-flavors.
- Fermenters with airlocks and stoppers, along with a blow-off tube, are for vigorous beginnings that send foam and liquid into a jar.
- Siphon, auto-siphon, and food-grade tubing for clean transfers!
- Hydrometer or refractometer, test jar, and thermometer to monitor gravity and temperature.
- Funnels, bottling wand, bottle capper, swing-top closures, and crown caps.
- Pressure-rated glass bottles (swing-top 500 to 750 ml) are sturdy and reusable.
- Sanitizer (Star San), spray bottle, soft brush, and drying rack.
- Kitchen scale with one-gram resolution, measuring spoons, and notes log.
- Yeast options include cider yeast, wine yeast, or a maintained sourdough starter.
- Dextrose (corn sugar) for priming. It dissolves fast and cleanly.
- Fermentation station: a stable shelf or crate, drip tray, towels, and a cooling hack: a frozen gallon of water to help maintain 18 to 24 degrees Celsius.
Essential Vessels
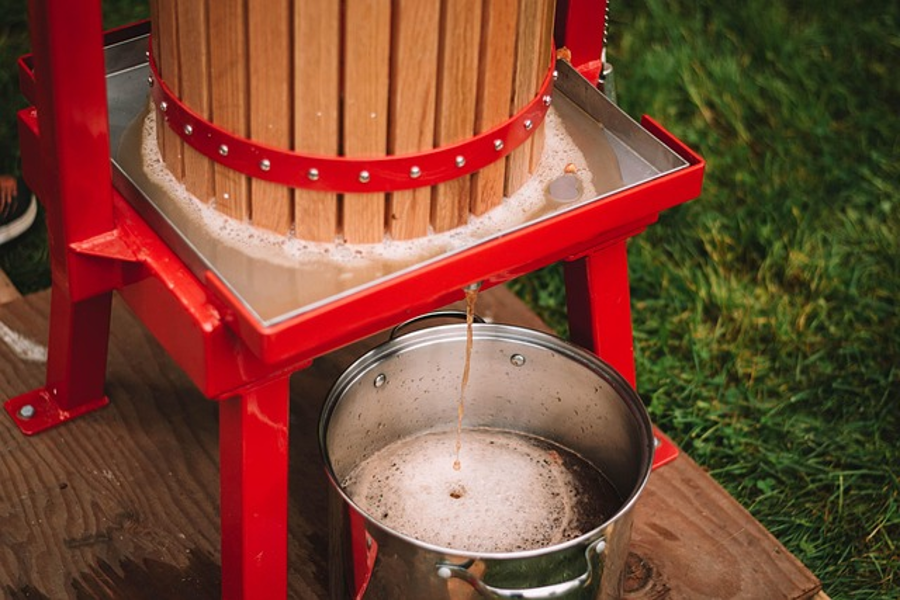
For primary fermentation, you need food-grade fermenters. Glass carboys or 3- to 5-liter gallon jugs are excellent for clarity and easy cleaning.
Plastic buckets are okay if unscratched and brew-labeled. Leave 5 to 7 cm of headspace. Vigorous cider throws a krausen hat. A narrow-neck jug with a blow-off tube reduces mess and the danger of a stuck airlock.
Secondary fermenter for racking when gravity is near terminal and CO2 slows. This settles yeast, hones flavor, and prepares the cider for bottling. Fit vessel size to batch volume. A 3 L test batch is good for early experimentation. A 19 L carboy suits scaled production.
Minimize headspace when conditioning to reduce oxidation.
Critical Tools
To ensure a successful cider production, set up a clear transfer chain: a wide-mouth funnel for juice input, an auto-siphon for racking, and a bottling wand for smooth fills.
Test gravity with a hydrometer in a test jar from start to finish, as it tracks sugar consumption and approximates ABV, indicating when fermentation is complete.
For those interested in making a homemade sparkling apple cider, a refractometer is quick for pre-fermentation checks and accurate for alcohol once active.
Cap your cider with a bench or wing capper, or swing-tops, to maintain a crisp fermentation process.
Additionally, measure nutrients, acid tweaks, and priming with a 1 g scale and spoons. Maintaining a temperature of 102°F/39°C and holding at 70°F/21°C is vital for good cider.
Keeping a gallon of water frozen next to the fermenter can help buffer temperature spikes, which is especially important for achieving a rich apple flavor in your final product.
For those keen on experimenting, incorporating different apple varieties can yield complex ciders. This includes using natural yeasts and aiming for the fermentation temperature that best supports the desired apple character.
Remember, good luck with your cider-making journey, and don’t hesitate to explore various apple cider recipes to find your perfect blend!

- Convenient Package Includes: each package includes 4 pieces of glass wine bottles, easy is about 11.4 x 5.4 inches/ 29 x 13.8 cm, easy to store your bulk items or keep your spice cupboard organized; You can use them all in your kitchen or even share them with friends or family; These jars are also easy to clean, so you can reuse them again and again without worrying about wear and tear
- Durable and Safe Material: crafted from quality glass material, the amber bottles are sturdy, long lasting, and ensure the protection of your food and ingredients; These jars do not contain harmful materials, so you can store your food with confidence
- Stylish Amber Color with 2000 ml Capacity: the amber color of our amber glass bottle is not only stylish and visually appealing, but also serves a practical purpose of blocking harmful UV light that can harm your stored food and ingredients; Plus, with a 2000 ml capacity, you can store a wide range of food items without worrying about running out of space; This design is ideal for kitchen use, making it easy to store baking ingredients, spices, tea, coffee, and more
- Convenient Handle Design: the amber glass jars come with a handle design that makes them easy to carry and handle, suitable for travels, picnics, and outdoor activities, ensuring that the products remain safe and secure
- Versatile Application: whether you are a home cook or a professional baker, these amber glass jars with lids are suitable for daily use; They can be applied to store and preserve a range of food items and ingredients, such as homemade jams, sauces, pickles, pickled eggs, and more; Being able to preserve these foods allows you to enjoy them for a long time
Last update on 2026-11-01 / Affiliate links / Images from Amazon Product Advertising API
Sanitization Supplies
Grab a no-rinse sanitizer, such as Star San, for anything that touches cider. Stir per label, have a spray bottle on hand, and refresh after any break.
Sanitize prior to prep, pitching, racking, and bottling. Air is not clean. Re-sanitize any tools that drop to the floor.
Air-dry sanitized equipment in a clean tub or on a shelf. Cover with foil to keep dust away. Discard scratched plastics because micro-scratches harbor microbes that outlive sanitizer.
Sourdough starter can ferment cider. Just keep her healthy and clean. Record gravities daily until stable. Then prime with dextrose and bottle.
How to Ferment Apple Cider
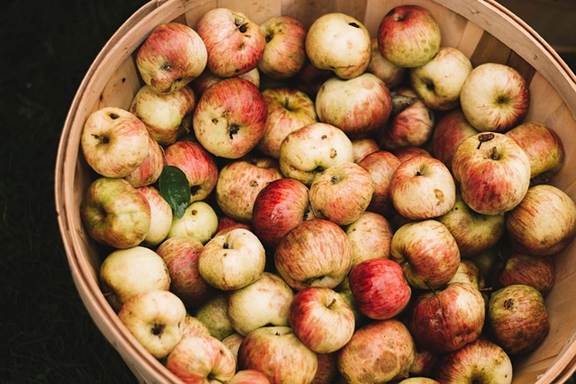
A clean process and consistent temperatures are essential for making reliable, enjoyable sparkling apple cider. Work in stages: prepare the juice, pitch natural yeasts, manage and monitor the fermentation, then rack.
Maintain fermentation around 18 to 21 degrees Celsius (60 to 70 degrees Fahrenheit), with 18 degrees Celsius (65 degrees Fahrenheit) ideal for balance.
Active fermentation typically lasts one to four weeks, with some batches taking a month or two. Record each step and ingredient for reproducible results.
1. Prepare Your Juice
Sanitize everything that touches juice: fermenter, siphon, airlock, and spoons. This one habit prevents wild microbes and off-flavors.
Press or purchase preservative-free juice. As a general guide, nine kilograms of apples will produce about 4.5 liters of juice, so size your batch accordingly.
Strain out skins and pulp for cleaner flavor and faster clearing. Others use a fine mesh bag or paper filters.
Add pectinase enzyme per label to break down pectin and help clarity. Let the juice warm to room temperature before adding yeast. Cold shocks cause sluggish starts.
Fix acidity if necessary. Cider aims at total acidity around 4.5. For higher ABV, add sugar. For example, 450 g of brown sugar per 3.8 L can lift gravity and add light caramel notes.
For a simple hard cider, use 3.8 liters of organic apple juice, 450 grams of brown sugar, 1 cinnamon stick, 3 whole cloves, 10 raisins, and half a pack of champagne or Côte des Blancs yeast.
2. Pitch The Yeast
Rehydrate dry yeast according to directions, normally 10 minutes in 35 to 40 degrees Celsius water, then temper with juice. Pour into the fermenter and shake or stir hard to aerate. Oxygen now assists yeast cell building.
Allow 20 to 25 percent headspace for krausen. Attach an airlock so carbon dioxide can bubble out but dust and fruit flies cannot get in.
3. Manage Fermentation
To create excellent cider, store your fermenter in a cool, dark space where the temperature is maintained between 18 and 21 degrees Celsius.
Warmer temperatures can quicken fermentation but may introduce harsh notes, while cooler conditions preserve the rich apple flavor.
Look for bubbles in the airlock and a foamy cap, common signs during fermentation.
A light sulfur smell might appear, but it usually dissipates as nutrients stabilize and carbon dioxide purges it.
When making homemade apple cider, don’t shift the fermenter after day one, as oxygen exposure increases the risk of oxidation.
If you’re using store-bought juice, which often lacks nutrients, consider adding yeast nutrient at the pitch and again at high krausen to support fermentation.
This will help achieve a stable cider with a crisp fermentation that highlights the apple character you desire.
For those who enjoy crafting a sparkling apple cider recipe, following these instructions is crucial. The process not only ensures a delicious cider but also enhances the overall fermentation experience.
By paying attention to these details, you can create a carbonated cider that showcases the apple flavor beautifully.
4. Monitor The Progress
Employ a hydrometer. Note down the original gravity, then daily or weekly readings. When gravity holds firm near the goal final gravity, it is finished. Bubbling decelerates as sugar falls.
Stillness combined with consistent gravity is an even better indicator. Taste small samples to determine dryness and fruit balance.
Most ciders finish in two to four weeks, though some thrive with a longer, cooler finish.
5. Rack Your Cider
Siphon off the lees into a clean secondary. Submerge the hose tip below the surface to minimize oxygen. Rack again after 1 to 2 weeks for super-bright cider.
Dump the lees; old yeast can impart rubber or autolysis notes. When bottling, leave 5 cm (2 in) headspace and top off to reduce oxygen. Age cool. If priming, watch carbonation closely.
The Art of Flavor
Flavor compounds develop from decisions you take prior to, during, and post-fermentation. Temperature control establishes the foundational profile. Aging influences texture and scent.
Post-fermentation steps perfect sweetness, sparkle, and polish.
Use pre-fermentation clarification (débourbage) with pectic enzyme for 12 to 48 hours to drop haze-forming pectins and let delicate apple notes shine.
Some producers rely on native yeast from the fruit. Low doses of sulfite can keep bacteria at bay while allowing wild strains to prevail.
Cider apples such as Kingston Black or Medaille d’Or provide tannin and depth that dessert apples do not.
Temperature’s Role
Try 15 to 22 degrees Celsius (60 to 72 degrees Fahrenheit). This window promotes consistent yeast development and pure ester production, resulting in sharp structure with apple-forward scents.
Below 15 degrees Celsius, fermentation drags, which can accentuate apple and diminish fusels, but you’ll risk a stuck finish if you don’t provide nutrients.
Pushing above 22C accelerates the ferment. It can increase fusel alcohols and solvent-like aromas. Natural yeast may be more temperamental than cultured strains, so consistency counts.
Use a temperature-controlled setup: insulated chamber, fridge with an external controller, or a heat belt with a probe taped to the fermenter. Trace internal must temperature, not just the room.
Record pitch temperature, ambient fluctuations, and the yeast origin. Little adjustments, like a 1-2°C dip near peak activity, can preserve aromatics.
Aging’s Impact
Age in cool darkness to round sharp edges and intertwine flavors in your sparkling apple cider recipe. Weeks can mellow a light, low-tannin cider, while months befit tannic blends or those made with hard apple cider.
Winter-slow ferments typically balance by spring or early summer, a cadence many old-school makers still rely on.
For optimal results, bulk-age for integration and easier oxygen management, or bottle-condition for native sparkle and tauter aromatics. Taste on a timetable, bi-weekly or tri-weekly, and record acid bite, tannin grip, and aroma lift.
Pull the plug when the profile matches your goal to ensure a good cider experience.
Avoid extended aging with significant temperature fluctuations, as unsteadiness can compromise the bubbles and encourage rot, particularly in low-sulfur wild-ferment batches.
A stable cider is essential for achieving that desired crisp fermentation.
Post-Fermentation
Select still or sparkling early. For sparkling, prime in the bottle for a soft mousse, or force-carb in a keg for precision and speed.
For sweetness, backsweeten with non-fermentables like xylitol or stevia, or stabilize with sulfites or sorbate, then add sugar.
A small tannin addition of approximately 1/8 teaspoon per 10 liters can tighten a flabby finish, particularly if dessert apples predominate.
Fine or filter if clarity is important; leave it hazy for a rustic style. Oak chips contribute vanilla and spice: light toast for lift, medium for caramel.
Short soaks lasting three to ten days at one to three grams per liter decrease danger.
Note fruit infusions by mass and contact time; whole berries and purée extract differently. Take close notes. Modify one factor per batch to craft your own signature recipe.

- 5x 9g treats 23L / 5 Gallons
- Suitable for brewing all types of cider including fruit & perry.
- Consistent, top quality results with each brew.
- Temperature Range: 54-82F (12-28C)
- Superior shelf stability and ease of use.
Last update on 2026-11-01 / Affiliate links / Images from Amazon Product Advertising API
Common Fermentation Pitfalls
Quick checks and quick fixes can save a batch and hone your skills.
Use this list as a field guide:
- Problem: sulfur stink, vinegar, medicinal notes. Solution: improve yeast health, control oxygen, sanitize rigorously.
- Problem: Stalled or stopped fermentation. Solution: Warm to 15-20 degrees Celsius, add nutrients, and repitch healthy yeast.
- Problem: Contamination (pellicle, mold, sour or cheesy odor). Solution: Discard, deep clean, sanitize, reset.
- Problem: Harsh acid or bitter edge. Solution: Blend with low-acid cider, adjust tannin and acid balance.
- Problem: Oxidation. Solution: Seal tanks, purge headspace with CO2, limit splashing.
- Problem: Mousiness. Solution: Discard batch and review sanitation and oxygen control.
- Problem: Over-sweet finish. Solution: reassess back-sweetening, stabilize, and ensure full dryness first.
Take gravity logs, temperature curves, pH, yeast strain, nutrient additions, and tasting notes. Patterns reveal root causes more quickly than speculation.
Off-Flavors
Hydrogen sulfide or wider volatile sulfur compounds (SO2, methanethiol, dimethyl disulfide) indicate yeast stress during cider production.
This stress may result from elevated fermentation temperature, low yeast assimilable nitrogen, or using wild yeast.
A light SO2 edge can be normal; however, rotten-egg or burnt-match aromas are not acceptable for good cider.
Prevention begins with clean equipment, as sanitation is crucial to stop bacteria that create undesirable odors. To avoid common fermentation mistakes, use fresh, trusted yeast and nutrients appropriate to your juice analysis.
For the best results in crafting a homemade apple cider recipe, maintain a temperature between 15 and 20 degrees Celsius during primary fermentation.
Once initial growth is complete, restrict oxygen exposure because oxidation can mute the apple character and promote sherry-like aromas.
If acid bites or tannin scrapes occur, combine with a gentler batch or correct with dosed malic or citric acid and tannin. Heavy back-sweetening on low-structure juice can result in a flabby taste.
Age short-term to allow sulfides to reduce. If reduction continues, copper fining at legal minimum doses can assist. Toss when faults linger or mousiness surfaces because you can’t fix mousiness.
Stuck Fermentation
A genuine stall exhibits steady gravity over 48 to 72 hours and minimal or no airlock activity. Appearance is deceptive. Believe the hydrometer or densitometer.
Rescue by warming to the yeast’s active range, oxygenating very lightly only at restart, dosing balanced nutrients, then pitching a robust starter.
Watch for sorbate or sulfite in store-bought juice. Too much preservative will kill yeast!
Normal-gravity ciders hardly ever stop prematurely. More often, sweetness targets or weak acid/tannin structure camouflage dryness.
Sieve for lack of sugar. Under-ripe blends can end up bone-dry but tasting thin.
Don’t over-pitch, because then you’ll burn through nutrients rapidly and crash.
Contamination Signs
Pellicles, mold islands, or oily films indicate bacteria or wild yeast. Sour, rotten, cheesy, or “mousy” aromas are proof. Mousiness is a sweet, musty aftertaste. Once you have it, dump it.
Chill below 10 °C (50°F) and reduce pH with malic acid to slow spoilage during triage. Don’t anticipate a cure. Close tanks, reduce oxygen, and disinfect all areas.
Full cleanup breaks the cycle: alkaline wash, rinse, acid rinse, then no-rinse sanitizer. Swap out scratched plastics and worn gaskets.
Beyond The Basic Recipe
This is where we move beyond the starter kit and into decisions that influence form, flavor, and mouthfeel of homemade apple cider.
It sets up when to pilot with numbers, when to believe the apples, and how to log tweaks to replicate good cider and adjust misses.
Wild Fermentation
Forget commercial yeast and inoculate zilch. Depending on native yeasts on skins, press gear, and the cellar air. Plan for a gradual start and long tail. The first air can go for weeks, then the haze for months.
Regular cider-range juices run about 8 to 13 Brix, which equals 4 to 7 percent ABV if fermented dry. Flavors range from orchard-fresh to barnyard.
You might taste notes of apple peel, hay, clove, and tart stone fruit.
That rustic profile pairs well with traditional styles, particularly if the blend benefits from tannic support from sharp or bittersweet apples.
Some throw in a pinch of tannin when dessert fruit rules. Others leave it out if the apples already deliver structure. Record gravity, pH, and smell every day in the beginning. Look for sulfur spikes, film yeast or stalled gravity.
If you want to hedge your bets, use Campden first to suppress spoilage bacteria, wait at least 24 hours, and keep temps cool to hold wild yeast off.
Rack to a glass carboy with an airlock after 1 to 2 weeks, once the cap falls, and let it be. Aging for up to a year can round edges.
Adding Nutrients
Apple juice can be deficient in yeast-assimilable nitrogen.
Balanced nutrients, such as DAP and organic amino sources, promote clean, complete fermentations, reduce sulfurs, and tighten timelines.
Stagger little additions. One at inoculation and one at 30 to 50 percent sugar depletion often keep yeast from going sluggish.
Over-supplement and you can drive fusels, solvent notes, or foamy blowoff. Keep temperatures steady to avoid stress, and choose your yeast intentionally: cider-specific strains are apple-philic and preserve fruit.
Ale yeast can add soft esters. Wine yeast tends to be drier and lean.
| Stage | Nutrient (g per 10 L) | Signal to Add | Notes |
| Start | 2–3 | After 24 h post-Campden, at pitch | Supports growth phase |
| Mid (50% sugar) | 1–2 | Gravity down ~ half of start Brix | Limits sulfur, stuck ferments |
| Avoid | >5 total | N/A | Risk off-flavors, excess foam |
Carbonation Methods
| Method | How It Works | Pros | Watch Outs |
| Bottle priming | Add 5–8 g/L sugar at bottling | Classic sparkle, low cost | Calculate CO2 by temp/gravity to avoid bombs |
| Keg force-carb | Chill, set 0.7–1.0 bar, shake or rest | Precise control, fast | Needs keg gear, watch overcarb |
| Pet-nat (bottle at 1 to 2 Brix) | Catch last sugars | Delicate mousse, rustic. Variable CO2, want strong bottles.
Utilize pressure-rated glass. Cap and warm-condition for 7 to 14 days, then chill to lock in CO2. Cellar or fridge storage keeps fizz stable and flavors tight.
Our Conclusion
To summarize, cider sings with fresh apples, sanitized equipment, and consistent temperatures. Fresh juice, a tight lid, and reasonable sugar content do the job.
Yeast selection establishes speed and flavor. Airlock bubbles characterize a good, healthy run. A hydrometer provides cold, hard information, not finger-in-the-air speculation.
For crisp cider, halt at 1.005 to 1.010. For dry cider, allow it to hit 1.000 or a bit lower. Cool to clear haze. Rack to trim astringent notes.
Mature to smooth the corners.
Need a bright lift? Sprinkle in some acid blend. Craving soft pear and honey notes? Use a low-temp ale yeast. Want sparkle? Prime six grams of sugar per liter, then cap in a strong glass.
Mess me up with questions or a batch to share! Leave a comment and join the conversation.

- Includes 1 gallon wide mouth glass jar with grommetted lid and three piece econolock airlock – Great for beer and wine fermentation.
- Comes with 1 lb. jar of North Mountain Supply food grade bentonite clay to help clarify and reduce oxidation in wines.
- Bentonite clay packaged in plastic jar with tamper evident air tight seal to ensure freshness.
- Glass jar features convenient wide mouth for easy cleaning and filling.
- Bundle includes supplies for starting beer or wine fermentation.

Last update on 2026-11-01 / Affiliate links / Images from Amazon Product Advertising API
Frequently Asked Questions
What apples are best for fermenting cider?
Use a mix of sweet, tart, and bitter apples to make good cider. Balancing these flavors is key; typical blends mix dessert apples with some tannic or sharp varieties to enhance the rich apple flavor and support dependable fermentation.
Do I need to pasteurize or Campden my juice first?
It depends on your objective. For clean results, dose with potassium metabisulfite (Campden), then pitch cultured yeast. If you’re looking for a more adventurous option, consider using natural yeasts for a hard apple cider that showcases rich apple flavor; however, wild ferments are less predictable and carry a higher risk of off-flavors.
Which yeast should I use for apple cider?
Opt for wine or cider strains with clean profiles, such as Lalvin EC-1118 or QA23, for your homemade apple cider recipe. They ferment consistently, add fragrance, and help you achieve that rich apple flavor essential for good cider.
What temperature should I ferment at?
Target 12 to 18 degrees Celsius for your hard apple cider recipe. Cooler ferments preserve delicate aromas and minimize fusels, while stable temperatures help avoid harsh flavors and sneaky by-products.
How long does fermentation take?
Primary fermentation of hard apple cider lasts 7 to 21 days, influenced by the yeast, temperature, and sugar levels. Allow gravity readings to settle for 3 days before proceeding with the cider production process. Conditioning and clearing can take 2 to 6 weeks.
How do I avoid common off-flavors?
SANITIZE EVERYTHING! To ensure a good cider, aerate only before pitching yeast and control the fermentation temperature. Use nutrients to avoid sulfur odors, and rack off sediment promptly to maintain the apple character.
How can I safely carbonate my cider?
For bottles of hard apple cider, add the exact priming sugar according to volume and temperature to achieve a good cider. Use pressure-rated bottles and check caps. Let it rest at 18 to 20 degrees Celsius for 1 to 2 weeks, then refrFor you want total control anduse, go with a keg and regulator.


One Comment