
Troubleshooting Fermentation Problems: Quick Fixes and Expert Solutions
Our Observations
- Good fermentation reveals itself through your senses, so tune in to transparent or well-distributed brine, fragrant, sour fermentation aromas, and delicious sour flavor, not just time or recipes. Sight, smell, and taste combine to reassure you that your ferment is safe and on track.
- As we’ll see, most fermentation issues can be boiled down to a few core variables: temperature, salt, oxygen, and contamination. Manage these with thermometers, brine calculators, airlocks or sealed lids, and consistent sanitizing of all utensils and vessels.
- Visual, aromatic, textural, activity, and taste clues help you troubleshoot what went wrong and where to take action. Develop and utilize a basic checklist for every batch to identify early indicators such as mold, unpleasant odor, mushiness, or halted fermentation.
- Corrective actions are most effective when they’re directed at the real issue rather than done in the dark. When fermentation goes awry, try adjusting temperature, salt, or time. Add starter or active brine, skim rot, or decant to clean jars to salvage borderline batches.
- The vessel and materials you select directly impact safety and flavor stability. Favor non-reactive, food-safe materials such as glass, ceramic, and stainless steel. Always check, clean, and sanitize before each new ferment.
- Over time, close observation and journaling cultivate a fermentation ‘sixth sense’ in you. Keep easy-to-maintain records of conditions, ingredients, and results so you can hone recipes, build confidence, and debug faster with every batch.

- 𝗨𝗡𝗜𝗩𝗘𝗥𝗦𝗔𝗟 𝗪𝗜𝗗𝗘-𝗠𝗢𝗨𝗧𝗛 𝗙𝗜𝗧 – Includes 3 stainless steel venting lids and 3 fermentation weights, designed to fit wide-mouth mason jars (jars not included). The Ultimate Fermentation Kit fits 4 oz, 8 oz, 16 oz, 32 oz, and 64 oz jars with a standard 3.375-inch wide-mouth opening. Dishwasher-safe and made with 100% BPA-free materials, this fermentation kit is designed for beginners and experienced home fermenters.
- 𝗠𝗔𝗞𝗘 𝗚𝗨𝗧 𝗛𝗘𝗔𝗟𝗧𝗛𝗬 𝗣𝗥𝗢𝗕𝗜𝗢𝗧𝗜𝗖 𝗦𝗨𝗣𝗘𝗥𝗙𝗢𝗢𝗗𝗦 – Fermenting veggies loads them with gut-friendly probiotics to support the health of you and your family. Fermented foods are a great way to get live, active probiotics into your gut. Get the Ultimate Fermentation Kit today to start making fermented superfoods. Click Add to Cart now!
- 𝗘𝗔𝗦𝗬 𝗙𝗘𝗥𝗠𝗘𝗡𝗧𝗔𝗧𝗜𝗢𝗡 𝗪𝗜𝗧𝗛 𝗡𝗢 𝗛𝗔𝗦𝗦𝗟𝗘 & 𝗡𝗢 𝗠𝗘𝗦𝗦 – The one-way airlock vents make safe, delicious ferments without needing to burp the jars. The mess free design of The Ultimate Fermentation Kit works great from day 1 all the way to day 30+. Simple and maintenance-free fermentation. It’s perfect for sauerkraut, kimchi, pickles, and more. Try it today!
- 𝗗𝗢𝗡’𝗧 𝗦𝗣𝗢𝗜𝗟 𝗕𝗔𝗧𝗖𝗛𝗘𝗦, 𝗗𝗢𝗡’𝗧 𝗟𝗘𝗧 𝗩𝗘𝗚𝗚𝗜𝗘𝗦 𝗙𝗟𝗢𝗔𝗧 – Floating vegetables are the #1 cause of mushy, moldy, wasted ferments. Our stainless steel fermenting springs push down veggies with consistent pressure and re-adjust their position as cabbage moves during the fermentation. Keep your ferments safe and delicious with the Ultimate Fermentation Kit. Get the Ultimate Fermentation Kit Today.
- 𝗙𝗥𝗘𝗘 𝗙𝗘𝗥𝗠𝗘𝗡𝗧𝗔𝗧𝗜𝗢𝗡 𝗚𝗨𝗜𝗗𝗘 & 𝗨𝗟𝗧𝗜𝗠𝗔𝗧𝗘 𝗟𝗜𝗙𝗘𝗧𝗜𝗠𝗘 𝗪𝗔𝗥𝗥𝗔𝗡𝗧𝗬 – The Ultimate Fermentation Kit comes with beginner recipes for kraut, kimchi, and pickles, and how to tell healthy ferments from batches to toss. We offer our Ultimate Lifetime Warranty and Money-Back Guarantee. If you are not satisfied for any reason or want to replace any broken part, just message our customer support team, and we will help you. Try the Ultimate Fermentation Kit risk-free today.
Last update on 2026-10-01 / Affiliate links / Images from Amazon Product Advertising API
Troubleshooting fermentation problems involves identifying what went wrong in the brew and rectifying it in a transparent, methodical manner.
Stuck fermentation, off-flavors, strange aromas, sluggish yeast, and haze are all common problems.
Factors such as temperature control, sanitation, oxygen, pitch rate, and nutrient balance are typically central to the process.
To make it practical, the following sections step through checks and easy fixes for each kind of problem.
Understanding Healthy Fermentation
Healthy fermentation occurs when the right microbes colonize your food, thrive in a controlled manner, and safely transform flavor, texture, and aroma for the better. Lactic acid bacteria and good yeasts consume sugars, lower the pH, and produce organic acids and gases.
Salt, cool to moderate temperature (typically 18–22 °C), and limited oxygen cooperate to promote these beneficial microbes and repel spoilage organisms.
Even with good control, fermentation remains a bit of trial and error. Busted batches happen to fermenters who’ve been at it for years, so looking, smelling, and tasting count more than chasing the ideal.
The Sights
For fermented vegetables, seek a color that remains vibrant or changes naturally, not a gray or brown murk. Most vegetables will change color and texture as they ferment, which is a normal part of the fermentation process. Cabbage will turn duller but even.
Carrots will soften but look clear and firm in the brine. The brine must appear clear, not stringy or fuzzy.
Bubbling is one of the most obvious indicators of live microbes at work. You could observe little CO₂ bubbles on cabbage shreds, a lazy “fizz” ascending kimchi, and light frothing over sauerkraut.
This foam is harmless and typically subsides after several days when activity wanes, particularly after the jar cools and the microbes deplete the sugars.
You don’t want fuzzy, raised, or colorful spots on top. Mold is blue, green, black, or pink in appearance and often grows in spots that rest above the brine.
Kahm yeast is more of a flat, dull white film or wrinkled skin that develops on top. Kahm isn’t harmful, but it can impart strange, soapy tastes.
You can skim it off, but it usually signals you need better salt, cooler temperature, or a tighter anaerobic setup next time. Everything should be under the brine.
Use weights, packed leaves, or a small glass to keep vegetables submerged and always leave at least 2 to 5 centimeters of headspace so gas can accumulate without pushing brine out.
If you’re using airlock-free jars, open them once a day early on to release pressure and reduce leaks or blown lids.
The Smells
Healthy lactic ferments smell tangy, clean, and a bit sharp, like mild vinegar, yogurt, or sliced green apple. Kimchi might add garlic and chili, but beneath that, the fundamental fragrance remains crisp and sour, not saccharine and decayed.
If you notice overwhelming sulfur, rotten eggs, or a thick “garbage” note that lingers well beyond 24 hours at room temperature, that denotes off microbes.
Overheating, too low salt, or veggies poking out of the brine all increase these smells and usually indicate the batch is not salvageable.
A good test is whether it smells like the ingredients list. You should smell the base food, along with a clean, lightly sour aroma. If you receive a dense, disgusting stench that causes you to recoil immediately, consider that a warning sign and don’t attempt to “correct” it with more time.
The Tastes
Taste is the final check: a good ferment has clear acidity, enough salt to feel firm and safe, and a layered flavor that keeps changing as you chew.
Sauerkraut is crisp, sour, and a little salty. A cucumber pickle still has snap and is not mushy, with a fresh lactic tang instead of straight brine.
In fermented dairy or meats, there is a soft savory richness. Yogurt, kefir, or salami develops more body and “roundness” as amino acids and peptides accumulate. These notes should seem blended, not astringent or tinny.
Bitterness, burning acidity, or one-note sharpness often means stress: maybe too warm, too long, or a wild yeast problem. Some slow yeast strains require additional days or weeks to complete, so if the taste remains sweet but fresh, time at the proper temperature may fix it.
If it is astringent or chemical in nature, it generally will not.
There is no right or wrong final taste. Match it to the style you were going for and your own comfort. If it’s refreshing, balanced, and you’d eat more, that’s a hallmark of healthy fermentation.
Diagnosing Fermentation Problems
Diagnosis starts with a simple checklist: what you see, smell, feel, and taste, plus how active the ferment looks over time.
Judge each batch against a vivid image of what “normal” tastes like for that particular food or beverage at that particular stage.
Most fermentation problems fall into two groups: the rate is wrong (too fast, too slow, or stuck), or the character is off (bad color, smell, flavor, or texture).
Note each clue in a log: date, temperature, salt or sugar level, starter amount, visible activity, and any odd signs. That record makes it simpler to trace issues back to the environment, ingredient quality, or technique.
1. Visual Cues
Visual inspections are essential for identifying a significant number of trouble spots in advance during the fermentation process. Cloudy brine, weird discoloration, or unexpected floating bits can indicate rogue microbes or insufficient washing or salt.
Not having brine in the first 4 days is crucial to report, as it could imply you packed too loosely, didn’t press hard enough, or your vegetables didn’t release enough water.
You might also observe the brine fall, which could be due to vegetables reabsorbing liquid, CO₂ pressure pushing brine out of the fermentation jar, or slow evaporation if the seal’s weak.
White deposits at the bottom of your fermentation jar are usually normal and consist mostly of yeast and small leftovers from the fermentation of vegetables, not mold. However, dry, fuzzy, or colored spots (green, black, or bright orange) probably indicate mold and a batch that has gone bad.
A thin white film can be wild yeast, which is not always bad but does indicate that some oxygen has entered the container.
When dealing with dairy or sauces, look for translucent layers, oil caps, or firm curds atop separated liquid. Light separation may be normal, but distinct layering, coupled with an unusual odor or appearance, indicates instability or spoilage.
Understanding these signs is vital for successful vegetable fermentation.
By keeping an eye on these factors, you can ensure that your fermentation works effectively and that the flavors of your fermented vegetables remain vibrant and appealing.
Always remember to maintain a proper fermentation temperature and avoid common problems to achieve the best results in your recipes.
2. Aromatic Clues
Smell is like a bad early warning alarm. In those first 48 hours, these microbes establish themselves, consume oxygen, and begin cell division.
Aromas move rapidly as they detoxify substances such as juice SO₂ in wine or cider.
A slight vinegary tinge at the tail of a complete ferment can seem natural. Strong, sharp, or solvent-like odors generally indicate spoilage. To maintain objectivity, contrast new batches against a few known good ones.
Write short notes: “clean sour,” “yeasty,” “sulfur,” “barnyard,” or “rotten.” If foul, chemical, or rotten-egg notes intensify over a day or two, it’s time to stop, chill, and reconsider your timing, temperature, and hygiene.
3. Textural Clues
Texture is where the fermentation process, including brine, salt, and temperature errors, usually reveals itself. Slimy or mushy vegetables could indicate low salt, excessive exposure to oxygen, or overly warm conditions during vegetable fermentation.
However, firm, crisp chunks suggest that the lactic acid bacteria were properly nurtured and that brine levels remained consistent.
For meats and cheeses, you want a consistent but tempered softening. A slice that is strangely rubbery, crumbly, or pasty can indicate uneven protein breakdown or incorrect pH levels. In dairy, gritty or chalky curds typically indicate incomplete fermentation or an imbalanced mineral profile, which can affect the overall flavor of your dishes.
Any mouthfeel that seems wrong compared to trusted products, such as slick, sandy, or powdery textures, should be noted as an alert that the fermentation works strayed from optimal conditions.
4. Activity Clues
Activity over time indicates whether the rate is appropriate.
Within the initial 24 to 48 hours of a beverage ferment, yeast cells should be acclimatizing, dividing, and beginning to show observable CO₂ release, with roughly 1,000,000 viable cells per milliliter pitched.
Bubbles, foam, and a little bump up in brine or must level indicate this growth phase is in progress. If no gas by day 2, treat as a stuck ferment and examine temperature, nutrients, and inoculation rate.
Low or falling brine in vegetable jars during the early days suggests the system is not sealed or is not active enough. For beer or wine, monitor specific gravity. A flat line for a few days in mid-ferment indicates rate trouble, even if you still notice a little foam.
On microscopic inspection of an arrested yeast culture, lysed cells or cells packed with moving granules indicate a population on the decline, difficult to resuscitate, and requiring a fresh starter rather than mere stirring.
5. Taste Clues
Taste is the ultimate judge. Off-bitterness, metallic hints, or harsh, overpowering acidity indicate that either the microbes were stressed or other microbes captured the torch.
Bland, flat, or “unfinished” flavors can indicate the ferment stalled before sufficient acid or aroma compounds developed.
Keep reference points: a few store-bought ferments or your own best batches. Compare saltiness, sourness, and aroma intensity. Utilize mini-spoon or cup tastings over a few days to determine whether the profile is trending in a positive direction or moving into ‘off’ territory.
If you see obvious signs of spoilage in multiple senses, such as a foul smell, a funky color, a slimy texture, and an astringent taste, it’s better to toss it than take a chance.

- The sauerknaut pounder is made of European imported beech wood, .Made from a whole piece of beech wood. making it not easy to crack and split and non-toxic Have use it for lot of different food such as mashed potatoes, tomato’s, meet and more you named.
- The two ends of Sauerkaut Pounder are flat, with a maximum diameter of 5.8CM and a total length of 30CM. It is easy to hold and is very suitable for packaging Mason bottle vegetable fermentation.
- Made Sauerkraut in a wide mouth quart jar and it fits perfectly to squeeze the juices. Added bonus, turn it around to use in regular mouth jars too. Very pleased with the quality of this pounder.
- This sauerkraut pounder is sturdy, smooth, and fits perfectly in Mason jars and crocks. It feels great in the hand and really speeds up fermenting prep. When kitchen chaos hits, it’s also great for taking out your frustration on the cabbage — not the kids!
- Our kraut pounder has good quality and affordable price,Beech Wood smasher does not leave harmful substances in food. Easy to clean after use. The overall service life is over 3 years.
Last update on 2026-10-01 / Affiliate links / Images from Amazon Product Advertising API
Common Fermentation Culprits
Most failed ferments trace back to the same few variables: temperature, salt, oxygen, and contamination, as well as the quieter issues of yeast health and ingredient quality.
These bugs are at the center of your command center, whether you’re brewing beer, crafting kimchi, or culturing yogurt.
Common mistakes and typical effects include:
- Too warm results in sharp, solvent-like alcohols, mushy vegetables, and harsh acids.
- Too cold: stuck or very slow fermentation, underdeveloped flavor.
- Too little salt leads to a soft, mushy texture and increases the risk of spoilage.
- Too much salt: weak activity, flat sourness, dull aroma.
- Too much oxygen leads to mold growth, vinegar-like off-flavors, and color loss.
- Poor sanitation: pink slime, fuzzy growth, rotten or sulfur smells.
- Weak yeast nutrition can lead to sluggish or arrested fermentation, sulfur notes, and haze.
Temperature
Temperature plays a crucial role in the fermentation process, influencing both the rate and taste of the final product. Yeast and lactic acid bacteria thrive within specific comfort zones.
If the temperature exceeds these limits, it can stress the cells, leading to undesirable flavors or even killing the culture.
Conversely, if the temperature is too low, the growth rate diminishes, potentially stalling the batch, especially when fermenting vegetables.
| Ferment type | Typical range (°C) |
| Ale beer | 18–22 |
| Lager beer | 8–13 |
| White wine | 12–18 |
| Red wine | 20–28 |
| Sourdough starter | 22–28 |
| Kimchi/sauerkraut | 18–22 |
| Yogurt | 40–45 |
| Kombucha | 22–28 |
Another common problem, particularly in winemaking, is poor temperature control. Heating can accelerate yeast metabolism, but pushing them beyond their ethanol tolerance can result in off-flavors and stalling at 8-11 percent alcohol.
On the other hand, chilling slows down cellular activity, keeping cell counts stable but making them sluggish, even if their viability remains high.
To maintain optimal fermentation temperature, simple tools like a stick-on thermometer or a heating belt can help keep your fermentation jar within the desired range.
If your environment is warm, consider reducing the scheduled fermentation time. In cooler conditions, anticipate a more gradual completion and allow for additional days without increasing warmth.
Proper temperature management is essential for successful vegetable fermentation, ensuring the growth of beneficial bacteria while avoiding common failures.
By monitoring these conditions, you can achieve the desired flavors in your fermented dishes.
Salinity
So, salt controls which microbes win in vegetable ferments. It inhibits many spoilage organisms, but lactic acid bacteria still thrive within the proper window.
Under-salting cabbage or cucumbers can seem fine at first, but it gives leeway to harmful bacteria, causes texture to collapse, and you’re left with soft spots or cloudy, stinky brine.
Over-salting causes the reverse problem. You guard the batch but stifle the microbes you desire. Fermentation drags, the acid remains low, and the resulting pickles are overly salty and lack zest or nuance.
This crops up frequently when people ‘salt by hand’ or mix spoons between different salts.
You can approach salinity like a mini-engineering challenge. Use a scale and a simple table:
| Target % salt (w/w) | Water mass (g) | Salt mass (g) |
| 2% (mild) | 1 000 | 20 |
| 2.5% | 1 000 | 25 |
| 3% (typical) | 1,000 | 30 |
| 5% (firm veg) | 1,000 | 50 |
For 2.5% brine, you combine 1,000 grams of water with 25 grams of non-iodized salt. If your jar requires 500 grams of water, halve both figures. Weigh and note down the amounts, then use the same ratio next time.
Oxygen
Almost all foods, especially fermented vegetables, crave low oxygen. When dissolved oxygen levels dip, lactic acid bacteria and brewing yeast thrive, while many spoilage molds grow only at the air-surface line.
A loose lid on a fermentation jar or a floating cabbage leaf can morph one corner of the jar into a mold nursery, even while the remainder remains safe.
Generating anaerobic environments is easy when fermenting vegetables. Press the vegetables under brine and submerge them with a weight. Use a water-sealed crock or a jar with an airlock so that gas can escape, but air can’t get back in.
For beer or wine, ensure that bung, lids, and gaskets all fit well and that plastic buckets don’t have cracked seams.
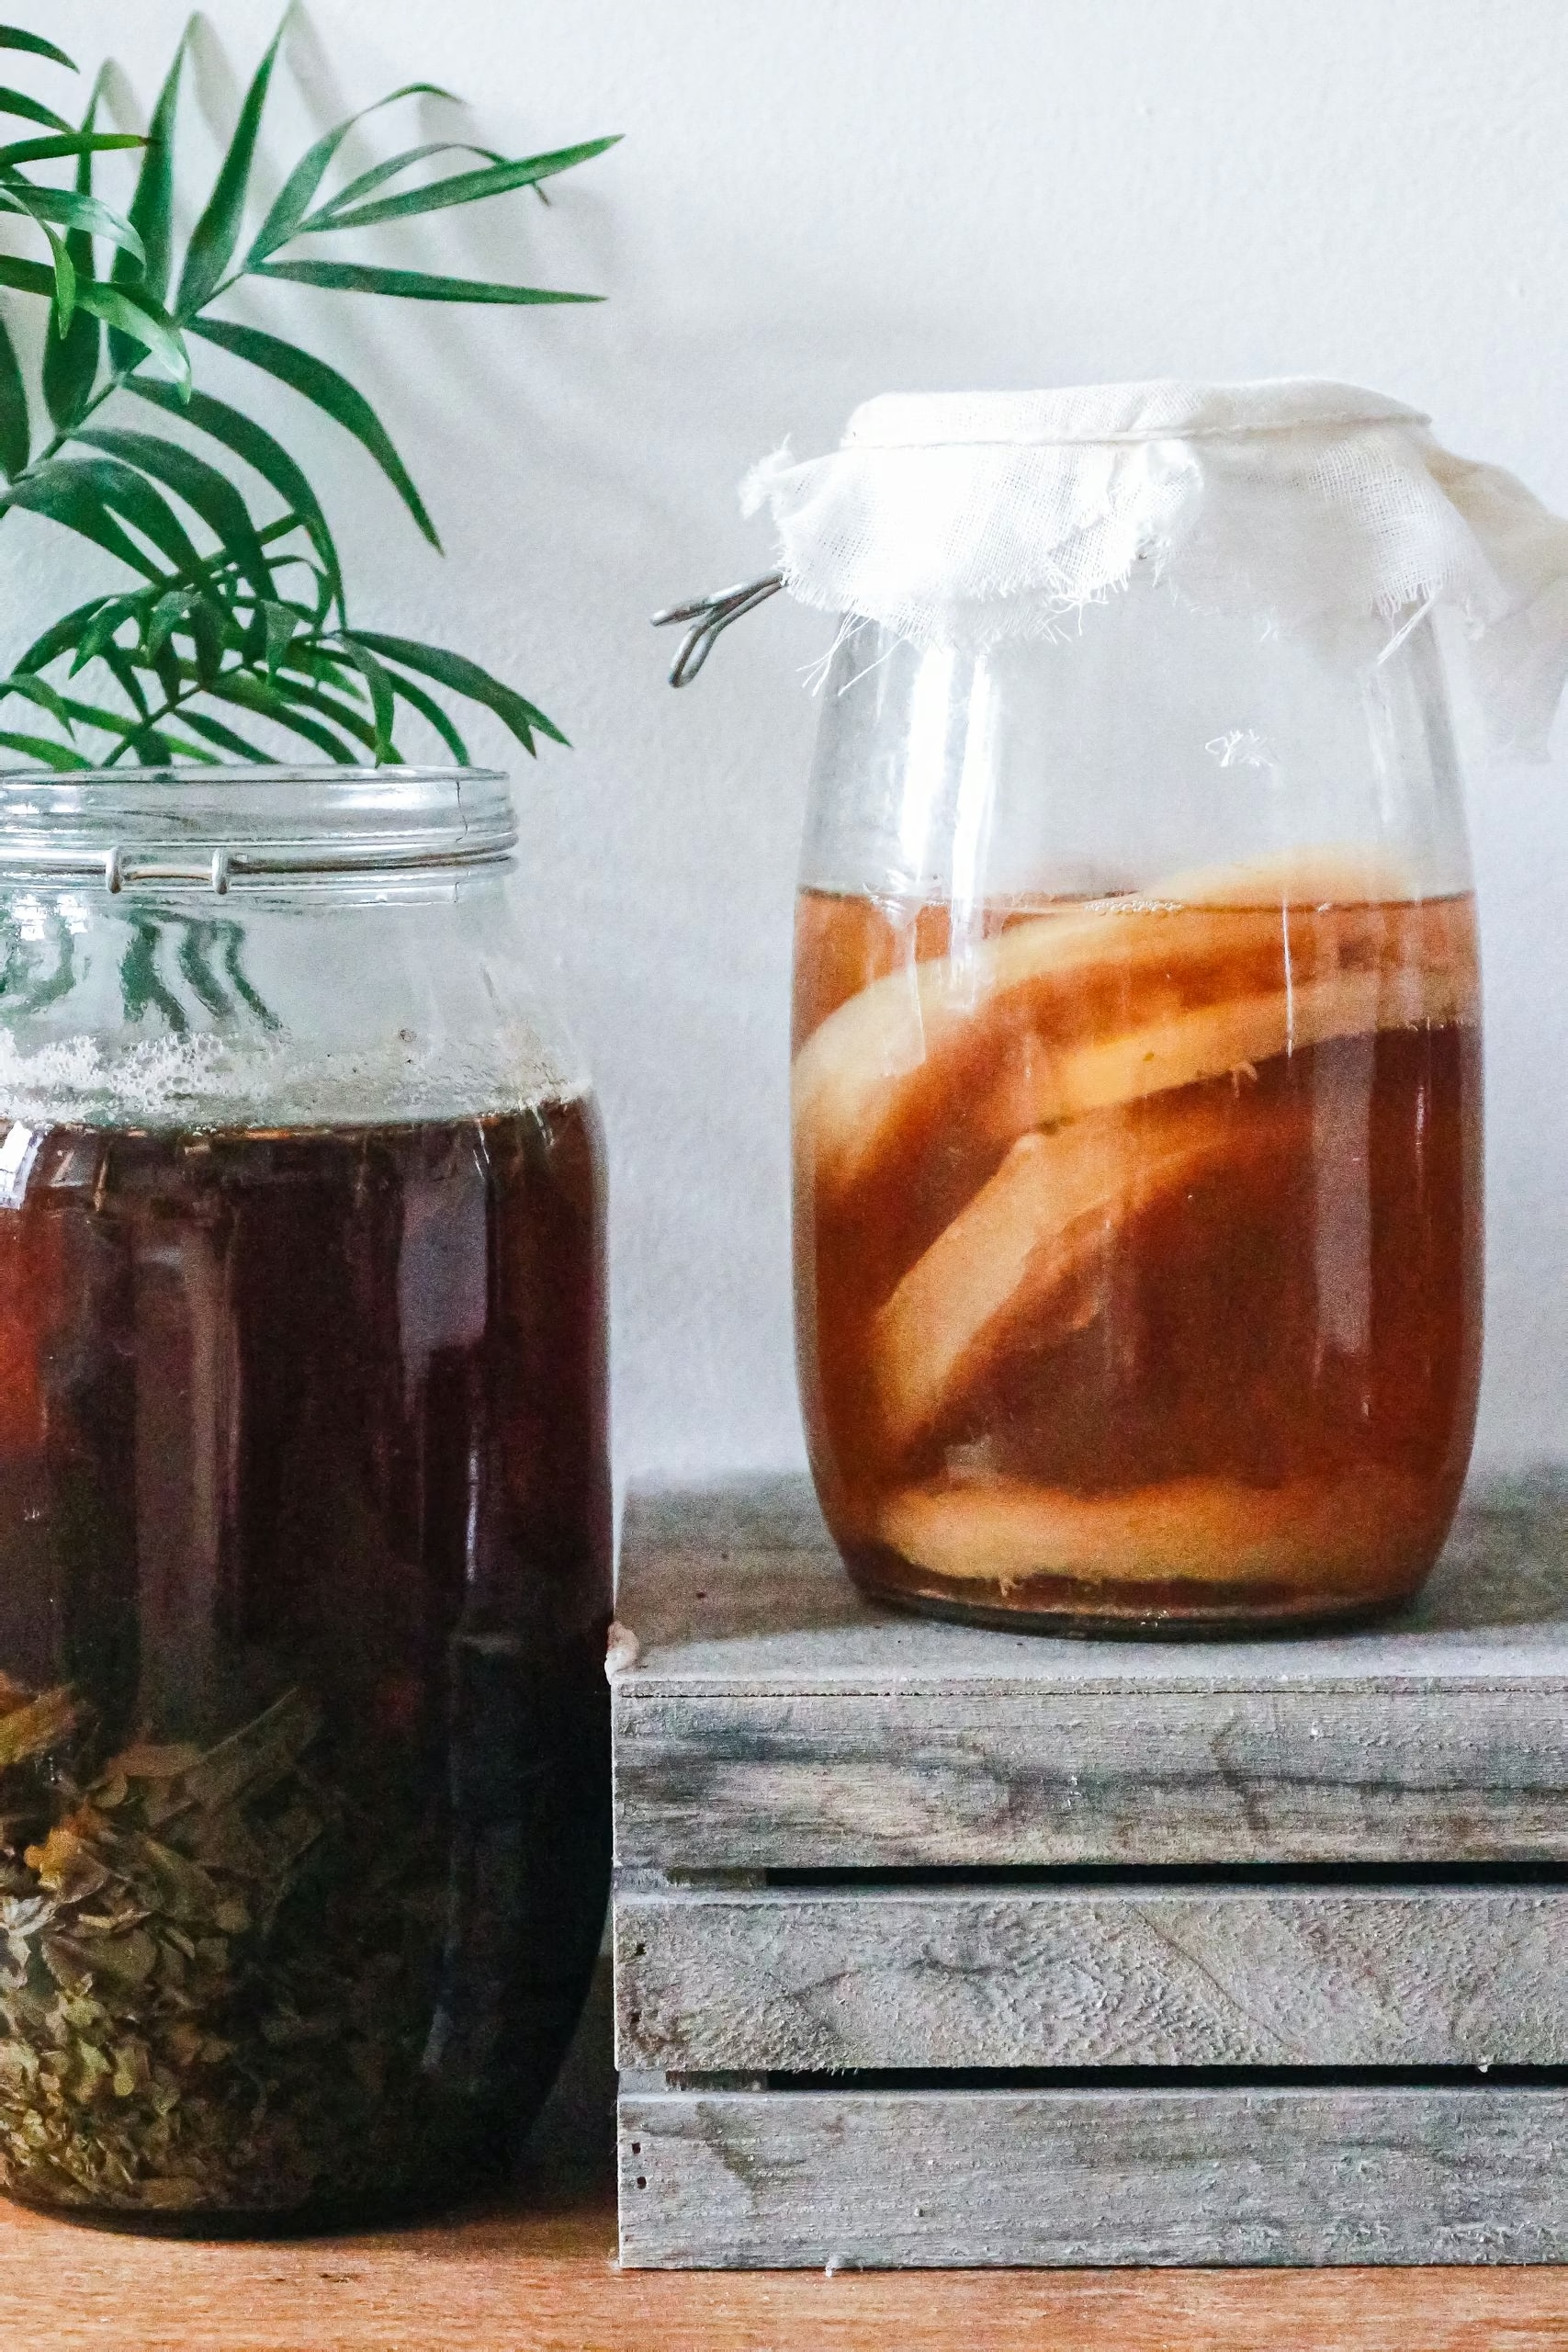
Certain ferments require controlled oxygen. Vinegar needs oxygen for acetic acid bacteria to convert ethanol into acetic acid. Kombucha consumes oxygen at the surface, where the SCOBY develops. In those instances, employ cloth covers or breathable lids, but still protect from dust and insects.
If you’re coming across persistent surface growth, first rule out leaks or warped lids. Then see if your liquid level is too low and exposing solids. Fix the hardware before blaming the microbes.
Contamination
Contamination signifies any of those naughty microbes crashing the party. That can come from dirty jars, old gaskets, unwashed hands, or subpar produce.
In mixed vegetable ferments, this frequently manifests as fuzzy mold, pink or orange streaks, or an overpowering rotten or fishy smell.
In alcoholic ferments, you might find vinegar scents, pungent sulfur, or a wispy, oily bloom. Good sanitation decreases the initial hazard. Rinse and, if you can, just boil or steam jars and utensils. Use fragrance-free cleansers and rinse well. Clean hands prior to scooping cultures or chilled wort.
With yeast-driven ferments, monitor inoculum levels: if you pitch at 10^8 cells per milliliter and don’t provide enough nutrients, the ferment can become sluggish and leave room for wild microbes to take over. Yeast nutrition ties in here.
Nutrient deficiencies, such as the absence of complex yeast nutrients or specific vitamins, can persist for dozens or even hundreds of generations in a lab and may not manifest until as many as 40 generations later, even when a needed vitamin is present.
In actual brewing, that can translate into a batch that begins robust, then stales, with stressed cells at maximum ethanol, haze, or sulfur tones.
A light sprinkle of complex yeast nutrient, introduced early, can help support healthy growth, so cell numbers between 10 and 100 million cells per milliliter indicate high viability and robust activity.
Even after your ferments are complete, they still require some attention!
Keep them in clean, sealed containers, under brine or syrup, and chill as necessary.
If you see mold, pink slime, or something just plain stinky, don’t scrape and save; ditch the batch and re-evaluate your method.
Corrective Actions and Fixes
Act early when a ferment veers off course. Small problems grow quickly once microbes get the upper hand.
The objective is to interpret symptoms, attribute them to one probable root cause, and then implement the most targeted fix possible.
Determine what to do by sight, smell, taste, and basic measurements such as temperature, pH, °Brix, and salt. Record every modification. Those notes are your troubleshooting playbook.
Reviving Stalls
- Diagnose the stall before you touch a thing. Compare temperature to the yeast or bacteria’s preference, test °Brix or sugar to still be high, and smell for solvent, rotten, sulfur notes. Under the microscope, lysed yeast cells or cells stuffed with moving granules (Brownian motion) are a population in decline, often too feeble to rescue, so supplementing more nutrients will not do any good.
Inquire whether the strain you used can tolerate the ethanol suggested by the original °Brix. Assume a worst-case conversion and verify its tolerance in the tech sheet.
- Add a powerful starter culture to re-seed the system. For wine, you can blend half-strength wine with fresh juice to drop ethanol to around 5% or less. Then pitch a vigorous yeast strain at the maker’s recommended rate, after allowing adequate hydration time and at the specified water temperature.
For veggies or kombucha, add 5-10% active brine or SCOBY from a trusted, robust batch to bring the microbial population back into a safe zone.
- Swirl the flask to re-suspend cells and nutrients. A soft, thorough stir disrupts thermoclines, returns yeast or lactobacilli to contact with sugar, and can release dissolved CO₂ that’s stressing cells.
For solid ferments such as sauerkraut, press and stir the mass so brine once again covers the surface.
- Test salt and pH, and adjust if necessary. Too much salt can slow lactic acid bacteria, while too little can let spoilage organisms win. Scale back, then tweak gradually, with pre-boiled, cooled brine instead of water when applicable.
In white wine, light browning can be corrected with gentle casein at 50 to 100 grams per hectoliter or with PVPP at 25 to 75 grams per hectoliter, followed by bentonite at 25 to 100 grams per hectoliter, always according to product specifications.
Adjusting Flavor
Flavor fixes count once fermentation is secure and stable. If a batch is clean but harsh, sharp, or flat, you can usually steer it without dumping it, especially if you do so while microbes are still active.
To counter acid and salt, taste, then measure pH; for wine or beer, measure titratable acidity. If it’s too sour, add a little clean water or low-salt brine, or, in wine or cider, a pinch of sugar, tracking each phase.
If it’s flat or “soapy,” a minimal salt bump in veg ferments or pH-directed acid additions in drinks can bring it to life.
Blending is a gentle yet forceful solution. Blend a pungent batch with a tamer one at mini test sizes before you go big. Herbs, spices, and garlic can cover up slight off-notes in kimchi, pickles, or hot sauce, but they won’t mask real spoilage.
Always sniff for rotten or moldy undertones first.
About fixes.
A longer fermentation or conditioning step at the appropriate temperature allows acids to blend and volatile compounds to blow off. Maintain low air exposure and test weekly.
Record every change so you can repeat good results. If defects lie close to the surface, gouge out just the offending section. Skim and dump oxidized top layers or oxidized wine from a carboy shoulder, then taste.
This can save significant volume when the defect is shallow and oxygen-driven.
Salvaging Batches
- Check texture: Slimy, mushy vegetables or ropey, oily wine or beer usually mean microbial spoilage.
- Check smell: Strong rotten egg, fecal, or “mouse cage” odors are red flags.
- Check taste: harsh acid can be okay. Bitter, metallic, or cloying sweetness is usually dangerous.
If the heart appears healthy but the vessel appears tainted, transfer to a fresh, sanitized vessel. This step reduces the burden of unwanted microbes that reside on scratched plastic or aging gaskets and can inflate beneficial cell numbers just by flowing through cleaner gear based on your sanitization routine and in-house Saccharomyces strains.
Panic, when in doubt, cool it. If you’re not sure about a given batch, refrigerate it to slow all microbial activity as you figure out next steps, seek expert advice, or conduct small tests.
If you utilize commercial aids, heed the manufacturer’s dose, contact time, and safety notes. More is not better here.
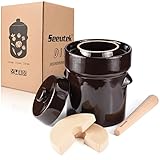
- 🥬 Seeutek fermentation crock is a traditional way of fermenting healthy kimchi sauerkraut food. A fermentation jar is a good way to create your own fermented vegetables, including pickles, kimchi and more. Rich in vitamins. Preserve fresh vegetables in season and enjoy the taste.
- 🥬 1.3 GALLON PICKLING CROCK WITH LID & WEIGHTS-suitable for retain any season’s vegetables – Retain fresh vegetables during that season can enjoy the taste all year round. Using fermented pot to keep your vegetables just a little salt water as fermented liquids. It can be retain for many years.
- 🥬 HIGH-GRADE ceramic natual material, fermenting crock surface and interior finished with a lead and cadmium-free glaze. food-safe coating ensure to pickles are delicious and rest assured to use.
- 🥬 EASY TO WASH AND CLEAN – The ceramic crock with smooth glazed fermenter surface and the jar mouth is reasonably designed. Hands can be directly inserted and washing with the washing liquid is convenient. Dry the crock fully and store it for your vegetables ferment
- 🥬 Water sealed jar’s cover is designed to allow the fermentation gas to escape, avoid oxidation and bad odor while maintaining air circulation. The weighting stones and pickle Tamper immerse your vegetables under salt water or fermented liquids. It will reach to a better fermentation result.

Last update on 2026-10-01 / Affiliate links / Images from Amazon Product Advertising API
The Fermenter’s Sixth Sense
Fermenters often mention a “sixth sense” because good troubleshooting mixes data with instinct. After a while, subtle nuances in smell, sight, and taste begin to stand out, signaling issues such as early infection, weak yeast, or stress from heat swings during fermentation.
Careful notes on the fermentation temperature and practice transform that sense from guesswork into a real tool.
Reading Your Brine
Brine is your progress report. Clear or lightly cloudy, with a constant color, typically indicates a healthy ferment.
Unexpected milky haze, stringy texture, or brown streaks can indicate unwanted microbes such as LAB or even gluconobacter, which frequently appear as bland films or a strange surface sheen in the presence of oxygen.
Keep an eye out for bubbles emanating from the veg or grain base. Nice, consistent bubbles in those first 8 to 24 hours indicate vigorous fermentation. In warm farmhouse ferments above 25 °C (77 °F), some brewers anticipate activity as soon as eight hours. If bubbles never appear and you know your starter or culture was healthy, you might have temperature issues or overly high salt levels.
About the Fermenter’s Sixth Sense: Smell the brine often. An acute, pure sour note is typical. Vinegar, solvent, or nail-polish odors can suggest the presence of gluconobacter, which a few brewers have observed thriving in high-gravity worts, particularly around 30 °C (86 °F). Taste small samples with a clean spoon for salt and acidity.
If the brine is suspiciously thin and gravity tests indicate the liquid ferment is drying up sooner than anticipated, early bacterial infection could be eating sugars. If things drift, course correct.
You can adjust salt with a tiny bit of powerful brine, chill the vessel a few degrees to slow aggressive bacteria, or optimize airflow regulation to restrict oxygen, which LAB and gluconobacter adore.
Every adjustment needs to be logged so you can connect what you did to how the brine appeared, smelled, and tasted.
Vessel Material Matters
Vessel selection plays a crucial role in the fermentation process, influencing both taste and risk.
Glass, ceramic, and food-grade stainless steel containers are ideal options since they are non-reactive, ensuring that the acidic brine does not leach harmful substances into your fermented vegetables.
In contrast, non-stainless metal or inexpensive plastic buckets can impart off-flavors and even nourish undesirable microbes by releasing trace metals into the mixture.
Before starting each batch of vegetable fermentation, it’s essential to inspect your fermentation jar, jars, crocks, and lids for any signs of damage, such as hairline cracks or warped seals.
Even a tiny chip at the rim can become a ledge where biofilms cling, compromising the quality of your cultured vegetables.
Additionally, faulty gaskets on airlocks may lead to surface growth, as oxygen creates a suitable environment for lactic acid bacteria (LAB) and gluconobacter.
Cleaning and sanitizing your equipment is vital for successful fermentation. A thorough hot detergent wash followed by a rinse and the use of an appropriate sanitizer will help keep background microbes low.
Pay special attention to threads, valves, and rubber parts, as these tight crevices can harbor yeast and bacteria from previous ferments, potentially leading to flavor problems in your next batch.
Trusting Your Instincts
Your senses are at the heart of troubleshooting during the fermentation process.
Even with hydrometers, pH meters, and temperature probes, most brewers rely on look, smell, and taste to determine whether fermented vegetables are progressing properly.
When the foam appears weak and lifeless, the sourness stings too early, or the color skews beyond what your notes have revealed before, that’s your sixth sense telling you to stop and check.
When in doubt, toss the batch. If a ferment smells rotten or slimy or tastes off in a way you can’t explain, you don’t need a lab test. Instructions and recipes assume clean gear and typical microbes, and they don’t trump your fundamental safety instinct, particularly in extended warm farmhouse ferments where LAB and gluconobacter are frequent miscreants.
Each kitchen has its own micro-climate and native microbes, so you may discover that some textbook schedules don’t quite work.
Perhaps your room temperature fluctuates from 18 °C to 26 °C daily, so you figure out how to ferment at cooler temperatures to prevent off-flavors or use smaller carboys so heat doesn’t accumulate during fermentation.
This kind of tuning is where that “sixth sense” grows: you link what you see and smell with log entries on gravity, pH, and temperature.
Over time, you notice patterns: a healthy farmhouse beer at 26 to 28 °C starts fast and then drops in gravity along a known curve.
A batch that stalls or dries out too soon may indicate premature bacterial activity. Each triumph and disaster conditions that internal bell, so you can spot infections like gluconobacter in the nick of time, before the taste is irreparably damaged.
Proactive Fermentation Strategies
Proactive planning is essential, as you do the majority of the work before any trouble arises.
You build a normal “fermentation profile” in your mind: how fast gravity should drop, what a healthy cap or krausen looks like, how it smells, and how the temperature should rise and fall.
Once you have that baseline in mind, you will be able to identify a stuck or sluggish ferment before it becomes difficult to remedy. This is crucial when you are working with fermented vegetables or other cultured foods.
Planning begins with ingredients, implements, and space. Check must or wort numbers up front: Brix, pH, and, if you can, yeast-assimilable nitrogen (YAN).
This tells you whether to feed, add water, or dilute with lower-Brix juice to prevent heat stress. Prepare clean tanks or carboys, a hydrometer or refractometer, a thermometer, and a notebook or digital log to track your fermentation process.
Free up your fermenter workspace so you can get in and out quickly when you need to chill, heat, or rack a batch. When you plan this way, vitamin gaps, low potassium levels, and harsh acidity become known risks rather than surprises.
This is particularly important when fermenting must or working with various types of vegetables.
Exact measurements and tried-and-true recipes keep you within secure boundaries. Weigh salts, nutrients, and sugar additions with a scale, not spoons.
Adopt proven nutrient regimens instead of haphazard “more is better” dosing, because an excess of diammonium phosphate or complex nutrients can shock yeast and lead to failures in your fermentation.
Choose a yeast strain that fits both the style and the conditions: for example, a high-ethanol-tolerant strain for a 25 °Brix red or a low-temperature strain for a cool white. If a strain shows slowness early on, don’t wait until ethanol levels rise and the cells are limping; have a backup strain ready to keep your fermentation on track.
Consistent observation and journaling transform experimentation into information. Monitor temperature, gravity, pH, and taste at regular intervals throughout the day.
An increasing temperature or a gravity plateau alerts you when to intervene. Manage temperature within a tight range.
Swings of 3 to 4 degrees Celsius can stall yeast or push them into a state of stress.
Many winemakers have a starter culture at about 3 to 5 percent alcohol, developed from the same must, so that the primary inoculation strikes the tank already adapted to sugar, acid, and some alcohol. This renders the principal fermentation curve more even and more predictable, especially when dealing with wine ferments.
Rotating and testing different methods and substrates gradually develops your skills. It’s always fun to conduct small test ferments with different strains, mixed strains, or different nutrient levels, and plot their curves to compare the final wines.
This experimentation can also be applied when making cultured vegetables.
Pay attention to which blends push through low pH, higher ethanol, or minor nutrient deficiencies without lagging.
Over time, this bank of experience makes troubleshooting feel less like panic and more like an easy, cool-headed decision.
Our Conclusion
Fermentation appears messy on the surface, but it hums on crisp signals: bubbles, odor, hue, consistency. Every sign is a story.
Gradually, your notes, your nose, and your eyes begin to coordinate. You recognize stuck fermentation from the krausen ring. You smell it quickly and save the batch.
Good habits pay off.
Sparkling gear, pristine yeast, rock-solid temp, detailed logs.
Remember that stuck brew you saved only by heating up the room by 2 degrees Celsius, or a sourdough resurrected after two fresh flour-and-water feeds.
To progress from guesswork to craft, select one ferment this week, monitor it closely, adjust one variable, and learn from the outcome.

- The Escali Primo Digital Food Scale is multifunctional and feature an easy to use two-button operation; Sealed control panel and rounded design make this digital kitchen scale easy to keep clean and very durable
- Simple two-button operation ensure the cooking scale is easy to operate and ensures quick and efficient use; Display and controls are sealed under a protective shield to guard against accidental spills
- Tare feature lets you to reset the food scale to zero weight to measure multiple items or subtract the weight of container; Automatic shut-off feature will turn the baking scale off four minutes of inactivity to help conserve and extend battery life
- Digital kitchen scale is (8.5 x 6 x 1.5 in) has a capacity of 11 lb (5,000 g) and provides weight readings in 0.05 oz (1 g) increments using the following units: oz, lb:oz, g
- Available in a wide selection of fun, playful colors; Lifetime warranty

Last update on 2026-10-01 / Affiliate links / Images from Amazon Product Advertising API
Frequently Asked Questions
How do I know if my fermentation is healthy?
Good fermentation of vegetables is characterized by consistent bubbling, a crisp, sour, or yeasty aroma, and the absence of fuzzy or fluorescent-colored mold. Ensure that the brine fully covers the solids to avoid common problems such as unpleasant flavor or mold.
Why did my fermentation stop bubbling suddenly?
Bubbling slows during fermentation when sugars are depleted, the temperature drops, or the fermentation jar becomes nearly anaerobic. If it still smells nice and sour and looks normal, it’s probably good. To troubleshoot common problems in vegetable fermentation, check the temperature, headspace, and seal, and avoid opening unnecessarily.
What causes bad smells during fermentation?
Rotten egg, vomit, or poo smells typically indicate the presence of bad bacteria or poor hygiene during fermentation. High fermentation temperatures can stress microbes and lead to unpleasant flavors, so it’s essential to revisit your techniques.
How can I fix a fermentation that is too salty or not salty enough?
If it’s too salty, you can add diluted brine with boiled, cooled water and re-taste later. If it’s not salted enough, make a stronger brine and top up. For safety, adjust salt at the beginning of the fermentation process, not at the end.
Is the white film on my ferment mold or just kahm yeast?
Kahm yeast, often a wispy, dull coating, can appear during vegetable fermentation and usually scrapes off easily without an unpleasant odor. In contrast, mold is fuzzy and colorful; if found, it’s safer to discard the entire batch of fermented vegetables.
Why is my ferment not sour after several days?
Lack of sourness in fermented vegetables can result from low temperature, excess salt, or insufficient time. Certain fermentation processes require one to three weeks to acidify. Leave the fermentation jar at a steady, warm room temperature and taste every few days until the flavors have developed.
How can I prevent fermentation problems before they start?
Clean tools, fresh vegetables, and precise salt by weight are essential for successful vegetable fermentation. Take care to keep all solids submerged, control fermentation temperature, and use an airlock or tight lid. Sticking to tried-and-true recipes helps perfect your method and prevent common problems.


6 Comments