

Easy Lacto-Fermented Beets: A Crunchy, Tangy Recipe for Beginners
Key Points
- Fermented beets provide gut-balancing and immune-boosting live probiotics, and they’re naturally preserved with lactic acid for a longer shelf life without any additional preservatives. Look for a crisp bite, enhanced nutrient bioavailability, and antioxidant activity.
- Lacto-fermentation depends on an anaerobic, salt-brine environment where bacteria transform beet sugars into lactic acid. This differs from vinegar pickling because the acid develops biologically, not through added acids.
- Target a 3.5% brine with non-chlorinated water and exact salt by mass for reliable outcomes. Keep all beet pieces covered by the fermentation weight, lid, or airlock to vent gases.
- Ferment at room temperature for 5 to 14 days, checking daily for bubbles, cloudiness, and a clean sour aroma. Burp the jar, sample on day 5, and stop when the flavor and texture suit your taste.
- Begin with organic, firm, medium beets and clean, sanitized glass jars to minimize contamination. Have fun experimenting with whole spices and herbs like dill, caraway, coriander, ginger, or chili, and remember that heat and aromatics intensify with time.
- Transfer finished beets to cold storage for 3 to 5 months and date-label for tracking. Incorporate beets and brine in salads, grain bowls, sauces and dressings, or even seed new ferments with a splash of finished brine.

- Supports Nitric Oxide Levels: Dr. Mercola Organic Fermented Beets provide a natural source of nitrates to support normal circulation, energy, and focus*
- Enhanced Nutrient Absorption: A specialized fermentation process pre-digests ingredients, making them easier for your body to absorb while preserving vital nutrients
- Standardized Nitrate Dose: Each serving delivers 15 mg of nitrates, allowing you to experience the full benefits of beets without the taste or sugar levels
- High-Quality Organic Formula: Made with USDA Organic ingredients and free from GMOs, gluten, soy, and dairy, with 0g of sugar for a cleaner nutritional profile
- Empowering You: We give you the resources to take control of your health with regenerative practices and informed consent principles
Last update on 2026-10-31 / Affiliate links / Images from Amazon Product Advertising API
Fermenting beets is a relatively simple process that utilizes only salt, water, and time to generate tangy, probiotic-rich food.
It uses lacto-fermentation, a technique in which lactic acid bacteria on the vegetables make the environment too acidic for spoilage to occur.
Expect a crunchy, vibrant, tangy, earthy flavor.
Clean jars, a 2% salt brine, and beet slices or sticks cut to the same size. For some additional flavor, add garlic, dill, or caraway.
Next, we discuss ratios, timing, and safe storage.
The Fermentation Advantage
Fermenting beets not only generates healthy probiotics but also intensifies taste and increases nutrient bioavailability.
The Science
Lacto-fermentation uses lactic acid bacteria (LAB) that live on beets and equipment. These microbes break down beet sugars into lactic acid, carbon dioxide, and a blend of aromatic compounds.
As acidity continues to fall, LAB prevail and establish a durable, self-defending ecosystem with a pH commonly below 4.0. An anaerobic rig is essential.
Keep beets in a 2 to 3 percent salt brine (20 to 30 grams of salt per 1 liter of water), with an airlock or a tight jar with a weight. An oxygenless space benefits LAB and inhibits molds and most pathogens.
This is different from vinegar pickling. Pickles depend on pre-added acetic acid for warp-speed sourness and shelf life. Fermented beets create acidity in situ via microbes, so the flavor is more rounded and complex.
Salt controls water activity and curbs wild yeasts. It slows unwanted microbes, balances crunch by drawing water from cells, and guides a cleaner ferment.
It helps reduce oxalates and lets LAB outcompete spoilage organisms.
The Nutrition
Fermented beets retain vitamin C, folate, potassium, and iron. Fermentation can increase the bioavailability of calcium, iron, and zinc.
Some studies find increases in specific B vitamins, as well as increased uptake due to lower anti-nutrients. Betalain pigments and other antioxidants may become more bioactive, and small trials and animal studies associate fermented beets with antioxidant and anti-inflammatory effects.
LAB action reduces certain sugars, which may make beets easier to digest and more blood-sugar-friendly. Fiber remains intact and joins forces with probiotics to promote bowel regularity.
The live cultures support gut balance and may support immune function by reinforcing the gut barrier. Animal studies show improved microbiota diversity and metabolic function after beet fermentation.
Beets’ nitrates convert to nitric oxide during fermentation, potentially reducing blood pressure. Paired with low oxalates, the overall impact may promote cardiovascular and kidney health.
The Difference
| Aspect | Fermented Beets | Pickled Beets |
| Acid source | Lactic acid (microbial) | Added acetic acid (vinegar) |
| Microbes | Live probiotics | Usually none (heat/acid kill) |
| Flavor | Tangy, layered, evolving | Sharp, uniform, immediate |
| Shelf life (sealed) | Weeks–months chilled | Months shelf-stable (if canned) |
| Nutrition | Higher bioavailability, possible antioxidant gains | Stable but fewer functional changes |
Raw beets are earthy and firm. Cooked beets are sweet, soft, and mellow. Fermented beets become tangy, tender-crisp, and have a savory bite.
Ferments are sour because of lactic acid, not vinegar. That sour taste is pure, with bright effervescence and nuanced undertones.
Use fermented beets in grain bowls, sandwiches, and salads. Add to tacos, blend brine into dressings, or serve with yogurt, hummus, or grilled fish!
Plus, you get probiotics, better mineral absorption, lower oxalates, and easier digestion in a single jar.
How to Ferment Beets
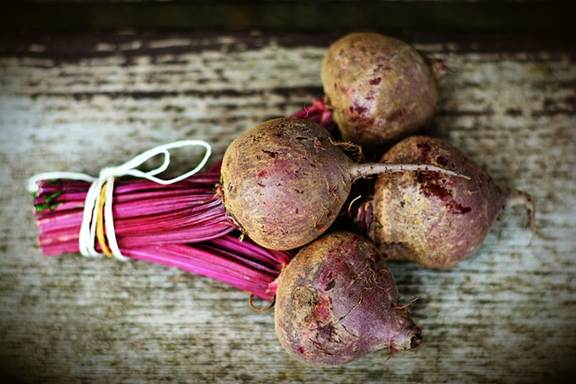
A clean jar, a 3.5% salt brine, and fresh beets are the core of this beetroot recipe.
Use sanitized tools, slice or grate the beets for even brine flow, and keep all pieces submerged under the liquid with a weight.
Optional spices like garlic, peppercorns, cumin, dill, or bay add range without changing the fermentation process.
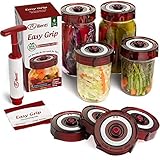
- Hassle free fermenting lid valve: No manual burping is needed; our easy to use no burp waterless airlock lids for wide mouth mason jars automatically vent gases
- Comfortable easy grip tabs: No more sore hands as the four ergonomically designed tabs allow easy opening when your fermented vegetable is done
- Fermentation lid kit with oxygen extractor pump: Our fermentation jar lids are made of high quality durable BPA free plastic with automatic valve; giving you a perfect lacto ferment every time; perfect starter fermenting pickler kit
- Simple date tracker: Date setter ring is easy to set and remembers the date for you so no need for date stickers; get a probiotic rich culture with sauerkraut, cabbage or any fermented food or vegetable; fill your wide mouth mason jar then set the date
- Low profile waterless airlock fermentation lids: No Bulky water filled airlock so the jars fit easily into cupboards; fill a widemouth mason jar with vegetables and brine and screw on the lid; it’s that easy
Last update on 2026-10-31 / Affiliate links / Images from Amazon Product Advertising API
1. Sourcing Beets
Select organic beets when possible. Less pesticide residue favors lactic acid bacteria and promotes more consistent fermentation.
Select crisp, fresh bulbs with unwrinkled skins. Soft spots or deep cuts decompose quickly and become mushy in brine.
Medium beets are simpler to slice into consistent coins or batons. Size uniformity minimizes under- or over-fermenting pockets in the jar.
Don’t toss the greens! Sauté with garlic, stir into grains, or blend into a pesto to reduce waste and add nutrients.
2. Essential Tools
All you need is a glass mason jar (500–1,000 ml), a fermentation weight, and a lid that vents, either with an airlock or a loose canning lid.
Utilize sanitized tongs, a nonreactive spoon, and a cutting board. A kitchen scale improves salt precision for dry salting and brine mixing.
Glass trumps plastic for stability and no leaching. Fermentation lids or airlocks let CO2 escape while restricting oxygen and reducing mold risk.
A scale allows you to achieve a 3.5% brine or a 2% salt by beet weight with accuracy.
3. The Brine
Mix 1 tablespoon sea or Himalayan salt into 2 cups (about 475 ml) of filtered or spring water to make a 3.5% solution, which is equivalent to 3.5 g salt in 100 g of dechlorinated water.
Don’t use chlorinated tap water because chlorine can kill the microbes you want.
Stuff beets, then brine to cover. Leave 2 to 3 centimeters of headspace, and make sure all pieces are submerged to prevent mold and discoloration.
4. The Process
Peel and grate 2 large beets on the coarse side, mix with 2% salt by beet weight, and let rest for 10 minutes to draw out the juice.
Or peel and slice into 3-5 mm rounds for a crisper texture. Press into the clean jar.
Throw in garlic, dill seed, or peppercorns if you like. Fill with the prepared 3.5% brine to the shoulder, press in a weight, and cap with an airlock or loose lid.
Place the jar at 15 to 24 degrees Celsius (60 to 75 degrees Fahrenheit), out of the sun. Room temperature keeps the lactic acid curve steady.
5. Fermentation Time
Anticipate 5 to 14 days. In most kitchens, flavor arrives around day 5, but 2 to 10 days isn’t uncommon, depending on your textural goals and heat.
Each day, inspect for bubbles, light cloudiness, and a clean sour smell. Burp twice daily if the lid is loose or if using an airlock.
If a thin white film (kahm yeast) appears, skim it. It’s harmless.
Taste from day 5 on; stop when the tang and crunch suit your palate, then refrigerate for 3 to 5 months or leave at room temperature for a few weeks.
- High Quality Materials—Our food-safe glass is lead free and non-porous so it never absorbs food odors, flavors, or colors.
- Innovative Design—our smart bulge handle design makes it easy to take these weights out of your Mason Jars and offer a much more stable solution than other grooved weights.
- Excellent Unversal Fit—Fits perfectly with typical wide-mouth Mason Jars, making them just right for small batches of fermented veggies and improving the entire lacto-fermentation process.
- Studry And Effective –Large and heavy enough to keep vegetables submerged below brine for best results of fermentation—better than DIY weights effective than DIY weights.
Last update on 2026-10-31 / Affiliate links / Images from Amazon Product Advertising API
Crafting Your Flavor
Flavor begins with fresh equipment and sweet beets. Pour into washed, very clean glass jars and add four to five small beets (around 450 grams). Chioggia or gold beets alter the ultimate flavor and hue.
Salt and water do the work here, not hot brine or vinegar, so the good bacteria can flourish.
Store jars in a warm location, around 18 to 26 degrees Celsius (65 to 78 degrees Fahrenheit). Taste every three days; re-taste on day five.
Craft your flavor with herbs and spices, then with timing.
The longer the ferment, the more aggressive the tang and the more audacious the spice note.
- Spice ideas to try: dill seed, caraway, coriander, mustard seed, cumin seed, black peppercorns, chili flakes, ginger slices, cinnamon stick, clove, star anise, rosemary, basil leaves, orange peel, bay leaf.
- Begin mild, then be brave. Start with classic combinations and add heat or sweetness afterward.
- Whole spices maintain brine clarity. Ground spices shadow and may taste muddy.
- Flavor develops with age and with more potent additives. Watch for sliminess.
Classic Pairings
- Garlic cloves and black peppercorns: clean heat, round finish. About: Make your own flavor – 2 to 3 cloves, 1 teaspoon peppercorns per 1 liter brine.
- Bay leaf and dill seed: herb-citrus edge that lifts the beet earthiness. One bay leaf, one teaspoon dill seed.
- Caraway and mustard seed: old-world profile, savory and sharp. One teaspoon each, whole.
Use whole spices, not ground. Grounds will make the brine cloudy and the extraction harsh. Combine with dill fronds or a little rosemary sprig for a gentle herb backbeat. Shorten rosemary if concentrated notes annoy you.
Use these classics as your constant foundation, then infuse bolder notes in subsequent batches.
Spicy Kicks
Add chili flakes, black pepper, or cumin seeds for heat and depth. A pinch of chili, one teaspoon of peppercorns, and one teaspoon of cumin per jar is a balanced start.
Ginger slices or a hint of grated horseradish provide a warm, sharp bite. They were bright by day three and hotter by day seven. Spice heat intensifies over time, so sample on days 3, 5, and 7.
Layer spicy things at the bottom of your jar so the brine drags flavor up through the beets.
Sweet Aromatics
Cinnamon sticks, cloves, or star anise lend a soft sweetness and a rounded nose. Add a small stick, 2 cloves, or 1/2 star.
Orange peel strips or a few apple slices add fruity hints that lighten the earthy foundation. They go well with gold beets. Employ these to offset beets’ earthiness without covering it.
Keep additional sugar low to prevent yeast bloom and off flavors. If using, remove basil leaves after 2 days, 1/4 cup whole, to avoid spoilage and slime.
Global Twists
Middle Eastern recipes often feature coriander and cardamom for a citrus and floral lift, while Eastern European fermentation recipes use caraway and dill for a rustic, clean flavor.
- Zhug-ish: coriander, cumin, chili, garlic.
- Garam masala-lite: cinnamon, clove, cardamom, cumin.
- Scandinavian vibe: caraway, dill seed, juniper berry.
- Sichuan hint: star anise, dried chili, ginger, and peppercorns, used lightly.
Navigating the Ferment
Fermenting beets is a sacred, living process that offers numerous health benefits. Expect shifts in color, aroma, and texture as beneficial bacteria transform sugars into acidic goodness.
Check the jar daily, observe, sample bites, and jot quick notes so you can adjust to taste.
What to Expect
Lacto-fermentation uses sea salt and occasionally whey to promote lactic acid bacteria, which increase vitamin C and add probiotics. It tastes tangy and clean.
The beets will retain their crisp snap. If they’re limp or taste flat, you’ll need to adjust your brine or salt concentration.
Cloudy brine, bubbles clinging to the glass, and that subtle ‘hiss’ as you loosen the lid are signs of wild fermentation at work.
These hints can appear within 24 to 48 hours at room temperature, faster in warm chambers and slower in cooler ones.
Color will intensify. Raw ruby beets turn to a darker, more vibrant color as pigments leach into the brine. Golden beets retain their color and still tint the liquid.
Aroma will be bright, lightly sour, and earthy.
No pungent spoilage, no chemical undertones. If it smells harsh or putrid, stop and toss.
Common Issues
If you see mold or any fuzzy growth on your fermenting fruits, it’s best to toss the jar. Don’t ladle and preserve, as this could compromise your fermentation journey. That thin, matte, cream-colored film is often kahm yeast.
While it is not poisonous, it is a sign of oxygen exposure. Skim it off, top the brine solution, and optimize your lid arrangement.
Soft or mushy beets can occur due to low salt or excessive heat. For a successful beetroot recipe, use non-iodized sea salt at approximately 2 to 3 percent by weight, slice your beets uniformly, and keep room temperatures cooler.
Cut the fermentation process short and transfer to cold storage once your beets are sufficiently sour. Brine overflow can happen when jars are overloaded, so leave headspace and use a catch tray.
Daily burping is essential if you have a solid lid. An airlock or loose lid helps release gas, ensuring your delicious veggie ferments thrive.
Safe Practices
Begin fresh. Sterilize jars, lids, and weights. Navigate the ferment.
Use a non-reactive bowl—glass, ceramic, or stainless steel—to combine beets and salt. Let the mixture rest for 5 minutes to draw out the water, which will help keep the slices submerged.
Weight down all beet pieces below the brine. Contact with air encourages yeast and mold growth. Keep in the fridge, away from direct sun and heat. Warm rooms ferment quicker, so sample earlier.
At 20 to 22 degrees Celsius, most batches develop a nice tang within around 2 days. Begin tasting and note your observations. If the batch smells funky, is slimy, or has mold, throw it away.
Once it tastes right, transfer to cold storage. A sealed jar in the fridge can last weeks to months. Test taste and texture periodically and calibrate future salt, cut size, or time accordingly using your journal.

- Bursting with Naturally Occurring Minerals: Whole-crystal coarse sea salt with over 70 trace minerals that preserve the ocean’s natural moisture. Unrefined & free from additives, it delivers a balanced mineral blend with clean flavor & natural hydration support
- Curated for Everyday Cooking: Perfect l for hydration, seasoning, pickling, brining, and crunchy finishing, this sea salt for cooking enhances flavor and texture without overpowering ingredients. Grinder ready for controlled kitchen use
- 3rd Party Lab Tested for Purity: Sustainably hand-harvested from coastal evaporation ponds over 1,000 years old and produced under GMP certification. This course sea salt reflects responsible sourcing and consistent safety standards
- Whole Crystal Texture: Mineral sea salt provides a satisfying crunch and gradual dissolve in soups, broths, fermenting, and marinades. A premium alternative to traditional refined salt for versatile culinary applications
- Everyday Kitchen Essential: Salt for grinder refill crafted for daily meals, hydration routines, and grinder use. Trusted by families and chefs seeking consistent seasoning with ancient traditional hand-harvested methods from sustainable ecosystems

Last update on 2026-10-31 / Affiliate links / Images from Amazon Product Advertising API
Beyond the Jar
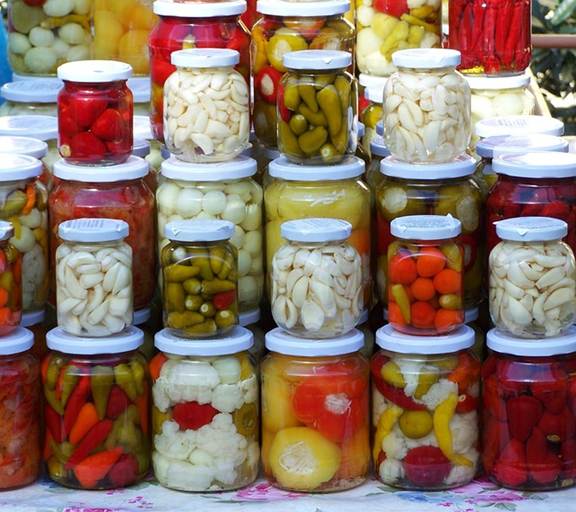
Fermenting beets, an underrated root vegetable, doesn’t stop when the bubbles subside; the fermentation process shapes taste and supports gut health.
Proper Storage
Once the sourness hits your mark, move the jar to cold storage. Refrigeration at 2–5°C slows microbial activity, holds texture, and keeps color stable. Use airtight glass to lock in aromatics and stop odor transfer to other foods.
Label with date, salt ratio, and add-ins like garlic or dill. This helps you track batch variation and plan rotation.
Most jars taste best within 3–5 months, though some stay crisp longer. Softer shreds fade earlier than cubes.
If you want to lower oxalic acid before fermenting, lightly steam beets and drain the water, then cool. This step softens cell walls but still allows a clean ferment.
For a fast shredded-beet recipe, mix beets with salt, let sit 5 minutes to get watery, pack, and ferment at room temperature for 2 days before chilling.
Culinary Uses
Slice for sandwiches with soft cheese and greens, or toss into salads for snap and acid. A Roasted Beet and Watermelon Salad gets lift from a spoonful of fermented beets, which offset sweetness and add briny umami depth.
Chop for grain bowls with quinoa or farro. Stir into hummus for a probiotic spread or fold through roasted winter squash to cut starch with tang.
Pair with fatty meats, aged cheeses, or roasted roots. Lactic acid cleans the palate and tightens the finish.
Then puree with some olive oil, brine, and mustard for a tangy dressing. Puree with tahini and lemon for a magenta sauce over lentils.
For heat and aroma, try a spicy Indian kvass: beets with carrot, hot pepper, and mustard, fermented to a bright, savory drink you can use as a marinade splash.
Nutritionally, fermented beets maintain antioxidant and anti-inflammatory compounds and detox pathways. They provide live cultures that can help balance the gut.
For those with a bumper harvest, convert excess into hybrid formats such as cubes, shreds, and kvass so you can mix and match textures and applications throughout the week.
The Brine
Drink 30 to 60 mL as a probiotic shot, or blend with oil for an instant vinaigrette. It enhances slaws, noodle salads, and cold beans.
Sprinkle a dash in soups or stews at the end for acidity and trace minerals. Too much can mute aromatics, so begin lightly and sample.
Seed new ferment batches with 1 to 2 tablespoons per 500 milliliters as a microbial booster. It reduces lag and stabilizes pH decline. Keep leftover brine in a sealed jar in the fridge for up to 2 months, and toss it if you notice haze, film, or off smells.
Share your trials, tweaks, and wins with friends or online groups.
Your notes assist the next jar.
My Fermentation Philosophy
Fermenting beets is an active way to learn, a nutrient-rich meal, and a hobby all at once. I care for it like a mini-lab that nourishes me.
It welcomes play, but it demands attention and specific actions that produce reliable, consistent outcomes in my fermentation journey.
I consider fermentation to be a joy-filled, artful, nutrient-rich kitchen activity. Beets make this simple, especially with their beneficial bacteria.
Their sugars nourish lactic acid bacteria, so they sour quickly and purely. I start with a simple baseline: 2% salt by weight. That’s 10 grams of salt per 500 grams of beets.
I grate the beets, mix in the salt by hand, and wait 10 minutes. That brief pause leaches brine, which helps the salt penetrate evenly and jump-starts osmotic action.
I pack the beets firmly so that air pockets disappear. I leave them under brine the entire time. If the brine rides up and the pulp floats, I press it down each day with a clean spoon or weight.
I burp the jar twice a day or fit an airlock. Gas has to exit, not enter. I value flexible methods that meet all skill levels. If you like crunch, cut into matchsticks.
If you want fast acid, grate fine. If you lack a scale, learn the “lightly salted, not briny sea” taste, but aim for that 2% when you can for repeat wins in your fermentation recipes.
Spice choices are modular. Caraway provides a Central or Eastern European vibe. Cumin and chili add heat.
Orange peel gives a bright edge. Add sliced garlic for depth, but keep total add-ins modest so salt balance holds. The core rules do not change: correct salt, full submerge, clean tools, and release gas.
I rely on tradition and an international ferment community.
Most places use beet kvass or pickled beets with lactic-ferment roots.
The steps echo each other across places: weigh, salt, submerge, wait, taste. A white film might appear on days three or four. That’s kahm yeast. It won’t hurt.
I skim it off and re-immerse the beets. If you get fuzzy mold in green, black, or pink, toss and start over with more submerging and cleaner equipment.
I share what works so others can do this with ease. At room temperature, I begin tasting on day five. Warmer rooms speed the process, and cooler rooms slow it down.
When it tastes bright and lightly sour, I transfer it to the fridge. Submerged and mold-free, it lasts for two to three months.
I date and salt-rate label so the next batch gets smarter, enhancing my collection of simple fermenting recipes.
Our Conclusion
Fermenting beets remains easy, clever, and inexpensive. Salt, water, clean jars and ripe beets do the work. Lacto bugs consume sugar and produce acid.
That acid seals out all the nastiness and locks in all the color. Crunch remains if you slice thick and chill. Taste gets better every day.
Try it on days 3, 5, and 7. Stop the jar suddenly once you reach your sweet spot.
Start small to build a habit.
One jar a week. Keep tabs on cut size, salt rate, and temperature. Watch the pH drop or just use taste as your guide. Pair with rice bowls, eggs, or grain salads.
Or just share a jar with a friend. Ready to make a batch today? Snap a photo, tag your notes, and continue.

- Precise Recipes: KUAIVO dual platform food scale features two distinct weighing capacities, designed to provide precise weight for a variety of cooking and baking needs. The large scale has a capacity of up to 33lbs with an accuracy of 0.1oz, the small scale can weigh 1.1lbs with an accuracy of 0.001oz. With its dual-range capabilities, KUAIVO kitchen scale ensures you can maintain accurate ratios for baking, cooking or preparing fitness meals.
- 7 Units: Food scales for kitchen, features 7 weighing units: g, kg, lb, oz, lb:oz, ml, and MILK ml. It provides versatility for various cooking and baking tasks, allowing you to measure solids, liquids, and even milk in different units. No matter which unit you choose, this scale satisfy to your preferences and is ideal for weighting a wide variety of ingredients.
- Tare | Accumulation: The digital food scale has tare and accumulation functions. Simply place the container on the scale, press the tare button, and then add the ingredients into the container to get the weight of the ingredients without including the container. The accumulation function enables you to sum the weights of items on two scales, eliminating the need for repeated measurements or manual calculations. These features work together to make food preparation more efficient and precise.
- LCD Display | Automatically Shut Off: Digital kitchen scale features LCD display that allows you to easily read the weight, even in dimly lit environments. Additionally, the scale has auto-off function that shuts off after 210 seconds of inactivity, helping to save power.
- Easy to Clean: KUAIVO food weight scale equipped with a durable stainless steel surface that is smooth and stain-resistant. Its non-porous material prevents dirt and food from sticking, making it quick and easy to clean after every use. Size: 10.8inches x 7inches.
Last update on 2026-10-31 / Affiliate links / Images from Amazon Product Advertising API
Frequently Asked Questions
What are the benefits of fermenting beets?
Fermented beets, an underrated root vegetable, can add healthy probiotics to your gut, which might help digestion and nutrient absorption.
This fermentation process can make vitamins more bioavailable, extend shelf life without heat, and develop a delicious, tangy flavor.
How do I ferment beets at home?
Slice or cube raw beets, an underrated root vegetable. Cover with a 2–3% salt brine (20–30 g salt per 1 liter of water), adding optional spices for flavor. Keep the beets completely submerged in the brine during fermentation. Ferment at 18–22°C for 5 to 10 days, tasting daily. Transfer to the refrigerator once the sour flavor is to your liking.
How do I keep beets from going soft or slimy?
Use fresh, firm beets as a key ingredient in your fermentation recipe. Just make sure they are all clean! Maintain a 2 to 3 percent salt brine solution and keep the beets submerged. Ferment at a cool room temperature, and if you notice mold on the surface, scrape it off.
What flavors work best with fermented beets?
Experiment with garlic, dill, caraway, mustard seed, black pepper, bay leaf, or ginger in your fermentation recipes. A little citrus zest adds brightness, while chili flakes can introduce heat. Keep spices mild for your first fermentation, then explore more options in future batches.
How do I know when the ferment is ready?
Look for a delightful sour aroma, bright color, and gentle sparkle in your beetroot recipe. Taste a piece: it should be tangy, lightly salty, and crisp-tender. If you like the flavor, pop it in the fridge to slow fermentation, as most fermentation recipes are ready in 5 to 10 days.
What if I see bubbles or a white film on top?
Bubbles are normal and indicate active fermentation, a key part of the process. A thin white film is probably harmless kahm yeast, but if you notice any green, black, or pink fuzzy mold, pitch the batch for safety.
How can I use fermented beets beyond the jar?
Sprinkle on salads, grain bowls, and wraps for a delicious addition. It pairs well with roasted beets or fish. Mix tiny amounts into dressings, or utilize the brine solution to inoculate new fermentation recipes or as a sour splash in soups.


